Puppet : Language Essentials
Configuarion Management and Puppet
By - scmGalaxy.com
About Me !


Module Overview

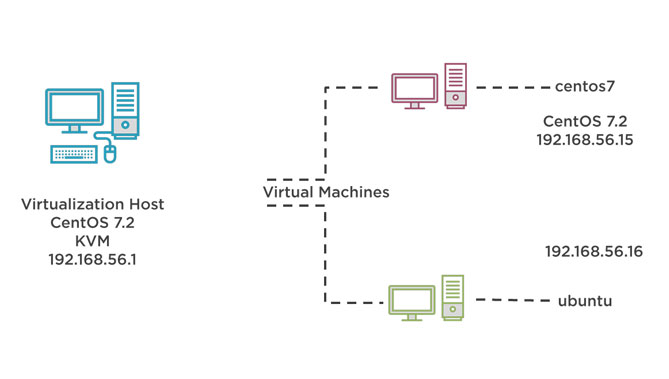
Lab Environment
Pluralsight Courses
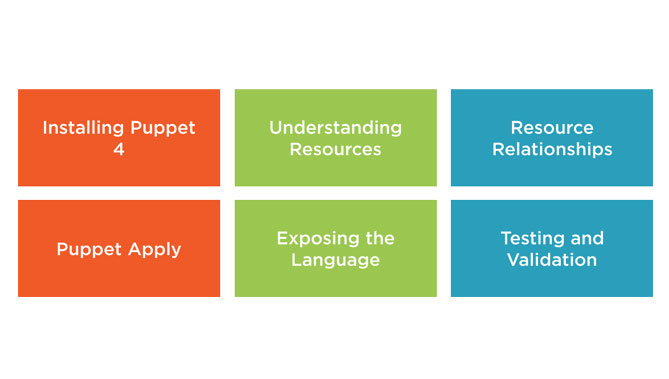
Course Content
Lab Environment
First in a Series on Puppet 4 and Puppet Enterprise
This course is the first of a series of courses where we help you to learn the new skills that are needed with Puppet 4 and Puppet Enterprise. The leading software in Configuration Management.

Puppet 4: Language Essentials
Puppet 4: Working with Modules and Classes
Puppet 4: Working with Files and Templates
Puppet 4: Hiera the Single Source of Truth
Puppet 4: Server and Puppet Enterprise
Puppet 4: Language Essentials
Demo

Puppet Language and "Idempotency"
Summary

Next up : Installing the Puppet Client
Installing the Puppet Client
Objectives
- Who are Puppetlabs
- Create Puppetlabs repositories
- Install the Puppet AlO client
- Locate important Puppet files and directories
- Running Puppet with and without sudo
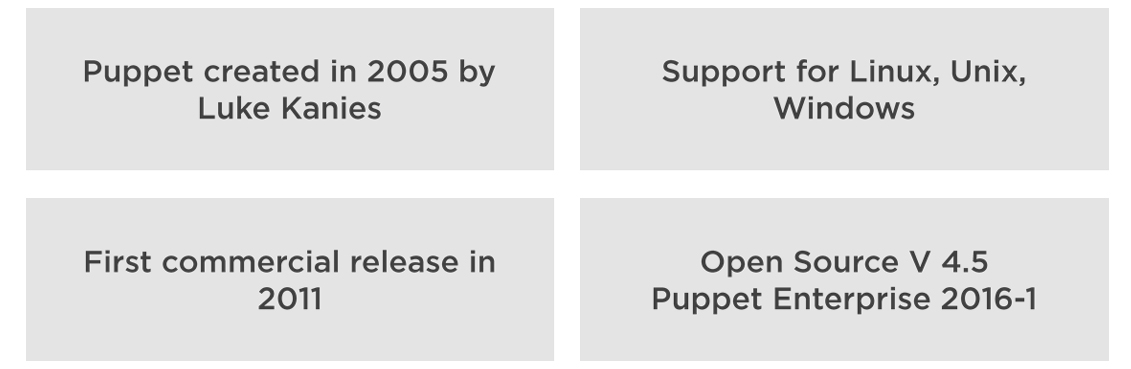
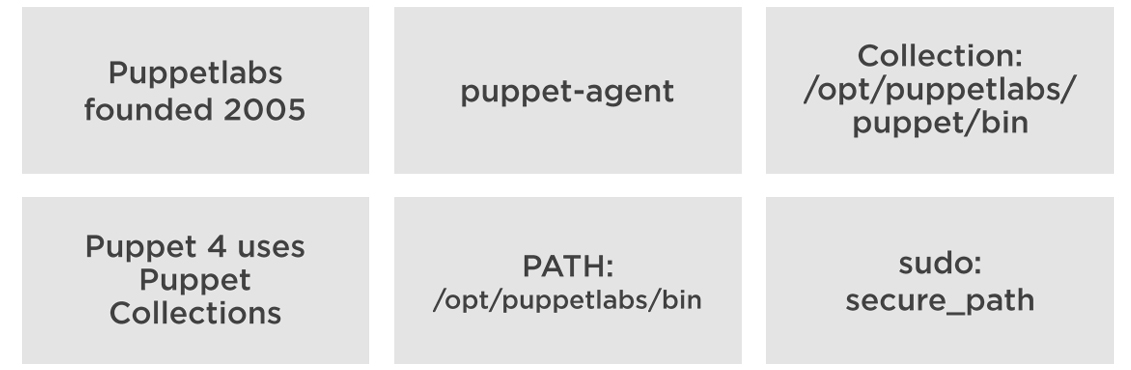
Puppetlabs
Create Repos for Puppet-Labs
Most distributions still ship Puppet 3 in their internal repositories. To be able to make use of the latest Puppet 4 code then we must first setup software repositories pointing to Puppetlabs.
sudo rpm -Uvh \
https://yum.puppetlabs.com/puppetlabs-release-pc1-el-
7.noarch.rpm
Package Collection Repository CentOS
Puppet collections are new to Puppet 4 and ensure that all dependency packages such as heira facter and ruby come from the same repository ensure most compatibility with the client.
					wget https://apt.puppetlabs.com/puppetlabs-release-pc1-trusty.deb

sudo dpkg -i puppetlabs-release-pc1-trusty.deb

sudo apt-get update
Package Collection Repository Ubuntu
The process for Ubuntu is similar. Here we use the code name of "trusty" for the 14e04 repository.
Adding Repositories
					sudo yum install puppet-agent #CentOS
sudo apt-get install puppet-agent #Ubuntu
Installing the Client
On both the Ubuntu and CentOS systems we can now install the All In One Client. To ensure that the package will not clash with the standard repositories the package name is puppet-agent
Installing the Client
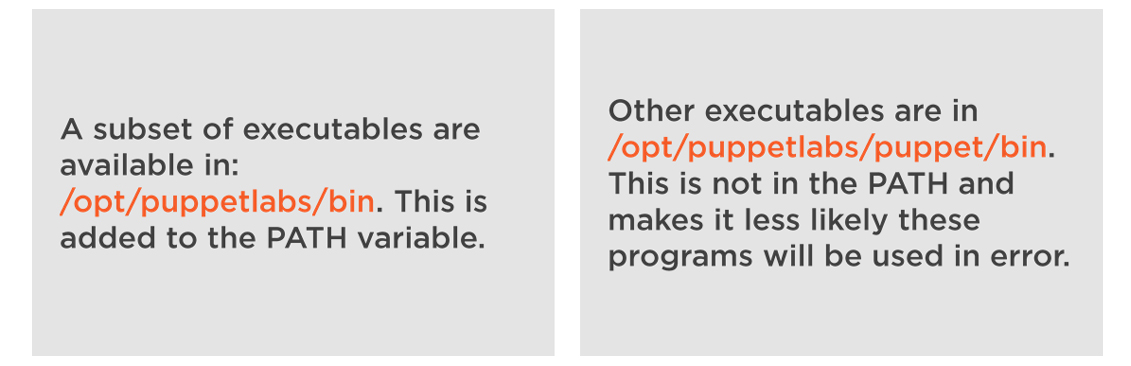
Binary Locations
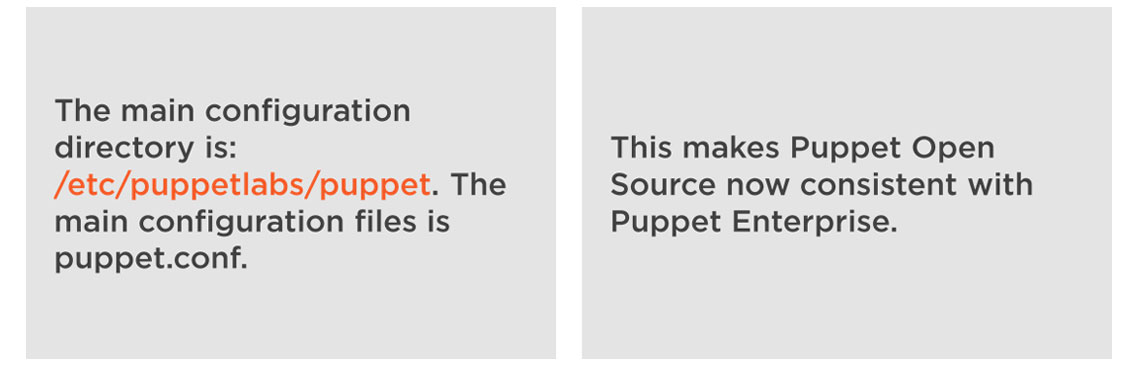
Main Configuration
					puppet agent -- version
puppet config print
puppet config print confdir
puppet config print certname
puppet config print { config rundir ssldir runintrerval}
Display Data
We can use the puppet command to display configuration data.Locate Files and Directories
sudo, su or not

Investigating Privileges
Summary
Next up : Working with Puppet Apply and Manifests
Working with Puppet Apply and Manifests
Objectives
- What are Puppet Manifests
- Using Puppet Apply
- Ensure Puppet agent is stopped and disabled
- Puppet style guide
- Syntax highlighting and styling in vim
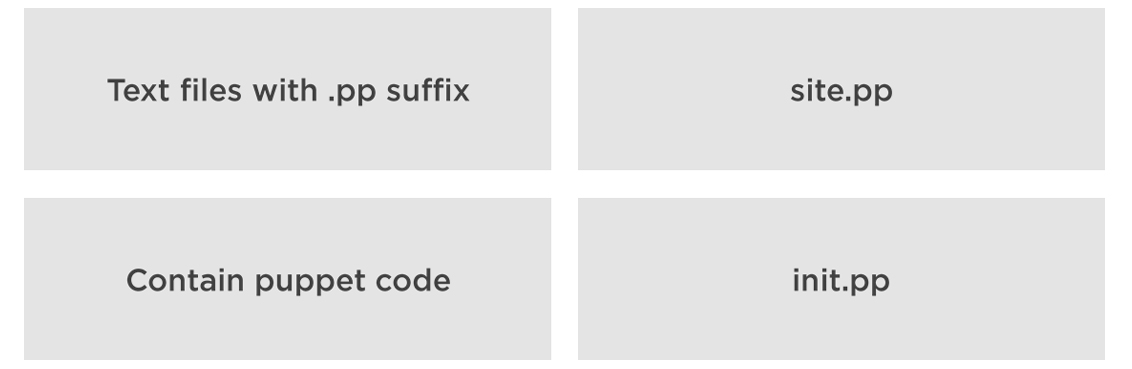
Puppet Manifests
notify {'Hello World' : }
Hello World
The notify resource type can be used to send a message to the agent log or screen if being used interactively. This makes a great and simple first manifest.
sudo puppet parser validate heloworld.pp
Validate the Manifest
Although this manifest is very simple we should get in the habit of validating code as we create it. Helping to keep our code robust and healthy.
Creating a Manifest
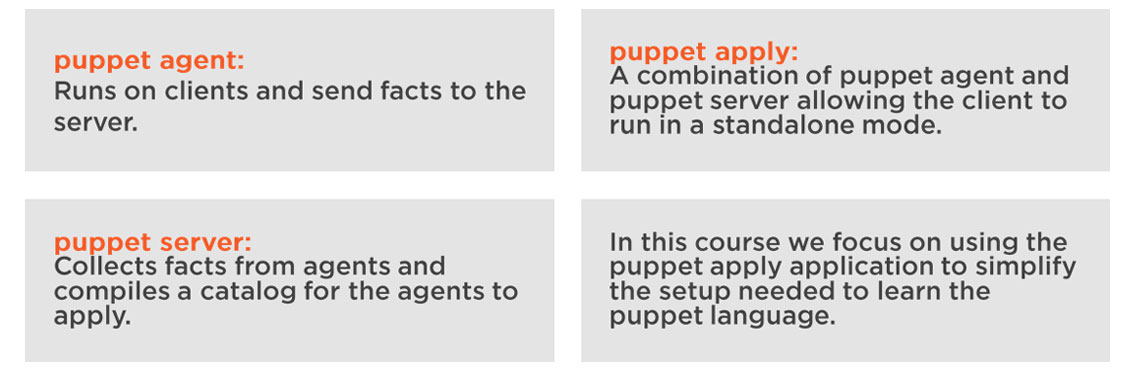
Puppet Architecture
					sudo puppet apply helloworld.pp
sudo puppet apply -e "notify { 'Hello World' : }"
Puppet Apply
We can use the application puppet apply to enforce a local manifest or puppet code.
					sudo puppet resource service puppet
	service { 'puppet':
	ensure	=> 'stopped',
	enable => false, }
sudo puppet parser validate puppet-service.pp
sudo puppet apply puppet-service.pp
Controlling the Agent
We currently do want to use the Puppet agent. This can run as a daemon service so we should check that it is both stopped and disabled.
					service { 'puppet':
	ensure => 'stopped',
	enable => false,
}
and is disabled.
Using Puppet Apply
Puppet Style Guide
Most languages have their recommend style guide. The way the code should be laid out. The full guide is in the documentation:
https://docs.puppet.com/guides/style_guide.html
					sudo puppet module install theurbanpenguin/puppet_vim
include puppet_vim
sudo puppet parser validate puppet-vim.pp
sudo puppet apply puppet-vim.pp
IDEs
IDEs or Integrated Design Environments can help with styling. We use the text editor VIM in this course. Even this though can help with styling. It is easiest to install the required elements using a Puppet Module.Configuring VIM and Puppet Styling
notify { 'Hello World': }
sudo puppet parser validate test.pp
sudo puppet apply test.pp
						sudo puppet apply -e \
"notify { 'Message': }"
Adding Style and Color
Install a module
sudo puppet module install \ theurbanpenguin/puppet_vim
						sudo puppet apply -e \
"include puppet_vim"
Next up : Working with
Puppet Resources
Working with Puppet Resources
Objectives
- Puppet Resources: The Big Three
- Package
- File
- Service
- Puppet Standard Library
- Users and Groups
- Hosts
- SSH_Authorized_Keys
- Resource Defaults
				type { 'title':

	attribute => value,

}
Puppet Resource
When defining a resource we first set the resource type. This should be all in lower case. We then set a title and key value pairs. The title and key value pairs are enclosed within brace brackets.
sudo puppet describe --list
List All Available Resource Types
						sudo puppet describe notify

sudo puppet describe user

sudo puppet describe user --short
Document a Resource Type
If you want to read the documentation on a resource type we can use describe it!
							sudo puppet describe file | grep namevar
file { '/etc/motd':  ensure	=> 'file',
content => 'Welcome to my server',
}
file { 'Message File':
ensure
namevar
An attribute may be marked as the namevar for that resource type. We can then use the resource title to populate the designated attribute so long as the attribute is not independently set.
Investigating Resources
The Big Three
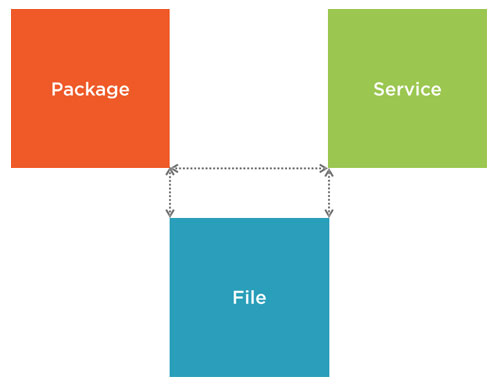
The Big Three
- For example we can ensure that the package NTP is installed on all hosts
- We can configure the time server configuration file, /etc/ntp.conf, on all hosts
- Finally we can make sure that the service is running on all hosts. In CentOS this is ntpd and in Ubuntu it is ntp.
					package { 'ntp':
ensure => 'installed', #'absent','purged','latest','4.1'
#name => 'ntp', #not used here as we make use of title
provider => 'yum', #Normally not required
}
Package
A resource package allows us to install or remove a package. We do not normally need to set many parameters. The package name can make use of the title.
							service { 'ntpd':
ensure => 'running', #'stopped',
#name => 'ntp', #Useful where the service name differs,
enable => true, #false
}
Service
Having installed a package we can ensure that the service is running and enabled on system
					$ntp_conf = '#Managed by Puppet
server 192.168.0.3 iburst
driftfile /var/lib/ntp/drift'

file { '/etc/ntp.conf':
ensure => 'file'
content => $ntp_conf, }
File
Larger configuration files are often best managed with templates or using the source parameter. We will see this later courses. We can use variables, which we cover in more detail in the next module, for our content.Managing NTP with Puppet
					user { 'bob':
ensure	=> 'present',
managehome => true,
groups => [ 'sudo', 'users'],
password => pw_hash('Password1','SHA-512','salt'),
User
We can add or remove users with Puppet. The password we set should be encrypted. For this we can use the pw_hash function from the standard library module. This will need to be installed if not already. The group membership is multi valued so we use an array.
group { 'admins': }
Group
Groups again are very simple and will default to ensure => 'present' if not specified.
					host { 'timeserver' :
ip => '192.168.0.3',
host_aliases => 'tock',
}
Local Host Entry
If DNS is not an option we can easily manage local host entries wit the host resource type.
					ssh_authorized_key {'tux@centos7':
user => 'tux',
type => 'ssh-rsa',
Key => 'sdjk jsdls kdslkj dlslkjd',
}
SSH Authorized Keys
To make use of public key authentication in SSH a user's public key must be added to the authorized_keys file on all hosts that the user will access. Puppet can make this happen easily. The key we share should be the public key generated by the user.Making use of Puppet Resources
puppet describe --list
puppet describe file
						file { '/etc/motd':
ensure	=> 'file',
content => 'My message',
}
						file { 'Message':
	ensure => 'file',
	content => 'My message',
	path => '/etc/motd',
}
						package { 'ntp':
ensure => 'installed',
}
						service {'ntpd' :
ensure => 'running',
enable => true,
}
						sudo puppet module \
install puppetlabs\stdlib
						File {
	owner => ‘root’,
	mode  => ‘0600’,
}
Where we need consistent settings for many resources we can use resource defaults.
Next up : Exposing the Puppet Language
Exposing the Puppet Language
Objectives
- Variables, Arrays, Hashes and HereDoc
- Facts and Facter
- Conditional Expressions
- Matching to Regular Expressions
- Lambdas and Interations
						$message = 'The message'	#String
$ntp_service ='ntp'		#String
$size = 100 			#Number
$answer = false			#Boolean
Variables
Variables are denoted with the $. In Puppet 4 the variable name must start with a lower case letter or underscore. They can contain lower case letters, numbers and underscores.
$admingroups = ['wheel','adm']
Arrays
Array contains lists of values and are denoted using the [] brackets.
						$user ={
	'username' 	=> 'bob',
	'uid' 		=> '2011',
}
Hashes
A hashed array contain key pairs, note that the key ¡s quoted unlike a resource.
						service {'NTP_Service':
	ensure => 'running',
	enable => true,
	name   => $ntp_service,
	}
	notify {"The $ {ntp_service} is up and running":}
Using Variables
If a variable is used on its own then we do not need to delimit it. Whereas if it is used within a string we need to delimit the variable with brace brackets. Use double quotes to interpolate the variable.
						$admingroups = ['wheel','adm']

notify {"The first group is ${admingroups[0]}":}

$user = { 'username' => 'bob', 'userid' => '2011',}

notify {"The user's name is ${user['username']}":}
Accessing Arrays
To access a single value from and array we can use the index or key.
						$ntp_conf =  @(END)
driftfile /var/lib/ntp/drift
server tock prefer iburst
server uk.pool.ntp.org
END
Heredoc
To create long multi line string we can use the heredoc. The tag END can be anything but must be consistent at the start and the end of the string.
Working with Variables
Using Facts
Working with Facts
Conditional Expressions
						if $facts['os']['family'] == ‘RedHat’ {
notify { ‘Red Hat’: }
} #Modern Fact

if $facts[‘osfamily’] == ‘RedHat’ {
notify { ‘Red Hat’: }
} #Legacy Fact
if
String comparisons are case insensitive unless we use regular expression matches. Some nested facts are still available as legacy facts at the top level.
						if $facts[‘os’][‘family’] == ‘RedHat’ {
notify { ‘Red Hat’: }
}
else {
notify { ‘Debian’: }
}
if/else
If we only have two conditions then we can use if and else
						if $facts[‘os’][‘family’] == ‘RedHat’ {
notify { ‘Red Hat’: }
elsif $facts[‘os’][‘family’] == ‘Debian’ {
notify { ‘Debian’: }
}
else {
 fail (“Your OS, ${facts[‘os’][‘family’]}, is untested”)
}
if/elsif/else
More options can be coped with using elsif. The fail function can be useful to exit the manifest in the event of untested options being returned.
						if $facts[‘os’][‘family’] != ‘RedHat’ {
notify { ‘Debian’: }
}

unless $facts[‘os’][‘family’] == ‘RedHat’ {
notify {	‘Debian’: }
}
Unless
Rather than use not equals to, !=, the use of unless may make the code more readable. New in Puppet 4 we can also use the else statement with unless
						case $facts[‘os’][‘family’] {
‘RedHat’: { notify {‘This is Red Hat based’: }}
‘Debian’ : { notify {‘This is Debian based’: }}
default : { fail( ‘Your OS is untested')}
}
case
The default option acts a little like the else option within if statements.
						$ntp_service = $facts[‘os’][‘family’] ? {
‘RedHat’ => ‘ntpd’,
‘Debian’ => ‘ntp’,
}
Selector
A selector can be used to populate a variable based on a condition. These are great where we need to set just one variable but in our case we need to see both the admin group and service.
Using Logic
							$facts ['os'] ['family'] =~ /Redhat/
$facts ['os'] ['family'] =~ /^Redhat$/
$facts ['networking'] ['fqdn'] =~ /^www\d/
$facts ['networking'] ['fqdn'] =~ /\.example\.com$/
Regular Expression Matching
Where we want case sensitive matching or more flexibility we can make use of regular expression matching. Instead of quoting the string we use forward slashes. Note the period has special meaning within a regex so we escape them in the FQDN.
facter partitions
Iterating Through Collections
New in Puppet 4 are lamdas and iterations. First we will look at a group of partitions that we can iterate through.
						each ( $facts[‘partitions’] ) | $devname, $devprops | {
if $devprops[‘mount’] {
notify { “Device: ${devname} is ${devprops[‘size’]}”: }
	}
}
Lambdas and Iteration
We can iterate though a collection with each. The values returned populate lambda denoted with at least one variable name between the pipe symbols.
Using Iteration
						$variable1 = 'fred'
$variable2 = 23
$variable3 = true
						$variablearray = ['fred', 23, true]
$variablehash = {
'name' => 'fred',
'age' => 23,
'employee => true,
}
$message = "Your name is ${variable1}"
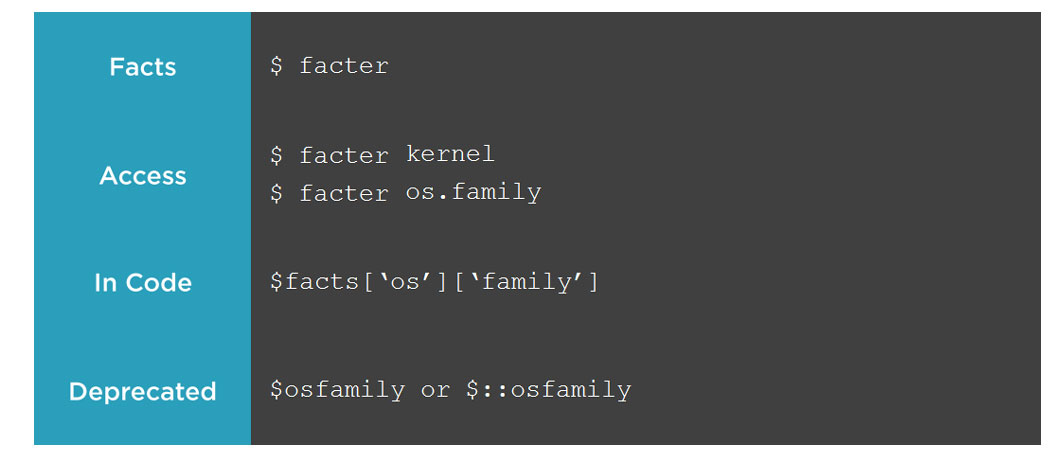
						facter
puppet facts
$facts ['os'] ['family']
$facts['osfamily']
						==
!=
=~
						if $facts ['os']['family'] == 'redhat' {
..}
elseif $facts ['os'] ['family'] == 'debian' {...}
else {...}
						case $facts ['os'] ['family']{
'redhat' : {...}
'debian' : {...}
default : {...}
}
						ntp_service = $facts ['os'] ['family'] ? {
'redhat' => 'ntpd',
'debian' => 'ntp',
}
						each ($facts['partitions']) | $n, $a | {
notify {"Device ${n} is ${a['size']}":
	}
}
Next Up : Managing Resource Relationships
Managing Resource Relationships
Objectives
- Resource Ordering
- Explicitly Ordering Resources
- Resource Auto Requires
- Restarting Services upon File Changes
- Arrows or Words

If we don’t add relationships to our resources then ordering of those resources will be down to the agent version:
Manifest : The default in Puppet 4. Resources will be ordered in the same order that they are read from the manifest.
Title-Hash : The default in all previous Puppet versions to Puppet 4. Randomized on the resource title but consistent between runs.
Random : Useful to flush out resources that have not been explicitly ordered.

Package: Typically we want the package resource first.
File: We want the file resource next. This will add the configuration data for the service. We want this after the Package to prevent the Package from overwriting our custom file.
Service: Finally we want the service resource to start the service. We also need the service to restart on the file change. This restart cannot be managed automatically without explicit relationship assignment.
						package { ‘pkg1’: }
file { ‘file1’: }
service { ‘service1’: }
Default Ordering in Puppet 4
Other than the issue in restarting the service the manifest ordering would appear on first view to be ok. If pkg1 fails to install the other resources will fail based on the dependency not being installed.
						package { ‘pkg1’: }
file { ‘file1’: }
service {‘service1’: }
package {'pkg2':}
file { 'file2':}
service {'service2':}
Until we Extend the Manifest
Now if pkg1 fails then so will all the other resources including those relating to pkg2 which perhaps do not actually require pkg1.
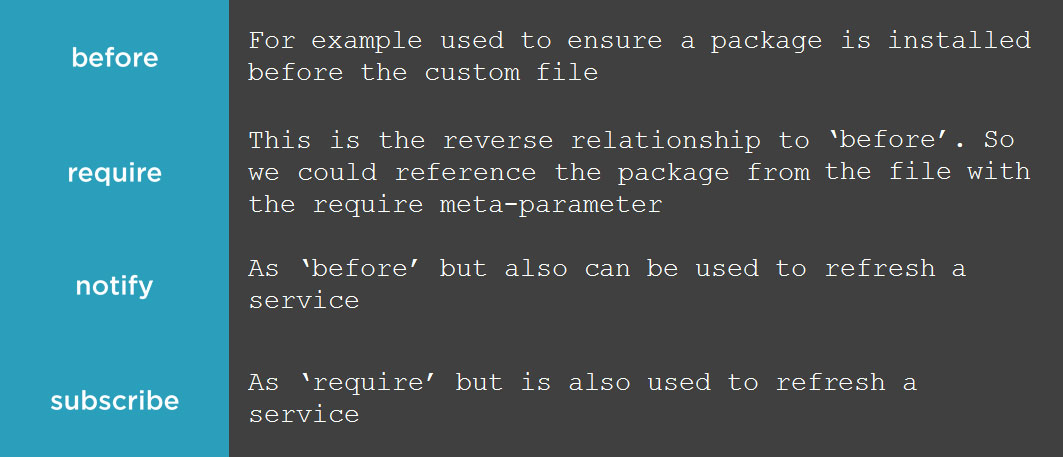
Meta-Parameter = Before or Require
						package { ‘pkg1’: before => File[‘file1’], }
file { ‘file1’: before => Service[‘service1’],}
service { ‘service1’: }
package { ‘pkg2’: before => File[‘file2’], }
file { ‘file2’: before => Service[‘service2’], }
service { ‘service2’: }
sudo puppet apply --ordering=random ntp1.pp
Detect Resources not Explicitly Related
Not every resource will need a relationship defined. Some resources such as the /etc/motd file will be perfect without any dependencies. However resources that do have dependencies that have not been explicitly defined can be detected using the random option.
Investigating Resource Relationships
						file { ‘/etc/motd’: } # Define the file
service { ‘ntpd’:
require => File[‘/etc/ntpd’], # Reference the file
}
We need to build a new airport # Define the airport
It will be London Airport #Reference the airport
Proper Case References
As you know we use proper case when making reference to a resource type and lower case when it is defined, If you find this confusing then compare it to English and Proper Nouns.
sudo puppet describe user | grep -A5 Autorequires
Autorequires
Many resources define parameters with an autorequire. For example if a user and group are in the same manifest and the user needs to belong to the group the group is processed first.
Working with Autorequire
Meta-Parameter = Notify or Subscribe
						package { ‘pkg1’: before => File[‘file1’], }
file { ‘file1’: notify => Service[‘service1’],}
service { ‘service1’: }
Refresh Services
package ['ntp'] -> File ['/etc/ntp.conf'] ~> Service ['NTP_S']
Defining Relationships with Arrows
Yes we can but the Style Guide does advise against it from a readability standpoint. An additional line is added that defines the relationships.
Explicit Relationships