In this tutorial we are going to install Jenkins on Ubuntu operating system. Ubuntu is another debian based operating system – open sourced and highly loved by developer community.
Step 1 – Install Java 11
Step 2 – Install Jenkins using Debian Packages
This is the Debian package repository of Jenkins to automate installation and upgrade. To use this repository, first add the key to your system:
 $ curl -fsSL https://pkg.jenkins.io/debian/jenkins.io.key | sudo tee \
    /usr/share/keyrings/jenkins-keyring.asc > /dev/null
Then add a Jenkins apt repository entry:
 $ echo deb [signed-by=/usr/share/keyrings/jenkins-keyring.asc] \
    https://pkg.jenkins.io/debian binary/ | sudo tee \
    /etc/apt/sources.list.d/jenkins.list > /dev/null
Update your local package index, then finally install Jenkins:
$ sudo apt-get update
$ sudo apt-get install fontconfig openjdk-11-jre
$ sudo apt-get install jenkins
Step 4 – Opening the Firewall
$ sudo ufw allow 8080
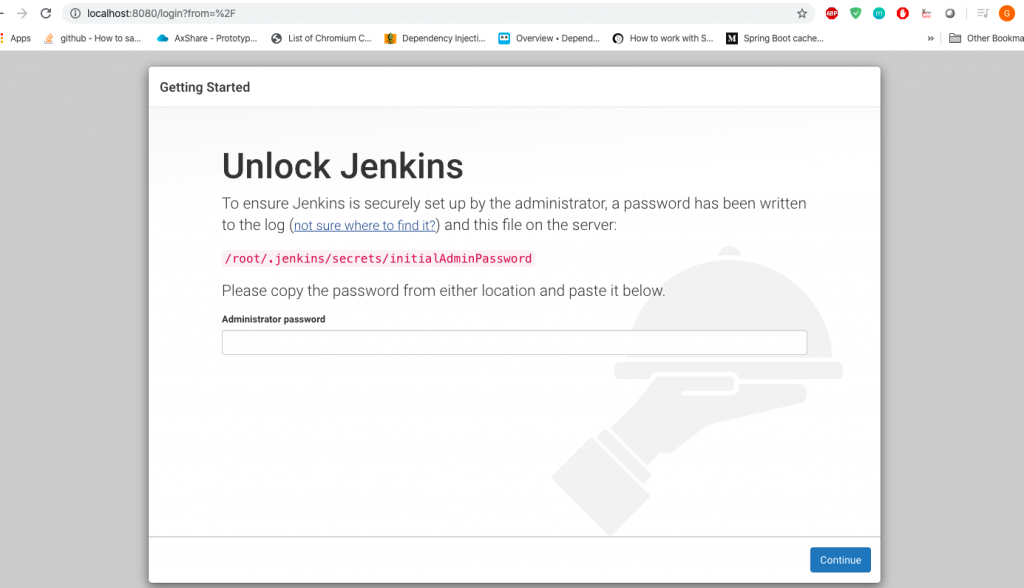
$ sudo ufw statusStep 3: Access Jenkins on 8080 port and Install plugins
Now you should be knowing what to do next 🙂
References :
1. https://jenkins.io/download/
2. https://jenkins.io/doc/book/installing/
Jenkins Complete Referenece by Rajesh Kumar in 2020 – Session-1
Jenkins Complete Referenece by Rajesh Kumar in 2020 – Session-2
Jenkins Complete Referenece by Rajesh Kumar in 2020 – Session-3
Jenkins Complete Referenece by Rajesh Kumar in 2020 – Session-4
Jenkins Complete Referenece by Rajesh Kumar in 2020 – Session-5
Jenkins Complete Referenece by Rajesh Kumar in 2020 – Session-6
Jenkins Complete Referenece by Rajesh Kumar in 2020 – Session-7
Jenkins Complete Referenece by Rajesh Kumar in 2020 – Session-8
Jenkins Complete Referenece by Rajesh Kumar in 2020 – Session-9
Jenkins Complete Referenece by Rajesh Kumar in 2020 – Session-10
Jenkins Complete Referenece by Rajesh Kumar in 2020 – Session-11
Latest posts by Gaurav Bajpai (see all)
- Jenkins Tutorials: Installing Jenkins on Tomcat - September 3, 2023
- Jenkins Tutorials: Install Jenkins as Docker Container - September 3, 2023
- Jenkins Tutorial: Install Jenkins on Ubuntu - November 27, 2022