Step 1: Install Required Packages
Before installing SVN packages, you must install required packages.Type the below command to install require packages.
# yum install httpd mod-ldap mod_authnz_external mod_ssl openssl
Start the apache service.
# chkconfig httpd on
# service httpd start
Step 2: Disable Iptables and Selinux
If you not able to see the apache test page, disable the iptables and selinux service on your server. Use following steps to disable the service.
For CentOS/RHEL 5/6
# service iptables stop
# chkconfig iptables off
For CentOS/RHEL 7
# systemctl stop firewalld
# systemctl disable firewalld
Now disabled the selinux of server. After disable the selinux reboot the server.
# vim /etc/sysconfig/selinux
SELINUX=enforcing
and replace with
SELINUX=disabled
Step 3: Install SVN Server
Once the Apache Web Server is installed, we’ll need to execute the following command to install subversion.
# yum install subversion mod_dav_svn
Check SVN Server Version
After installing the SVN Server check the version of SVN using following command.
# svn --version
svn, version 1.6.11 (r934486)
   compiled Feb 10 2015, 22:08:22

Copyright (C) 2000-2009 CollabNet.
Subversion is open source software, see http://subversion.tigris.org/
This product includes software developed by CollabNet (http://www.Collab.Net/).

The following repository access (RA) modules are available:

* ra_neon : Module for accessing a repository via WebDAV protocol using Neon.
  - handles 'http' scheme
  - handles 'https' scheme
* ra_svn : Module for accessing a repository using the svn network protocol.
  - with Cyrus SASL authentication
  - handles 'svn' scheme
* ra_local : Module for accessing a repository on local disk.
  - handles 'file' scheme
Step 4: Create Directory
Now create directory on server for SVN repositories.
# mkdir /var/www/svn/repos
Step 5: Configure SVN Server
After installing Apache Webserver we open or create the SVN configuration file and add the below lines in the file.
# vim /etc/httpd/conf.d/subversion.conf
<Location /repos>
DAV svn
SVNParentPath /var/www/svn/repos
AuthzSVNAccessFile /var/www/svn/user
SSLRequireSSL
AuthBasicProvider ldap
AuthType Basic
AuthzLDAPAuthoritative off
AuthName "My Subversion server"
AuthLDAPURL "ldap://192.168.10.55:3268/DC=techoism,DC=com?sAMAccountName?sub?(objectClass=*)" NONE
AuthLDAPBindDN "svn.admin@techoism"
AuthLDAPBindPassword "r3Dh@+@123"
require ldap-attribute objectClass=user
</Location>
Step 6: Create SVN Repository
Create a new repository and change the ownership of repository using following command:
# cd /var/www/svn/repos
# svnadmin create techoism
# chown -R apache.apache techoism
Step 6: Repository access to LDAP User
After creating new svn repository now we need to give permission to any LDAP user to access the repository.
# vim /var/www/svn/user
[techoism:/]
dennis.r = rw
steve.jobs = rw
Note: If you want to give permission to any user to access all the repository, then do following entry in the file.
[/]
dennis.r = rw
Now dennis has rights to access all the SVN repositories
After creating user we will restart Apache Service.
# service httpd restart
Now you should be start the svnserve process by using this script:
# service svnserve start
Next, to set this script to run ‘start’ on server boot register the service:
# chkconfig --add svnserve
# chkconfig enable svnserve
Step 7: Access Your Repository in Browser
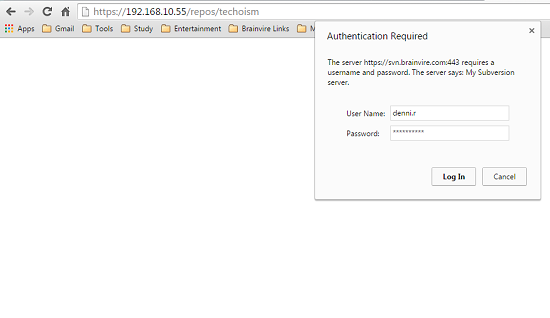
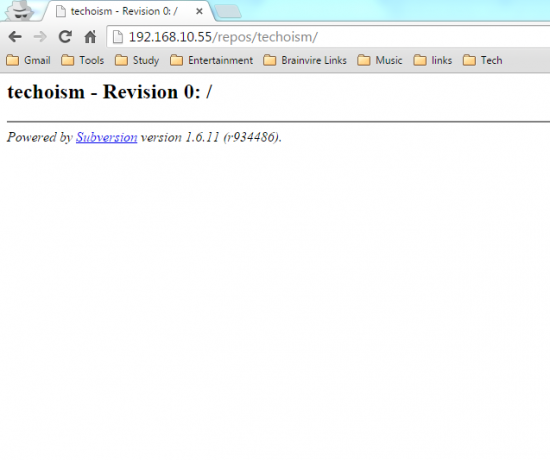
Now open your svn repository in a browser. It will prompt for authentication.
# http://192.168.10.55/repos/techoism
or
# http://svn.techoism.com/repos/techoism
I’m Rajesh Kumar, a DevOps, SRE, DevSecOps, Cloud, and Platform Engineering expert passionate about sharing practical knowledge, real-world experiences, and industry best practices. I have worked at Cotocus and regularly write about technology, travel, investing, health, product reviews, and digital marketing through my various platforms.
I publish technical articles at DevOps School, travel stories at Holiday Landmark, stock market insights at Stocks Mantra, health and fitness guidance at My Medic Plus, product reviews at TrueReviewNow, and SEO and digital marketing strategies at Wizbrand.
Find Trusted Cardiac Hospitals
Compare heart hospitals by city and services — all in one place.
Explore Hospitals