Angular file management is essential to web application development. But most people get confused about using the codes and everything. This tutorial will make it easy to implement file management or file explorer components in our web file manager interface. Let’s continue reading!

What Are The Features Of An Angular File Explorer?
Features of an angular file explorer component may vary depending on the brand, such as Filestack. But some common features are listed below:
- Toolbar
- Navigation Pane
- Content Pane
- Different File Operations
- Sorting
- Searching
- Moving Files and Folders
- Access Control Restriction
- Restrict File Types On Upload
- Multiple File Selection
- Quick Access Menu
- Localization
- Management Of Storage services

How To Create a File Explorer Component in Angular?
Creating a file management component in angular may seem complex, but it is pretty easy. In this part, we will learn to use an angular material library. It will help us to create a visually appealing component that manages the files.
Ready? So let’s start our work.
Set A New Project
First, we will learn how to set up a new project. We have to use angular-CLI for this purpose. CLI helps us to create the project by following the code:
ng new angular-file-explorer
Since we have to do it in an ordered way, we must create our component in a separate feature module. So we use the following code at the root of our project:
ng generate module file-explorer
Using External Dependencies
Here we will use the angular material library. It will give us UI components. The UI components in this library follow the material design styles of Google. Therefore, these components just look awesome.
But we have to install the library by using npm as under:
npm install –save @angular/material @angular/cdk
We also need to import different styles along with our library. For this purpose, we use style.css file to import them as under:
@import ‘~@angular/material/prebuilt-themes/indigo-pink.css’;
Since we also need to have material design icons, we add a link in the index.html file under:
<link
href=”https://fonts.googleapis.com/icon?family=Material+Icons”
rel=”stylesheet”
/>
We need to use flexbox to align the items nicely.
npm install –save @angular/flex-layout
Moreover, we need a small module that helps us to generate random ids:
npm install –save uuid

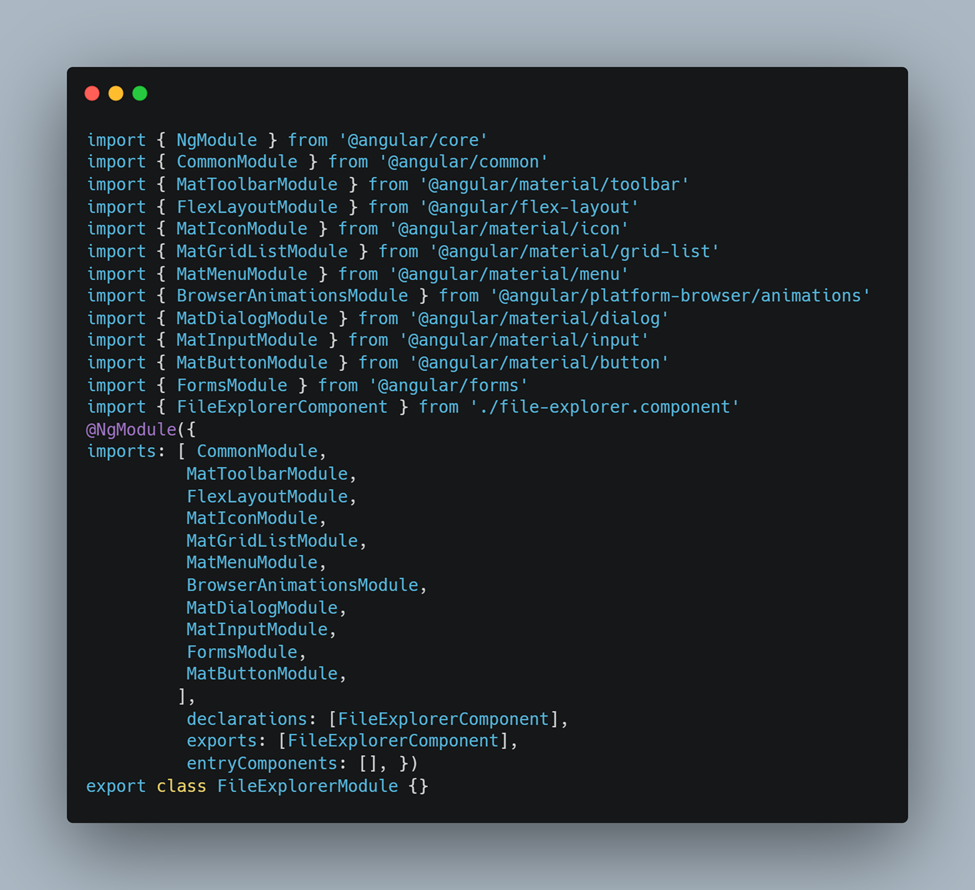
Import Stuff
We must know that our angular material has to follow a modular approach. So what we do is we import different stuff into the file-explorer module.
One thing should be clear we only adjust the module until it starts looking like this:

Define Modules
In this step, we define file modules for our folders and files. We achieve it by creating a class for the file manager module:
ng generate class file-explorer/model/fileElement
FileElement class helps us to define things that are being displayed in our file manager.
export class FileElement {
id?: string
isFolder: boolean
name: string
parent: string
}
Creation Of A Dumb Component
Since we need to create a reusable angular file management component, we achieve it by creating a dumb component. It makes the component completely independent from the server logic. Moreover, it will have zero private states.
The process enables the component to be used with state-management libraries. One main example of state management libraries is ngrx.
We should aim to design the file management component so that it becomes reusable. At the same time, there are multiple ways that can help us handle the files. So we make it as dumb as possible.
When implementing this system, we have to handle everything via outputs and inputs. The component will help us to receive an array including FileElements and visualize them.
The component also takes action to notify the parent component by firing an event. It happens once the user takes action. This process also gives us a nice separation between logic and view.

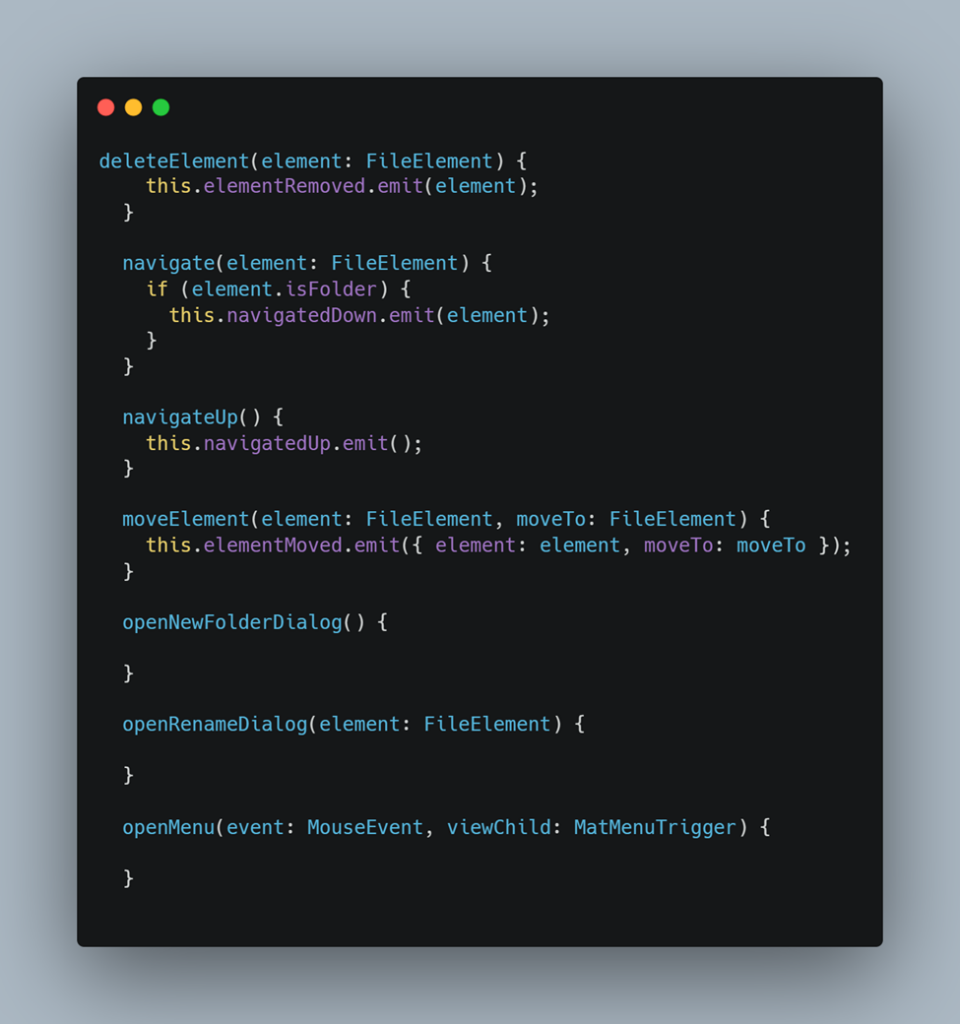
Implementation Of Component Logic
We implement small functions that emit events for our outputs. We place all these functions in FileExplorerComponent.
Creation Of Angular Material Dialogues
It is interesting to note that the angular material implements a dialog for us. But we have to create a small component for each dialog. We need two:
- newFolerDialog
- renameDialog

We have to create them in the form of separate components. It helps to keep them independent. In this process, we use angular-CLI.
ng generate component file-explorer/modals/newFolderDialog
And then, we use the following code:
ng generate component file-explorer/modals/renameDialog
The templates will look like as under:
<h1 mat-dialog-title>Create a new folder</h1>
<mat-dialog-content>
<mat-form-field class=”example-full-width”>
<input matInput placeholder=”Folder Name” [(ngModel)]=”folderName” />
</mat-form-field>
</mat-dialog-content>
<mat-dialog-actions>
<button mat-raised-button mat-dialog-close>Cancel</button>
<button mat-raised-button [mat-dialog-close]=”folderName” color=”primary”>
OK
</button>
</mat-dialog-actions>
Opening The Created Dialogs
import { MatDialog } from ‘@angular/material/dialog’;
…
constructor(public dialog: MatDialog) {}
Designing The File Manager Component
Finally, we set up the file manager component by using the code as under:
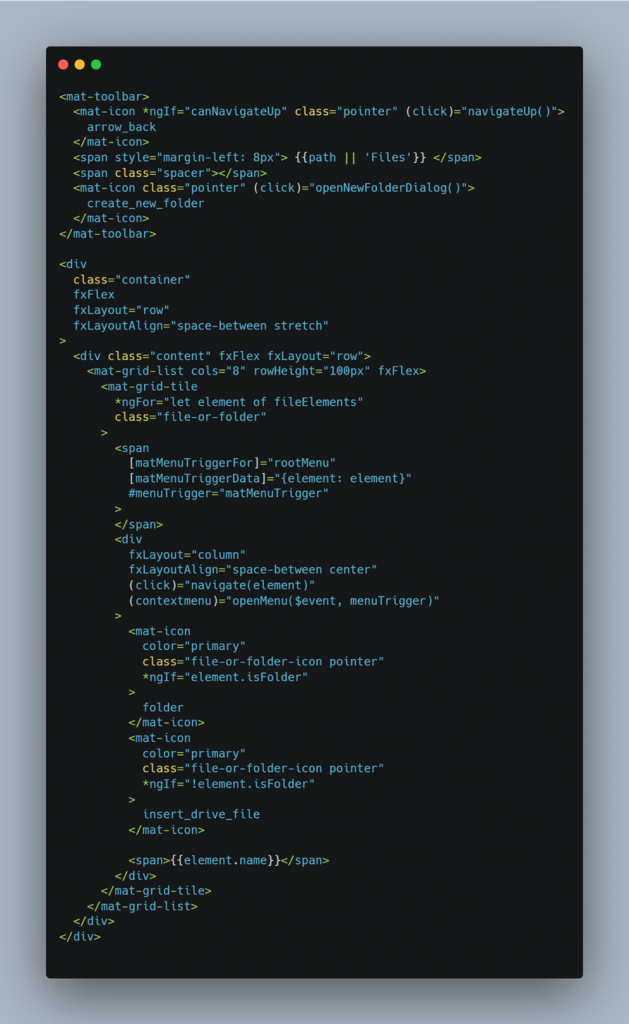
Then we place menus as under:
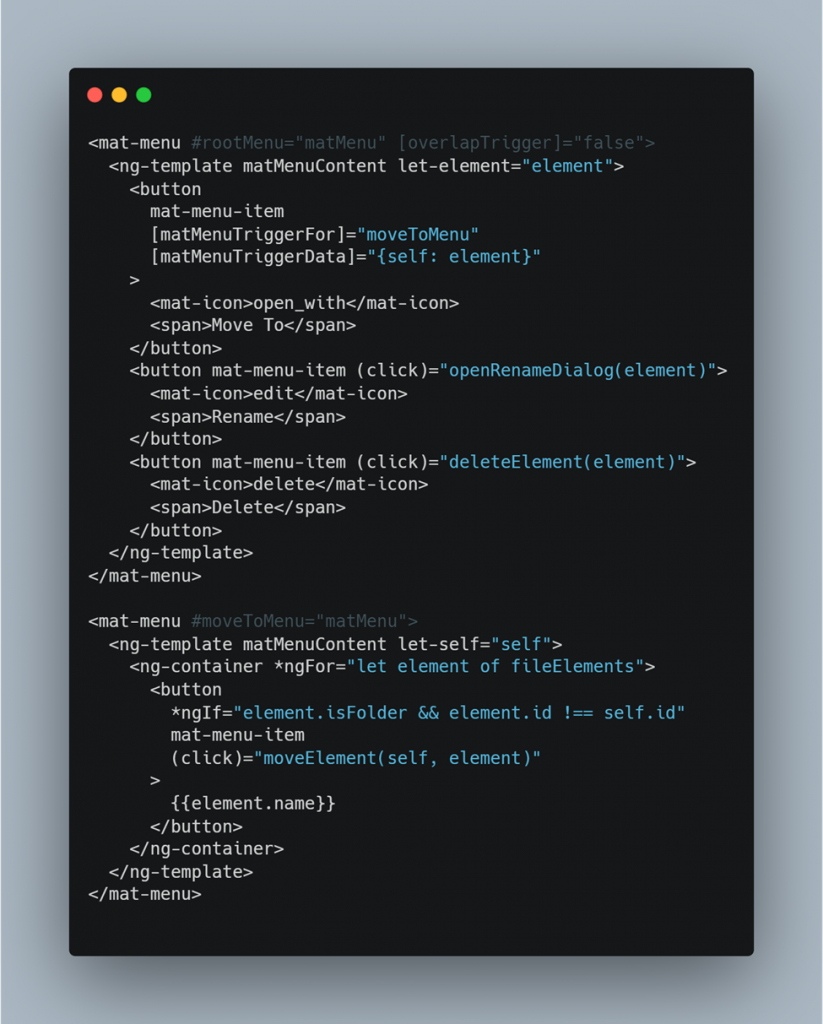
Finally, our component is ready for displaying files and passing through user interaction.
Final Thoughts
We have learned to make a file manager component using the codes given above. But to create a fully functional component, we must handle all the events outside the component. We can develop it easily by implementing an in-memory solution or developing it against our API.
You can find all the coding examples provided in the article here.
Find Trusted Cardiac Hospitals
Compare heart hospitals by city and services — all in one place.
Explore Hospitals
bro that not a good tutorial