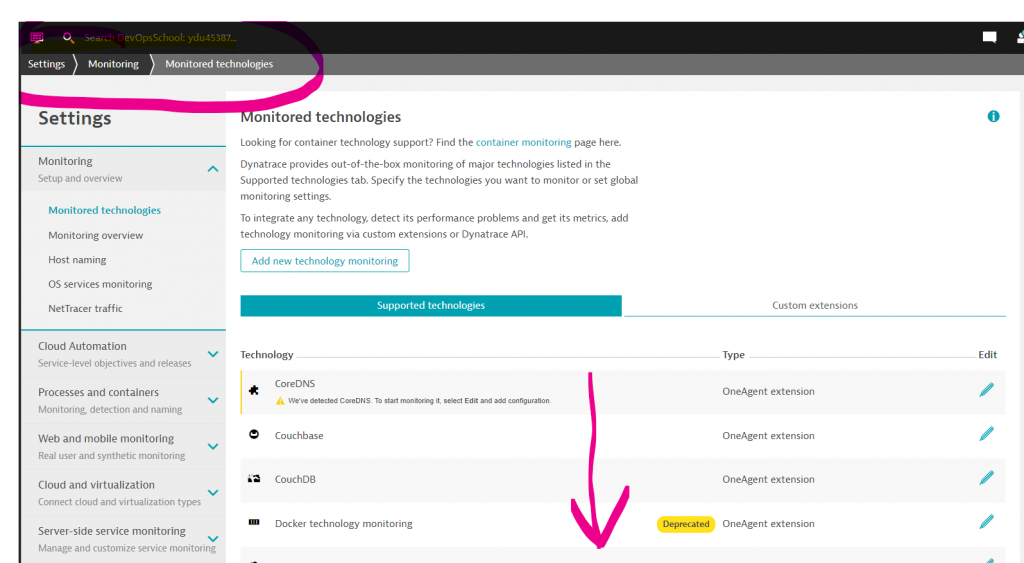
Step 1 – Check if Dynatrace Log Monitoring is enabled globally
- In the Dynatrace menu, go to Settings > Monitoring > Monitored technologies.
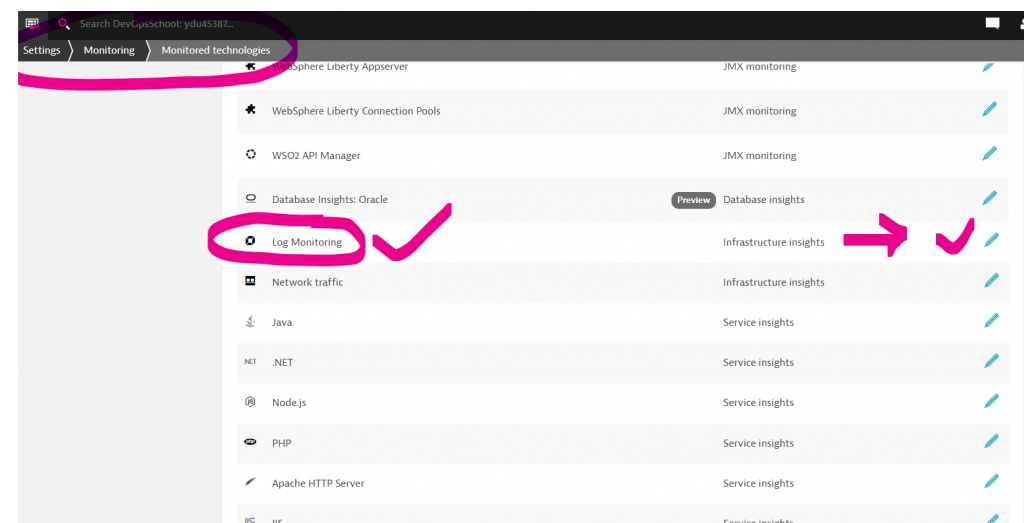
- Find Log Monitoring in the list of supported technologies, and select Edit (pencil icon).
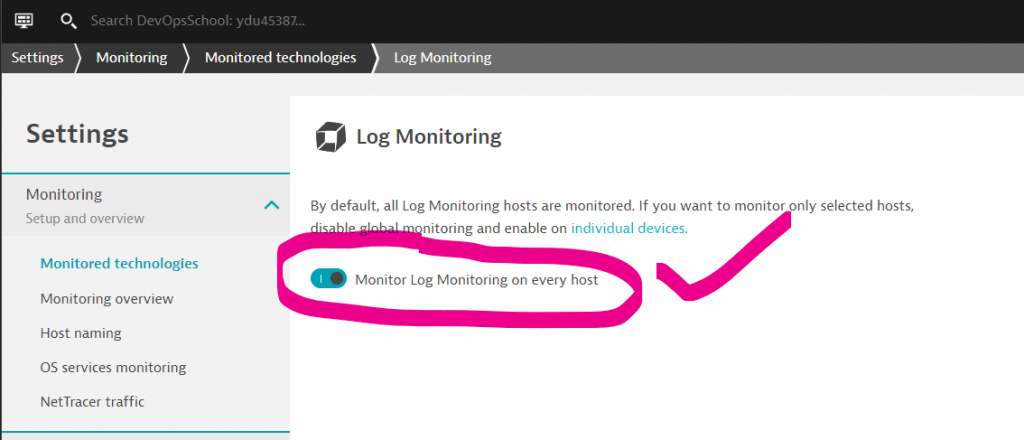
- Check if Monitor Log Monitoring on every host option is enabled.
- Turn on Monitor Log Monitoring on every host.
Step 2 – Check if Dynatrace Log Monitoring is enabled on a host level:
# To Check if Log Monitoring is enabled or not
$ cd /opt/dynatrace/oneagent/agent/tools
$ ./oneagentctl --get-system-logs-access-enabled
$ ./oneagentctl --get-app-log-content-access

# To Enable Log Monitoring is enabled or not
$ ./oneagentctl --set-system-logs-access-enabled=true --restart-service
$ ./oneagentctl --set-app-log-content-access=true --restart-service
Code language: PHP (php)
Step 3 – Understanding OneAgent Changes
Dynatrace Log Monitoring uses OneAgent log module enabled by default with all OneAgent installations.
While Log Monitoring does not require any specific configuration, you can modify some of the options available for OneAgent log module.
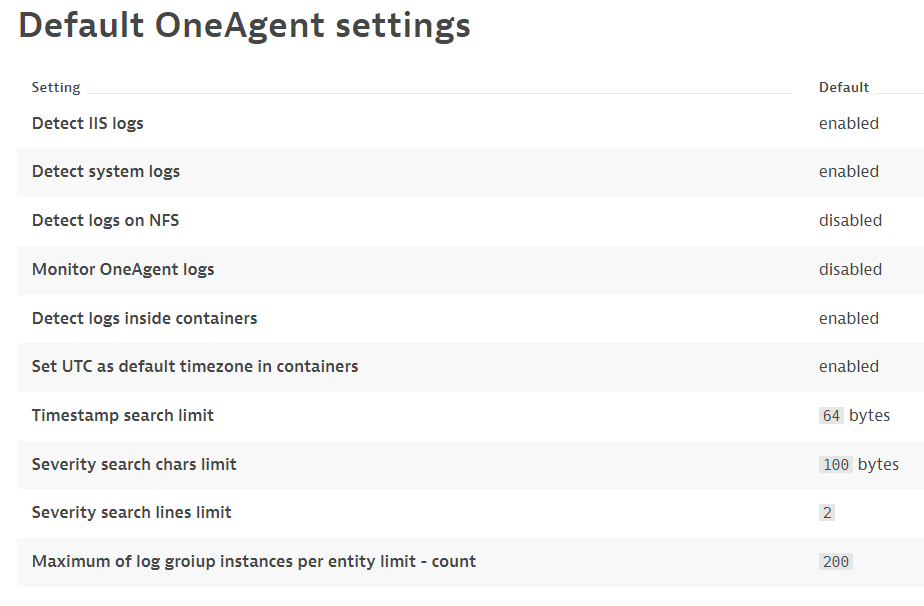
You can adjust:
- Enable and disable automatic log detection for different technologies.
- Define default timezone in containers.
- Enable defining the storgae configuration by a configuration file on the host.
- Define specific location where the timestamp and severity occur in your incoming log data.
- Define the maximum number of log group instances per entity.
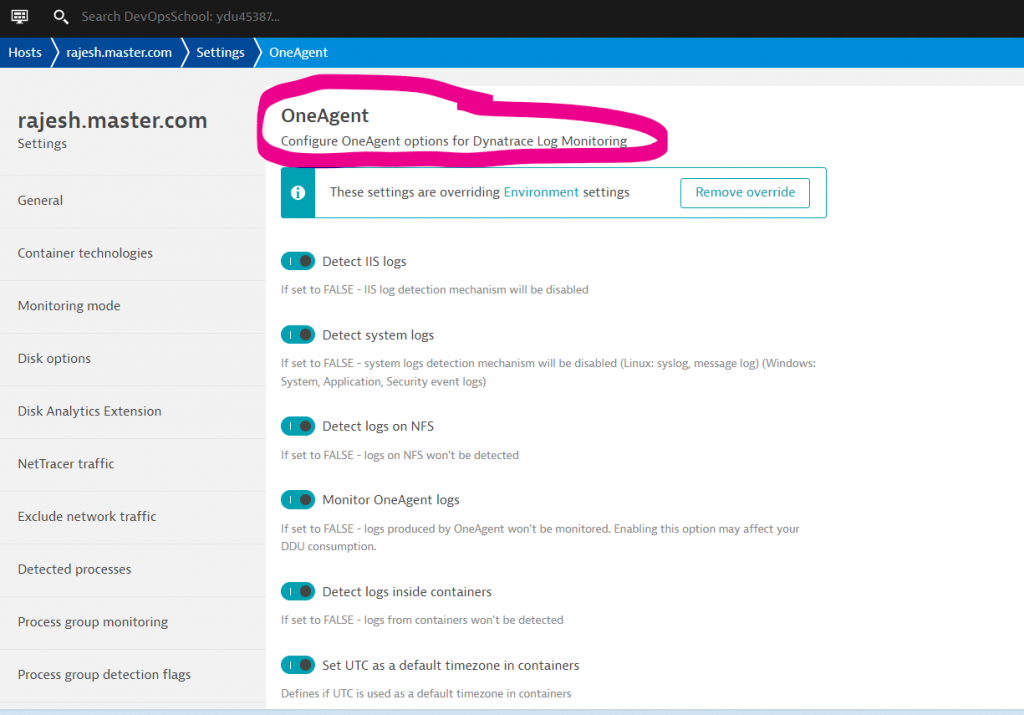
- From the Dynatrace menu, select Settings > Log Monitoring > OneAgent settings.
- Adjust settings and Save changes.

Step 4 – Host-specific OneAgent settings for Log Monitoring
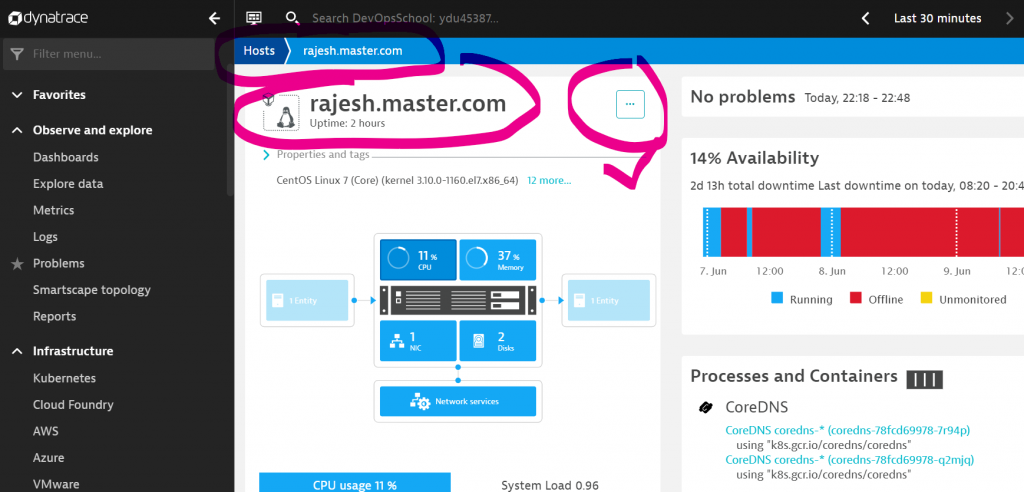
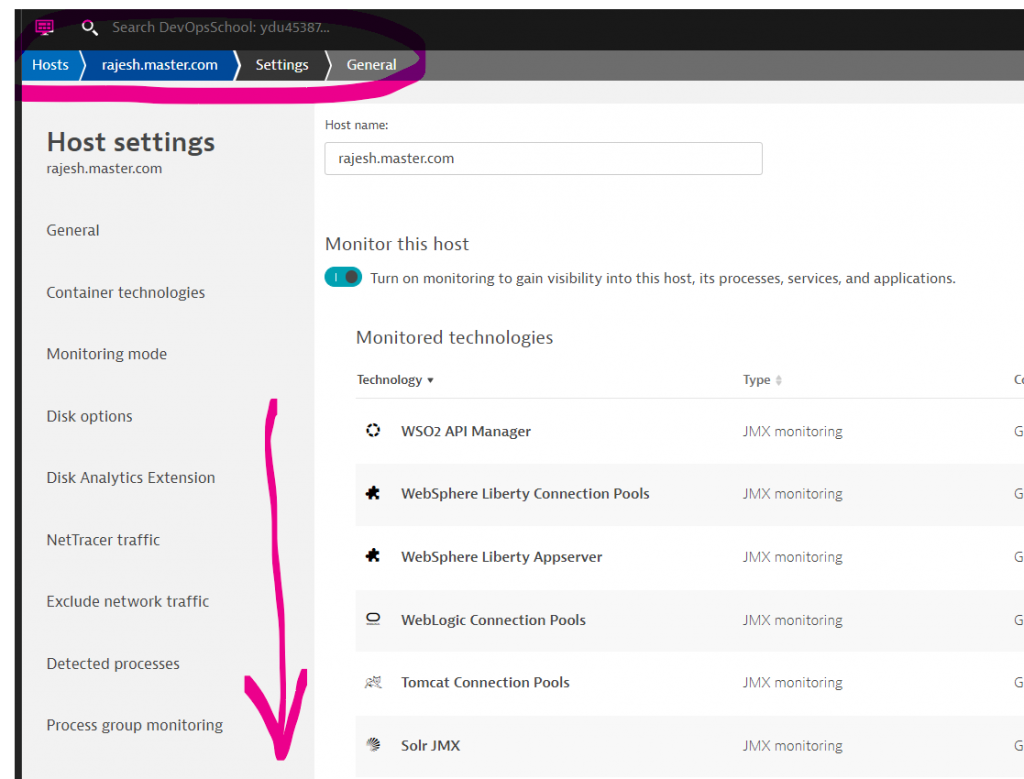
- In the Dynatrace menu, go to Hosts and select your Linux host.
- On the host overview page, select More (…) > Settings in the upper-right corner of the page.
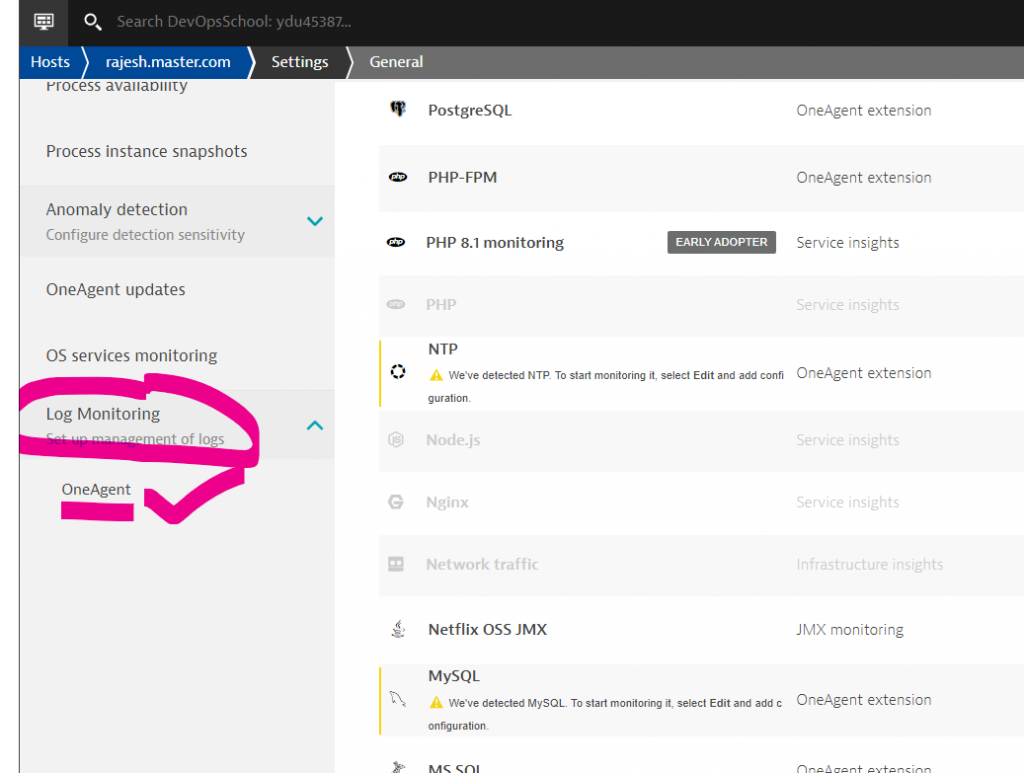
- One the Host settings page, select Log Monitoring and OneAgent settings.
- Adjust settings and Save changes.
Step 5 – Enable using Configuration File [optional]
The configuration file located on each OneAgent is used to set three options. For security reasons, these options can only be set on the host level and are available only by creating a JSON file in a specific location:
- Linux:
/var/lib/dynatrace/oneagent/agent/config/ - Windows:
%PROGRAMDATA%\dynatrace\oneagent\agent\config\
The configuration file name must have the json extension; the file name is otherwise unrestricted.
By default, these options are set for the OneAgent log module to operate properly and to auto-detect log files on the specific host. Modifying this configuration file is not required.
{
  “agent-configuration”:[
    {
      “AppLogRemoteConfiguration”:true,
      “AppLogContentAccess”:true,
      “AppLogAutoDetection”:true
    }
  ]
}Code language: JavaScript (javascript)
Step 6 – Add Log sources and storage
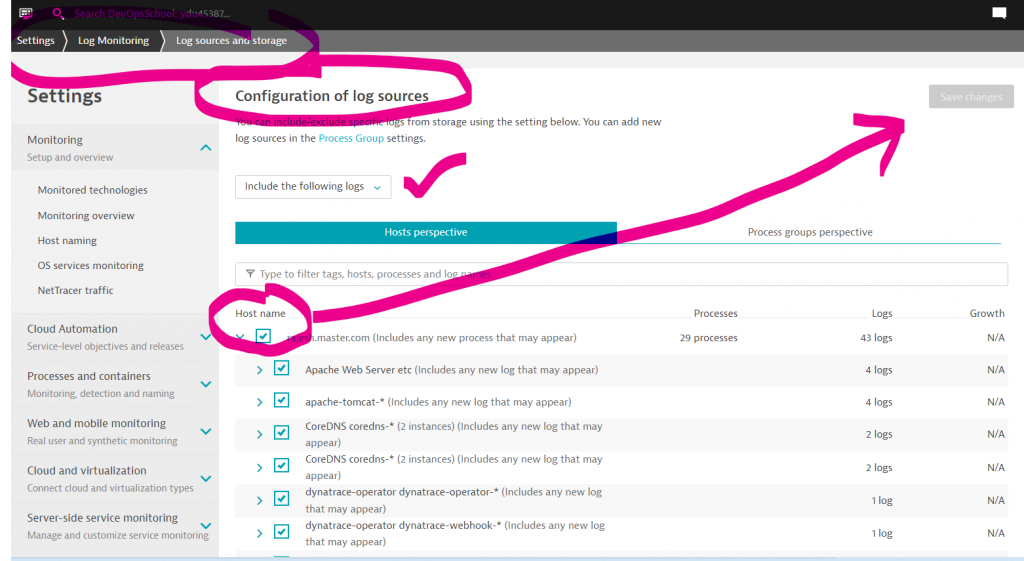
To include or exclude specific log sources from storage
- Select Settings from the Dynatrace navigation menu and in the Log Monitoring section, select Log sources and storage.
- Select Include all logs, Include the following logs, or Exclude the following logs from the list.
- Switch between tabs to select logs from Hosts perspective or from Process groups perspective.
- Select Save changes.
Step 7 – Confirm Logs in Dynatrace

I’m Rajesh Kumar, a DevOps, SRE, DevSecOps, Cloud, and Platform Engineering expert passionate about sharing practical knowledge, real-world experiences, and industry best practices. I have worked at Cotocus and regularly write about technology, travel, investing, health, product reviews, and digital marketing through my various platforms.
I publish technical articles at DevOps School, travel stories at Holiday Landmark, stock market insights at Stocks Mantra, health and fitness guidance at My Medic Plus, product reviews at TrueReviewNow, and SEO and digital marketing strategies at Wizbrand.
Find Trusted Cardiac Hospitals
Compare heart hospitals by city and services — all in one place.
Explore Hospitals
Need to understand custom log monitoring – How to montore specific error string/code from log file?