To set up New Relic JMX monitoring, follow these steps:
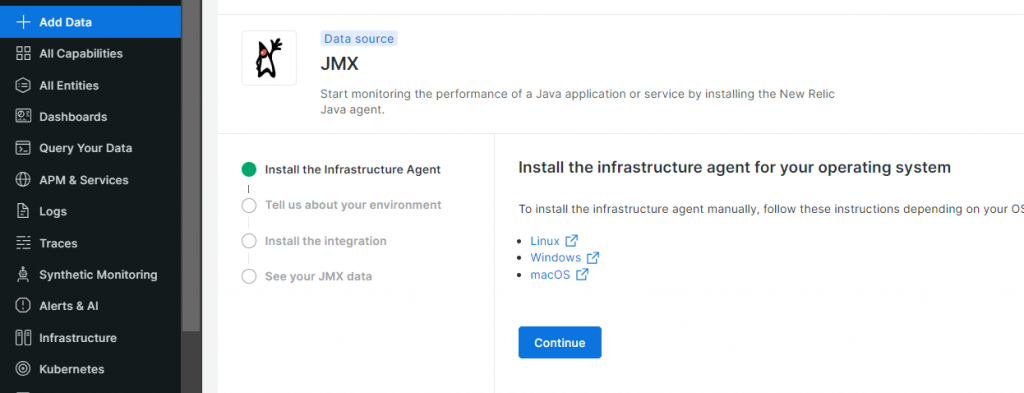
- Install the New Relic infrastructure agent.
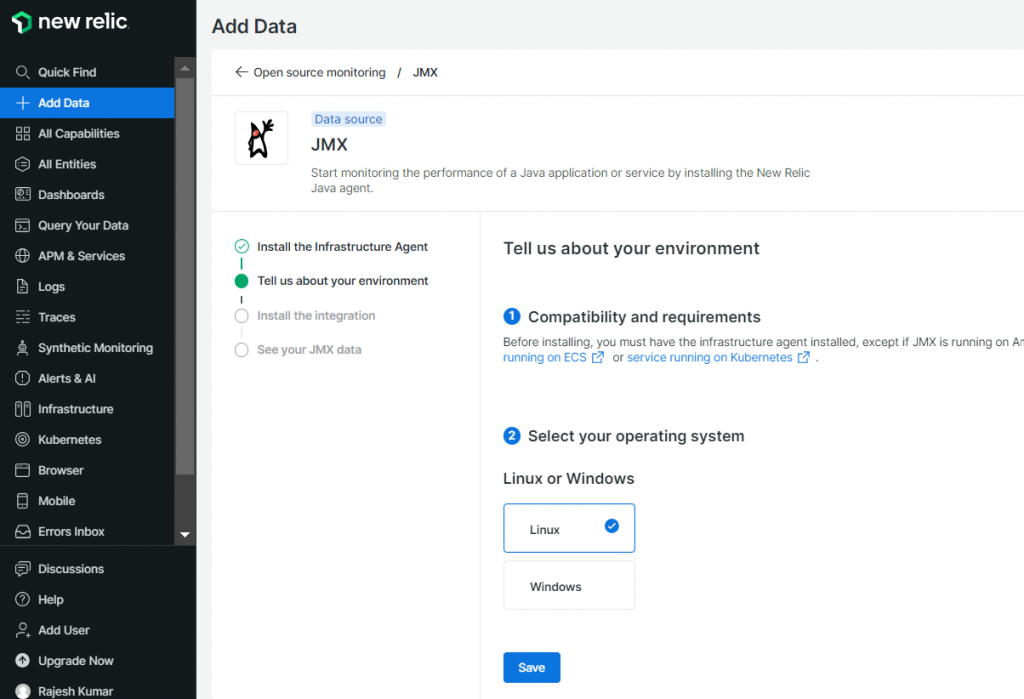
- Enable JMX monitoring.
- Configure the JMX integration.
- Restart the infrastructure agent.
Step 1: Install the New Relic infrastructure agent
If you haven’t already, install the New Relic infrastructure agent on your server. Follow the instructions on the New Relic website: https://docs.newrelic.com/docs/infrastructure/install-infrastructure-agent/get-started/install-infrastructure-agent/.
Step 2: Enable JMX monitoring
Once the infrastructure agent is installed, you need to enable JMX monitoring. You can do this in the New Relic UI or by editing the infrastructure agent configuration file.
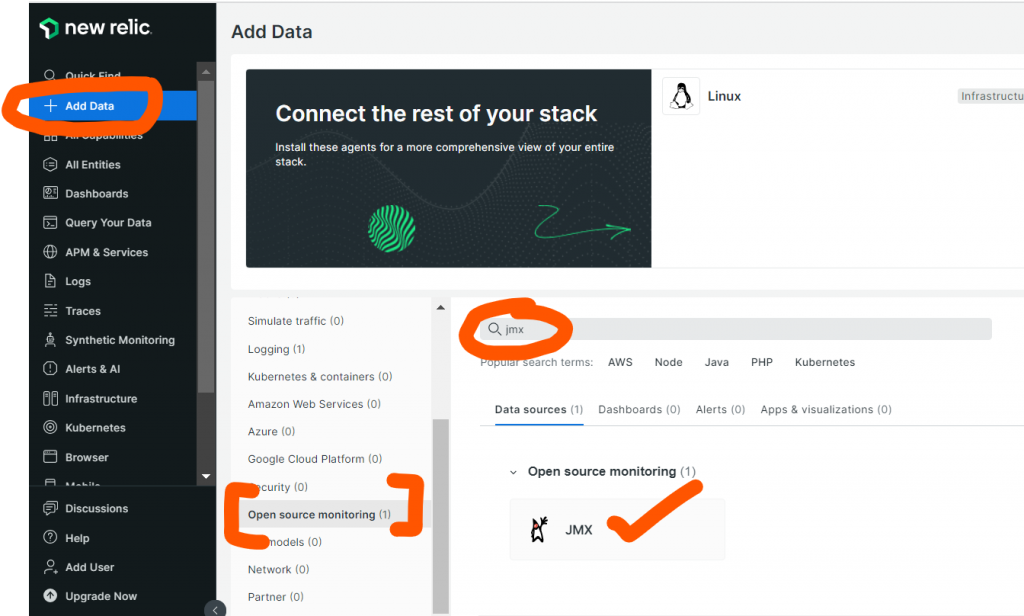
To enable JMX monitoring in the New Relic UI:
- Go to one.newrelic.com.
- Click Integrations.
- Click Add integration.
- Select JMX and click Add.
- Click Enable.
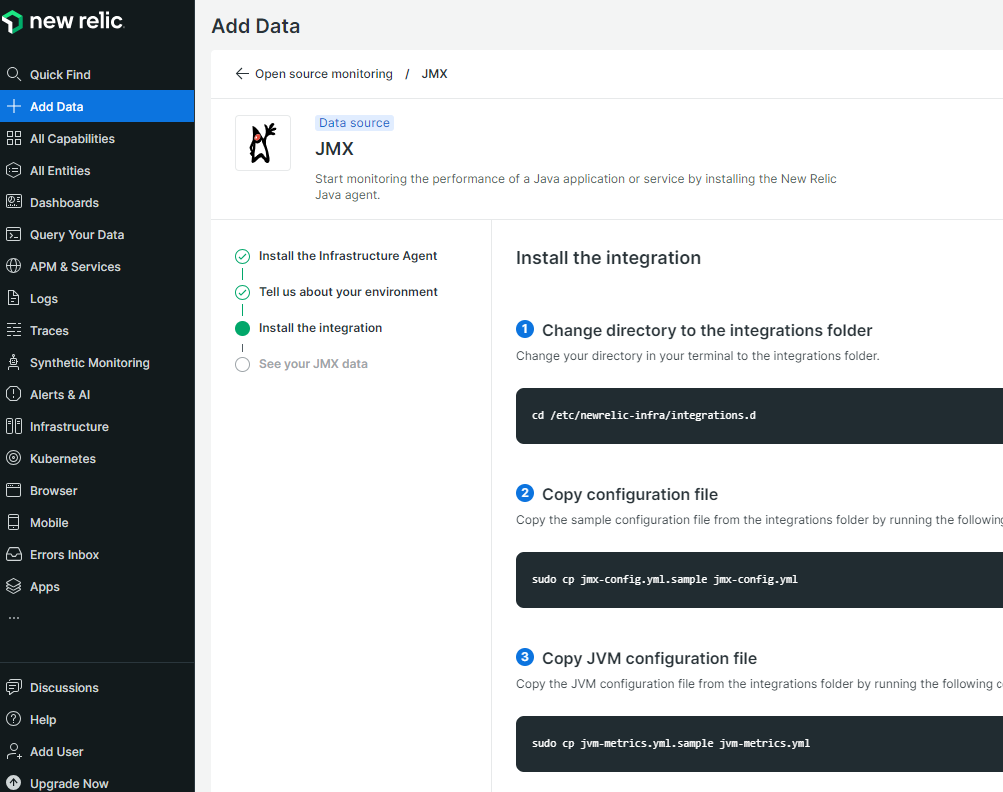
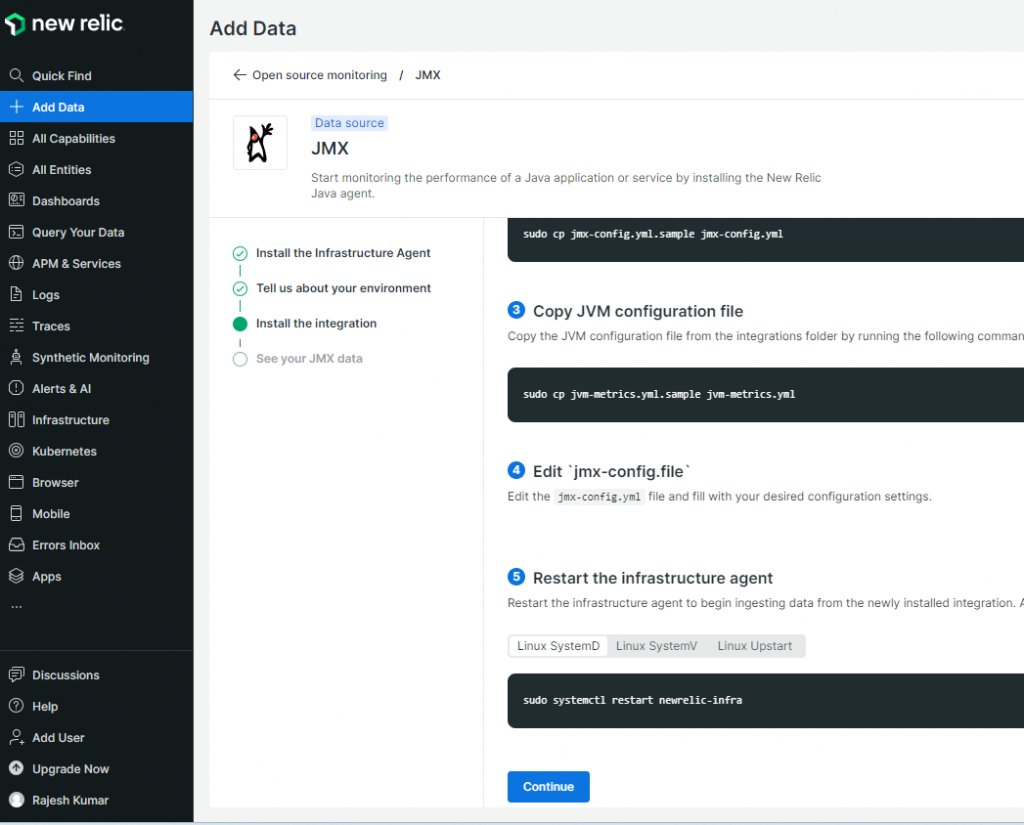
To enable JMX monitoring in the infrastructure agent configuration file:
- Open the infrastructure agent configuration file in a text editor.
- Find the
integrationssection. - Add the following lines to the
integrationssection:
jmx:
  enabled: true
Code language: JavaScript (javascript)- Save the configuration file and restart the infrastructure agent.
Step 3: Configure the JMX integration
Once JMX monitoring is enabled, you need to configure the JMX integration. You can do this in the New Relic UI or by editing the infrastructure agent configuration file.
To configure the JMX integration in the New Relic UI:
- Go to one.newrelic.com.
- Click Integrations.
- Click the JMX integration.
- Click Configure.
- Configure the integration settings.
- Click Save.
To configure the JMX integration in the infrastructure agent configuration file:
- Open the infrastructure agent configuration file in a text editor.
- Find the
jmxsection. - Configure the integration settings.
- Save the configuration file and restart the infrastructure agent.
For more information on how to configure the JMX integration, see the New Relic documentation: https://docs.newrelic.com/docs/infrastructure/host-integrations/host-integrations-list/jmx-monitoring-install/.
Step 4: Restart the infrastructure agent
Once you have configured the JMX integration, you need to restart the infrastructure agent for the changes to take effect.

I’m Rajesh Kumar, a DevOps, SRE, DevSecOps, Cloud, and Platform Engineering expert passionate about sharing practical knowledge, real-world experiences, and industry best practices. I have worked at Cotocus and regularly write about technology, travel, investing, health, product reviews, and digital marketing through my various platforms.
I publish technical articles at DevOps School, travel stories at Holiday Landmark, stock market insights at Stocks Mantra, health and fitness guidance at My Medic Plus, product reviews at TrueReviewNow, and SEO and digital marketing strategies at Wizbrand.
Find Trusted Cardiac Hospitals
Compare heart hospitals by city and services — all in one place.
Explore Hospitals