Adding custom fields in Jira is a powerful way to tailor your Jira projects to your team’s specific needs. Custom fields allow you to capture and track additional information beyond the default Jira fields. Here’s a step-by-step guide on how to add custom fields in Jira:
1. Log in to Jira:
Log in to your Jira instance with the necessary permissions to configure custom fields. You typically need administrative or project administrator privileges to create and manage custom fields.
2. Access Custom Fields:
After logging in, follow these steps to access the custom fields section:
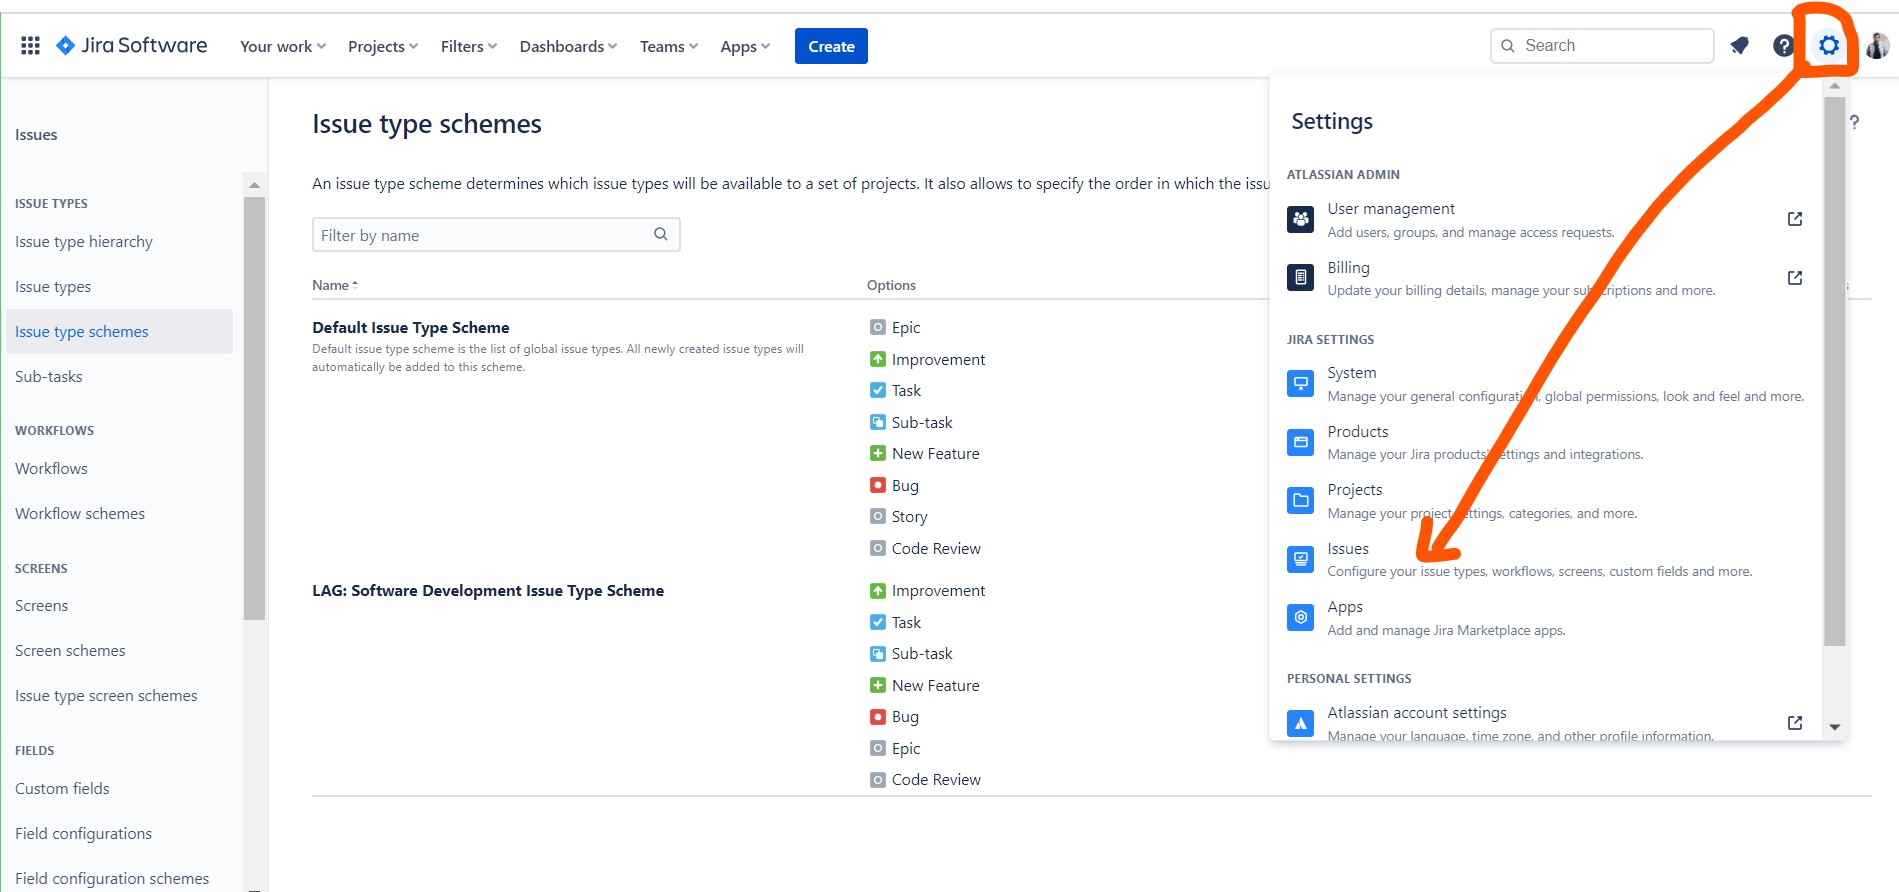
- Click on the gear icon (settings) in the top right corner of the Jira dashboard.
- Under “Jira Settings,” locate and click on “Issues.”
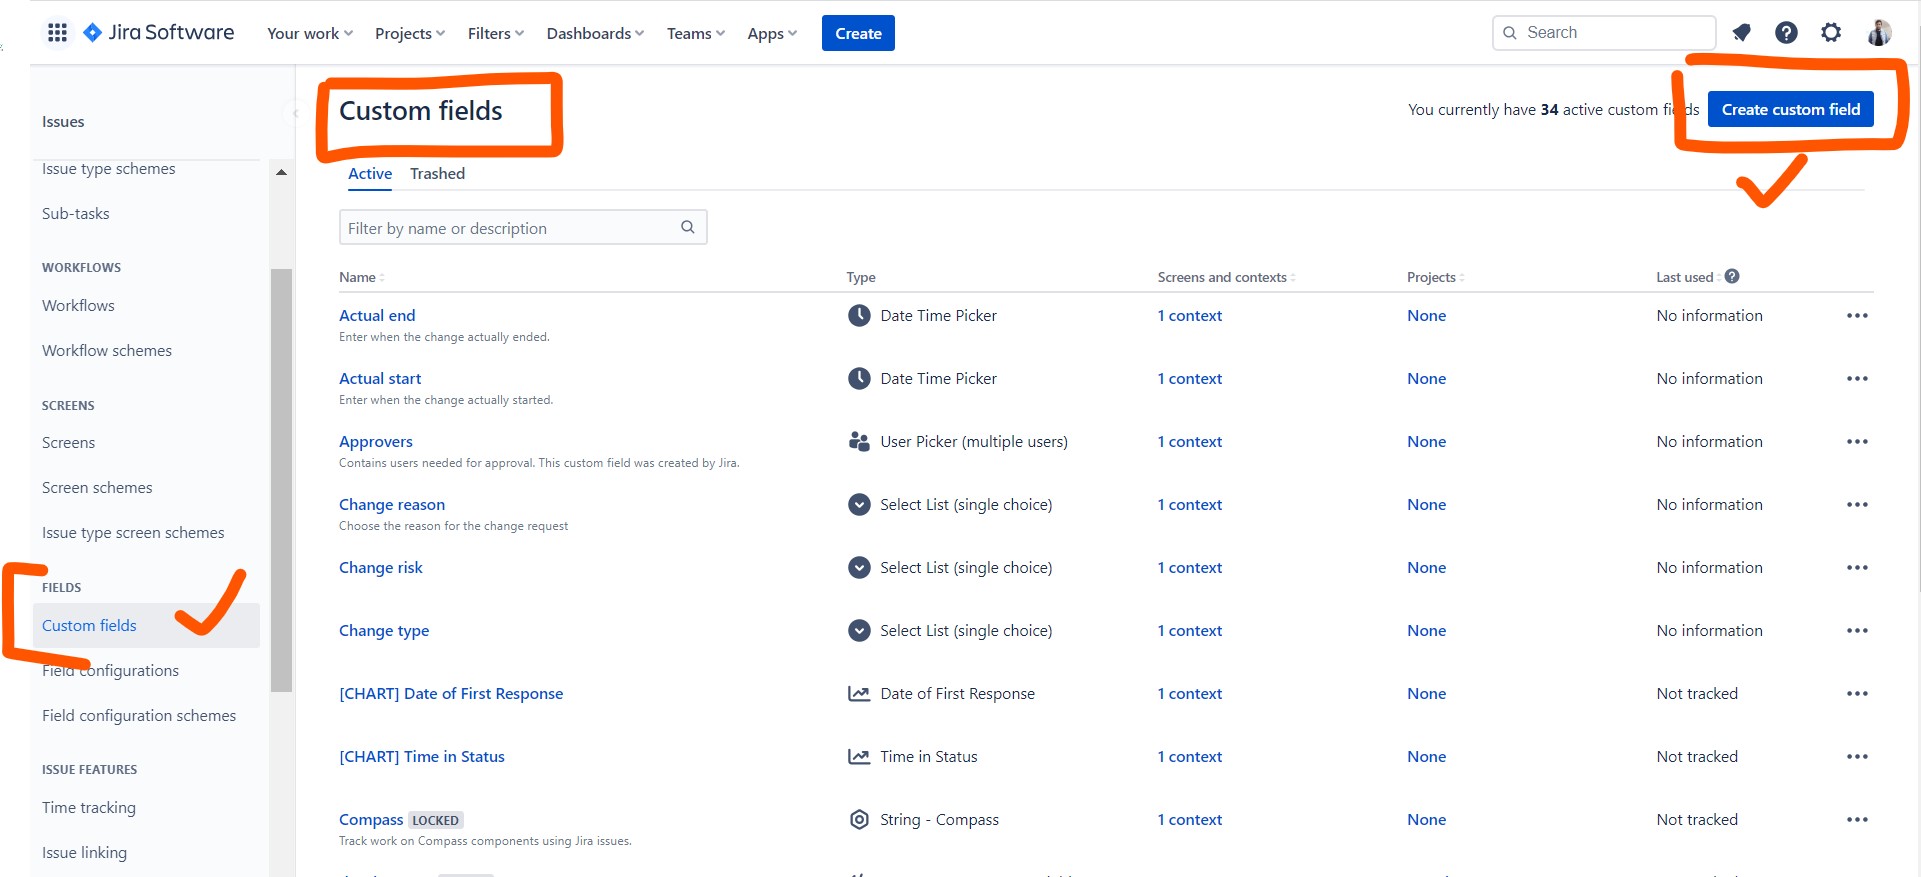
- In the left sidebar, under “Fields,” click on “Custom fields.”
3. Create a New Custom Field:
To create a new custom field, follow these steps:
- Click on the “Add Custom Field” button. This will open a new window with various options.
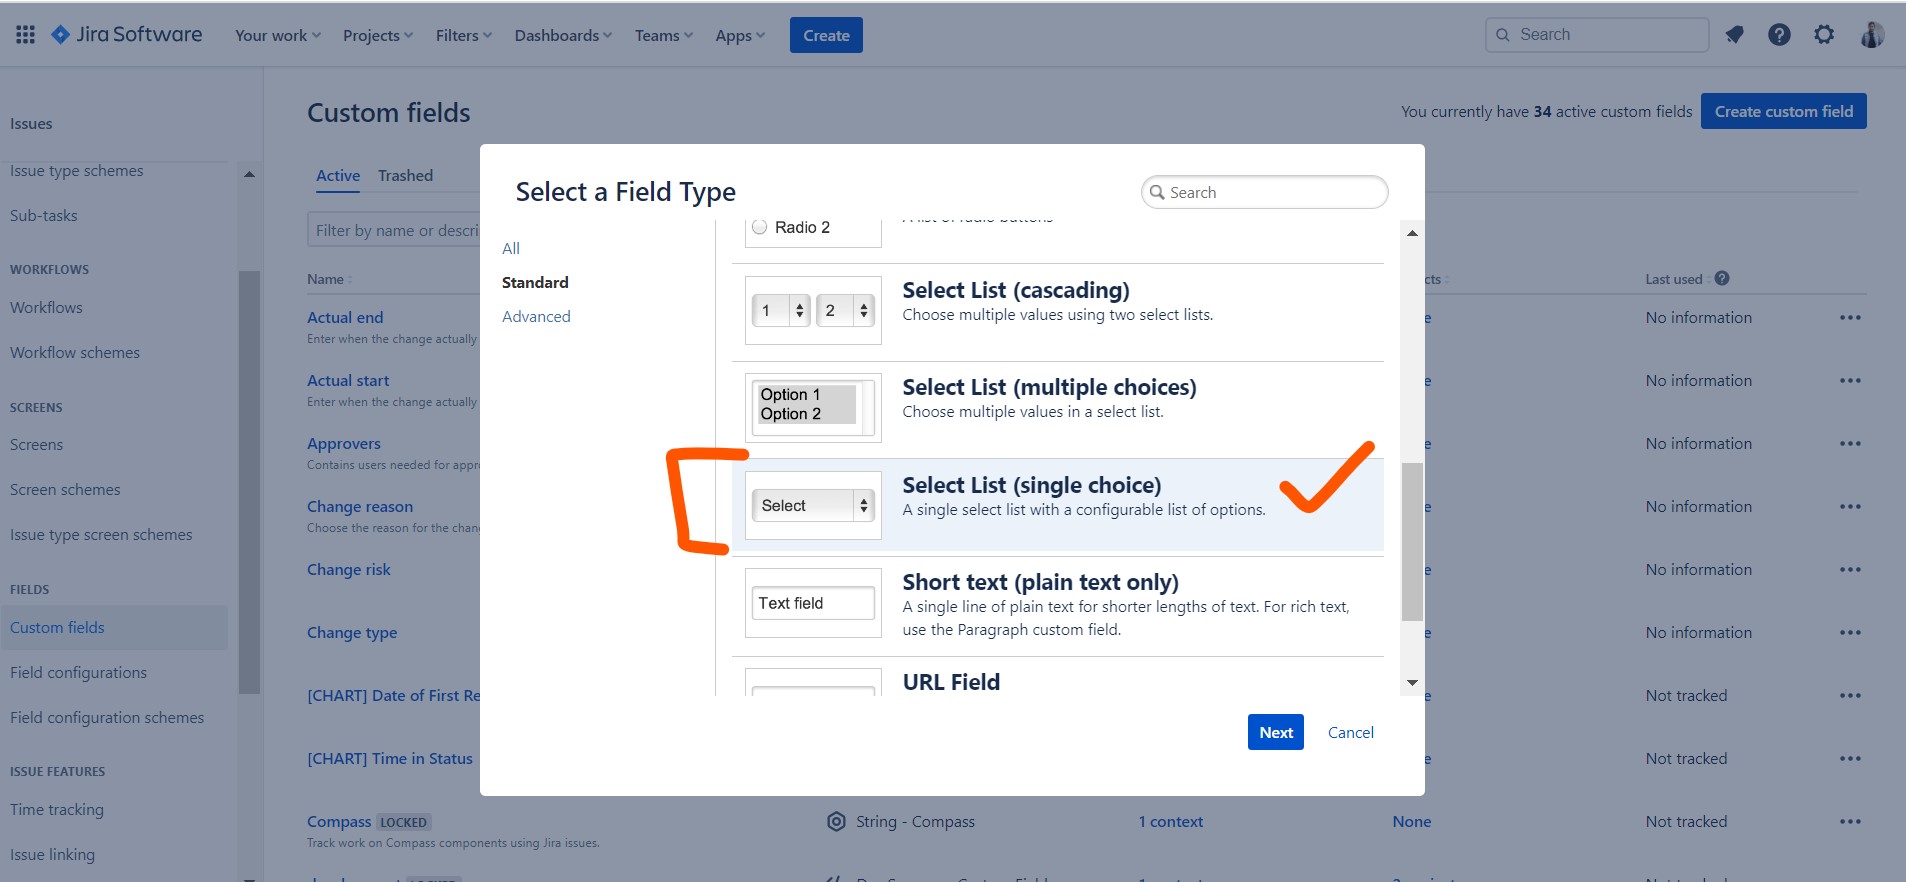
4. Choose the Custom Field Type:
Jira offers various custom field types to capture different types of information. Here are some common custom field types and their use cases:
- Text Field: Use for short text, such as a product name.
- Number Field: Use for numerical values like priority scores.
- Date Picker: Use to capture dates, such as due dates or release dates.
- Select List (Single Choice): Use for dropdown lists with a single selection.
- Select List (Multiple Choices): Use for dropdown lists with multiple selections.
- Radio Buttons: Use for single-choice options.
- Checkbox: Use for yes/no or true/false options.
- User Picker (Single User): Use to associate an issue with a single user.
- User Picker (Multiple Users): Use to associate an issue with multiple users.
Choose the appropriate field type for your custom field based on what information you want to capture.
5. Configure the Custom Field:
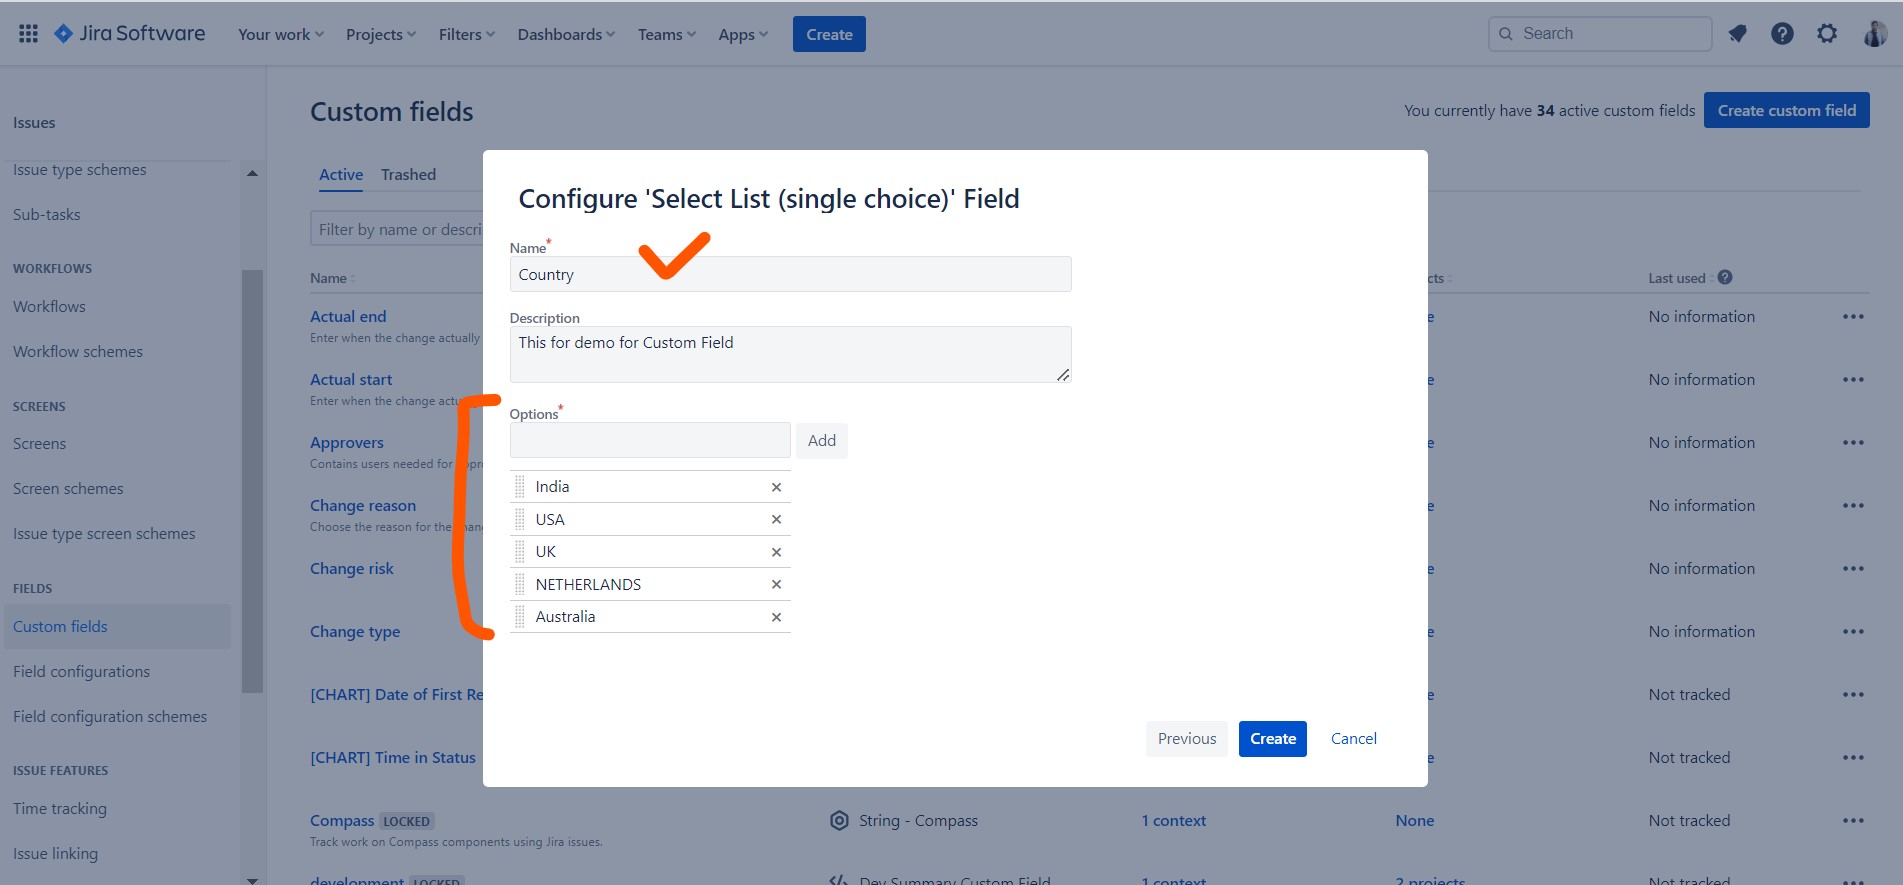
Once you’ve selected the field type, you’ll need to configure the custom field based on your requirements. Configuration options may vary depending on the field type you chose. Common configuration settings include:
- Field Name: Give your custom field a descriptive name.
- Description: Add a brief description to help users understand the field’s purpose.
- Context: Specify the Jira projects and issue types where this custom field should be available.
6. Set Additional Options (if applicable):
Depending on the field type, you may have additional options to configure:
- Default Value: Set a default value if needed.
- Options: Define the list of options for select lists or checkboxes.
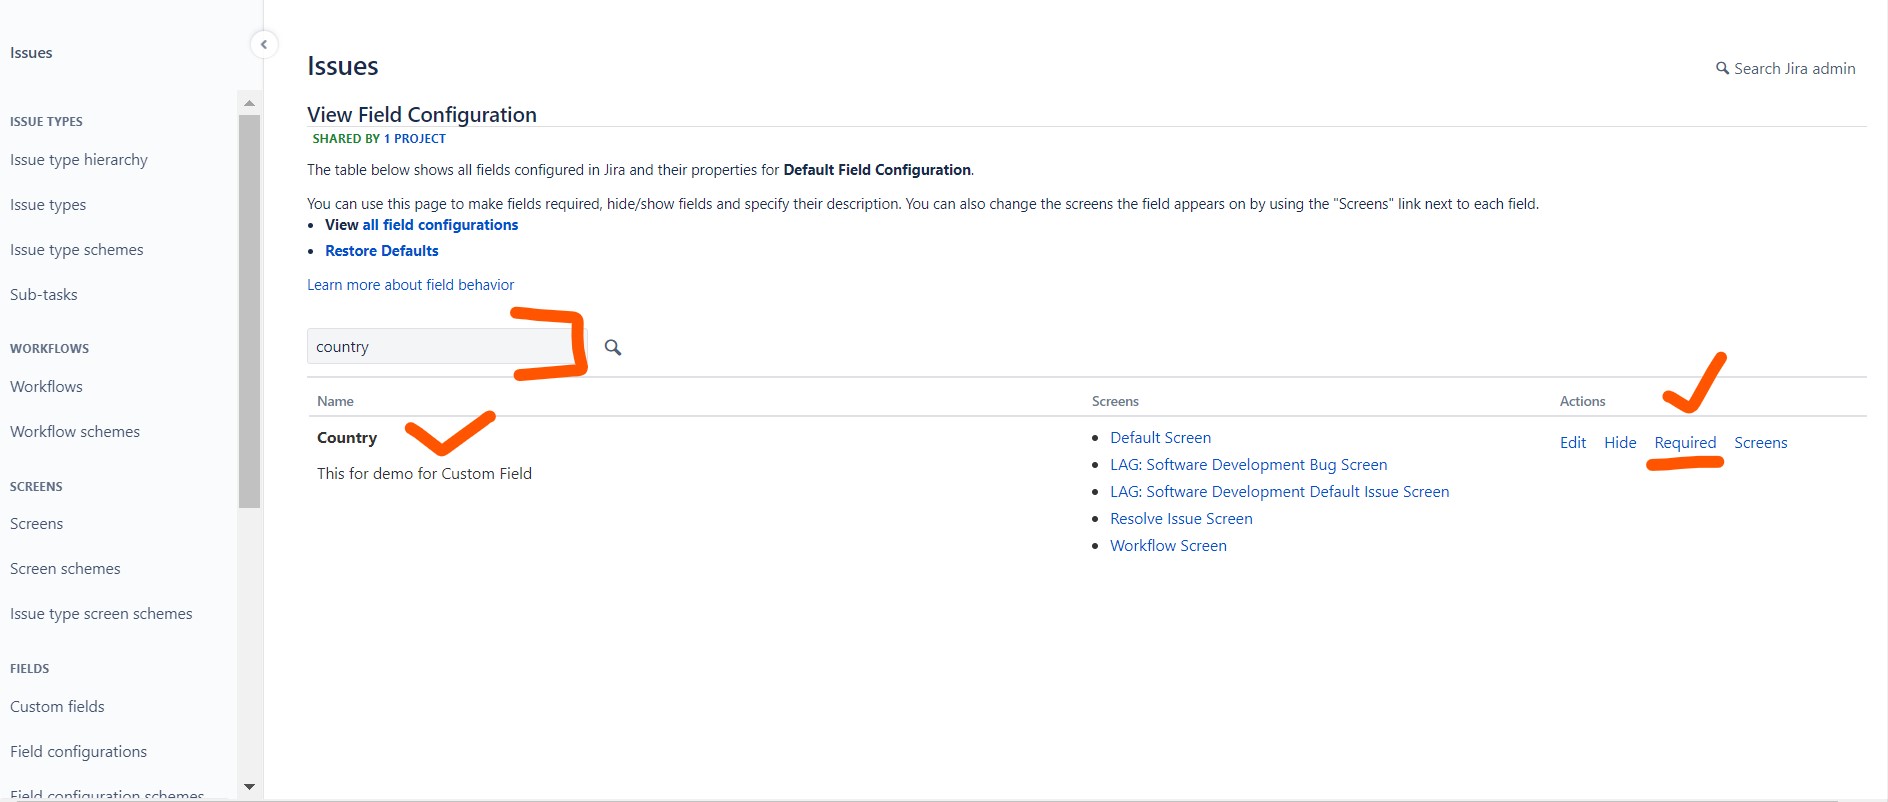
- Validators: Add validation rules to ensure data consistency.
- Screens: Configure which screens should display this field during issue creation and editing.
7. Save the Custom Field:
Once you’ve configured the custom field to your satisfaction, click the “Create” or “Save” button to save it.
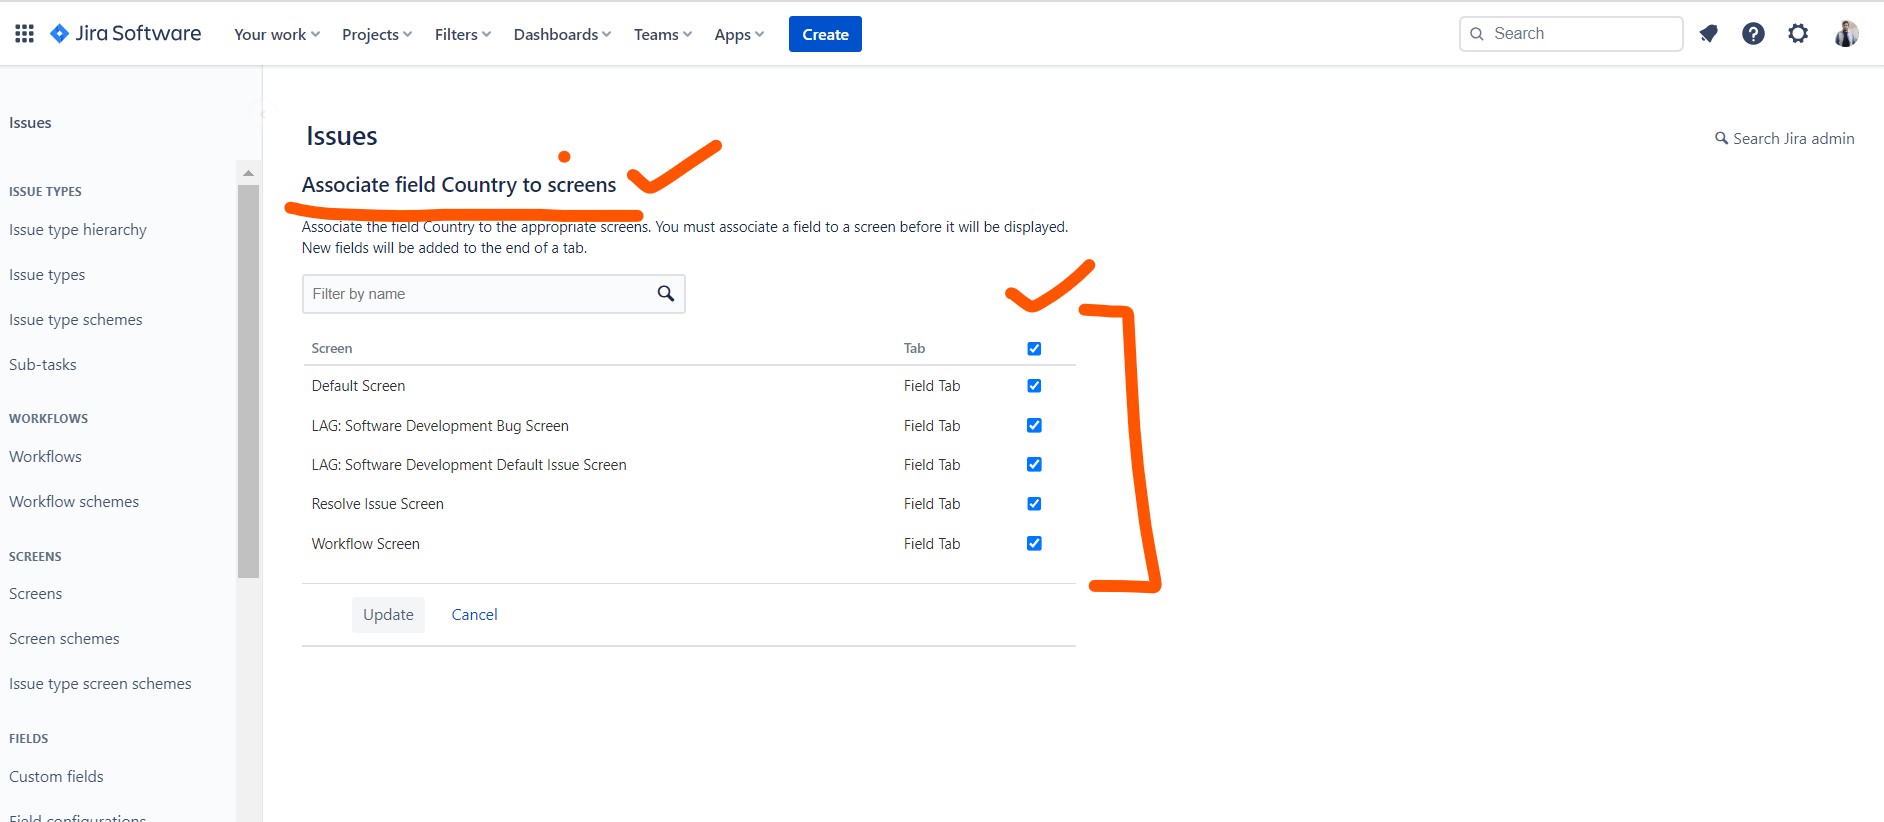
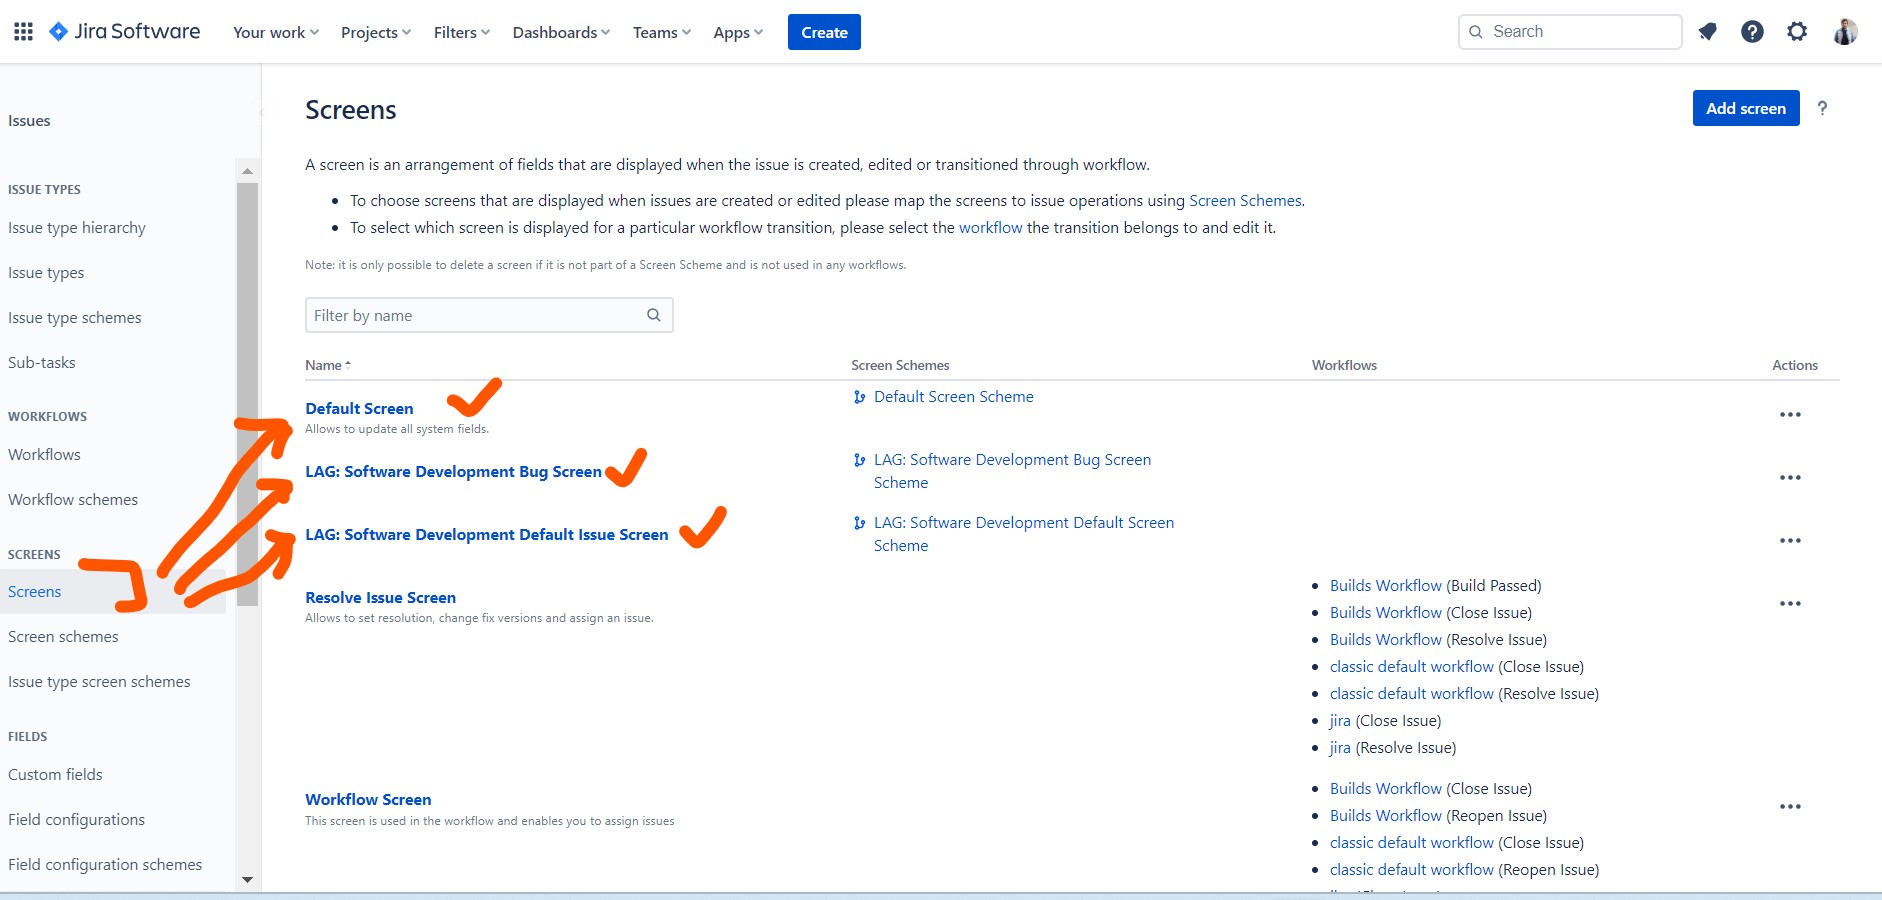
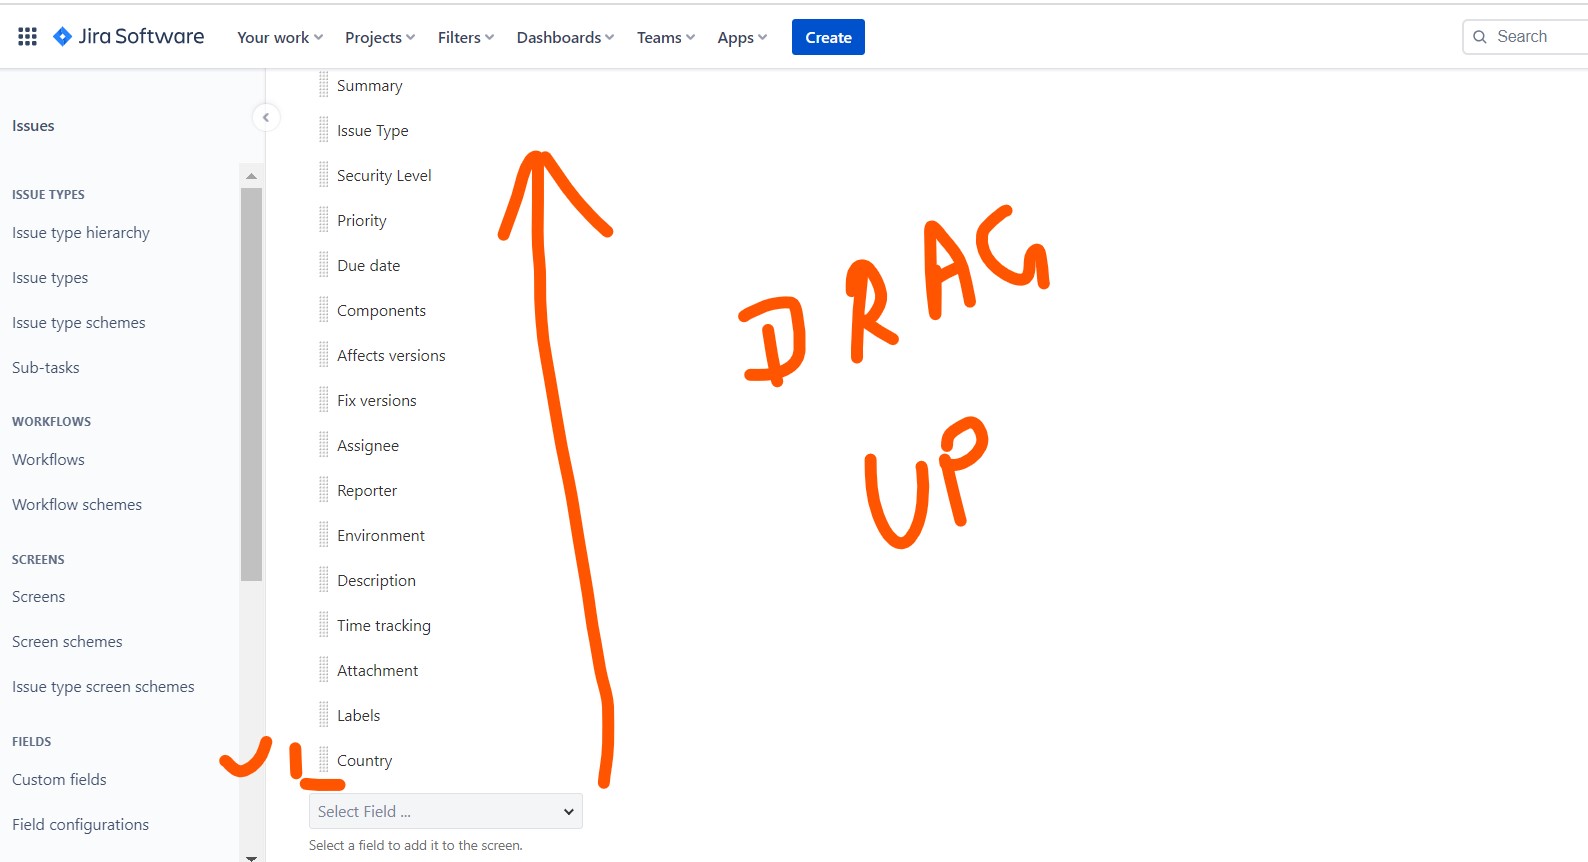
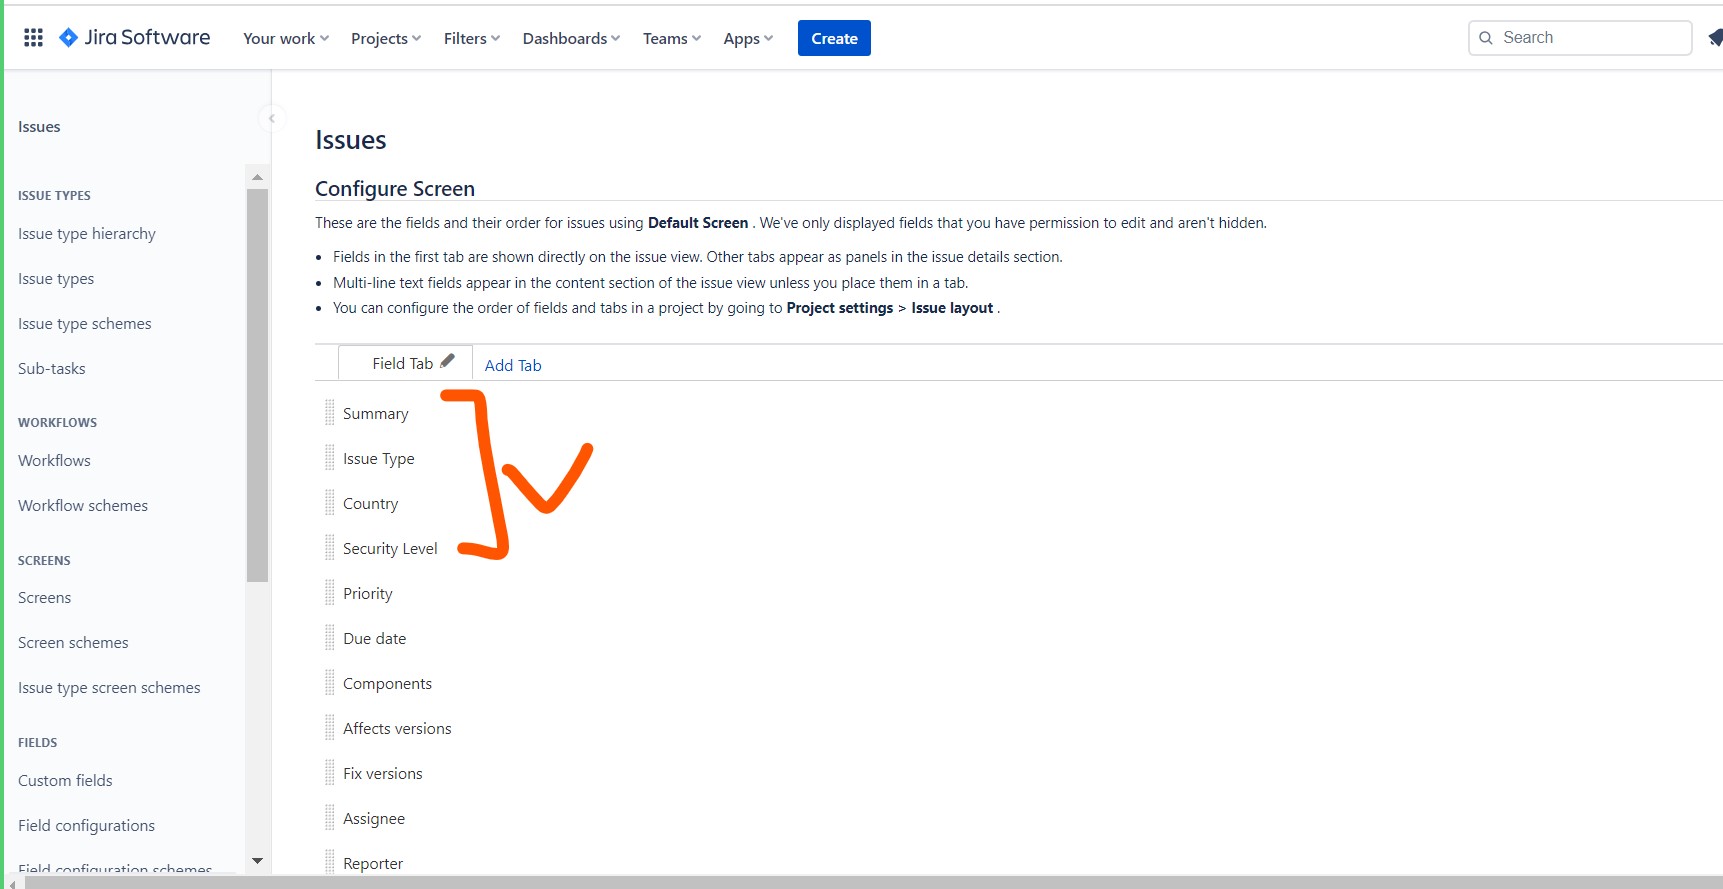
8. Add Custom Field to Screens:
To make the custom field visible and usable, you must add it to the appropriate screens. Screens define where and when fields are displayed in the issue creation and editing process. To do this:
- In the “Custom Fields” section, find your newly created custom field.
- Click on the three-dot menu (…) next to the field.
- Select “Screens” and choose the screens where you want the field to appear.
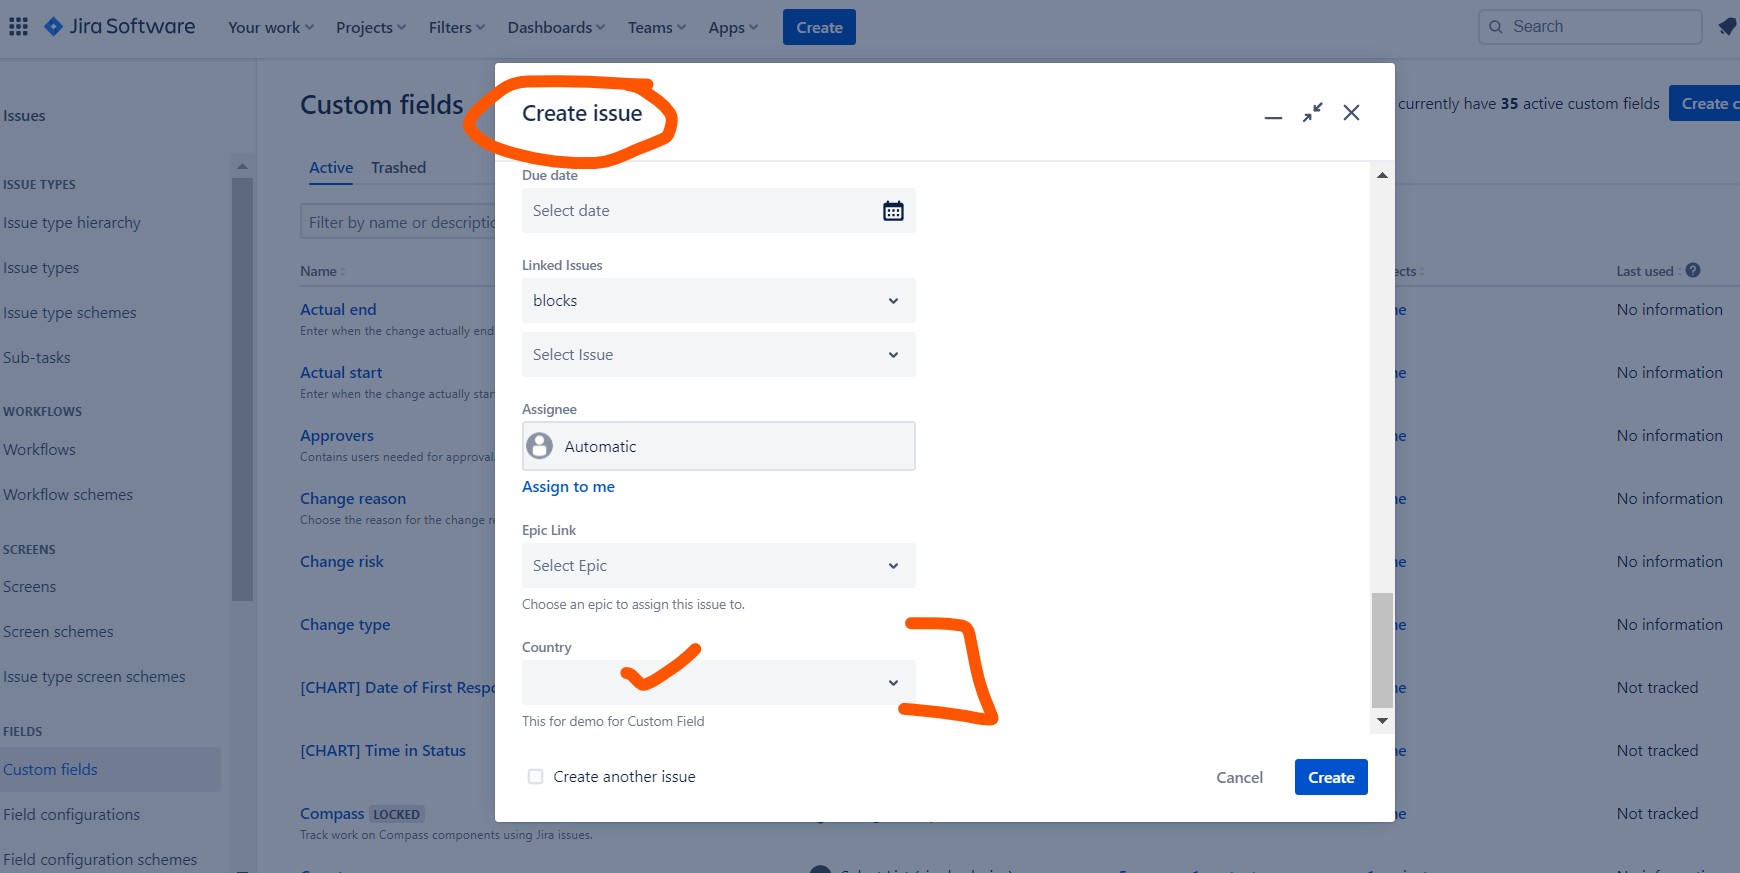
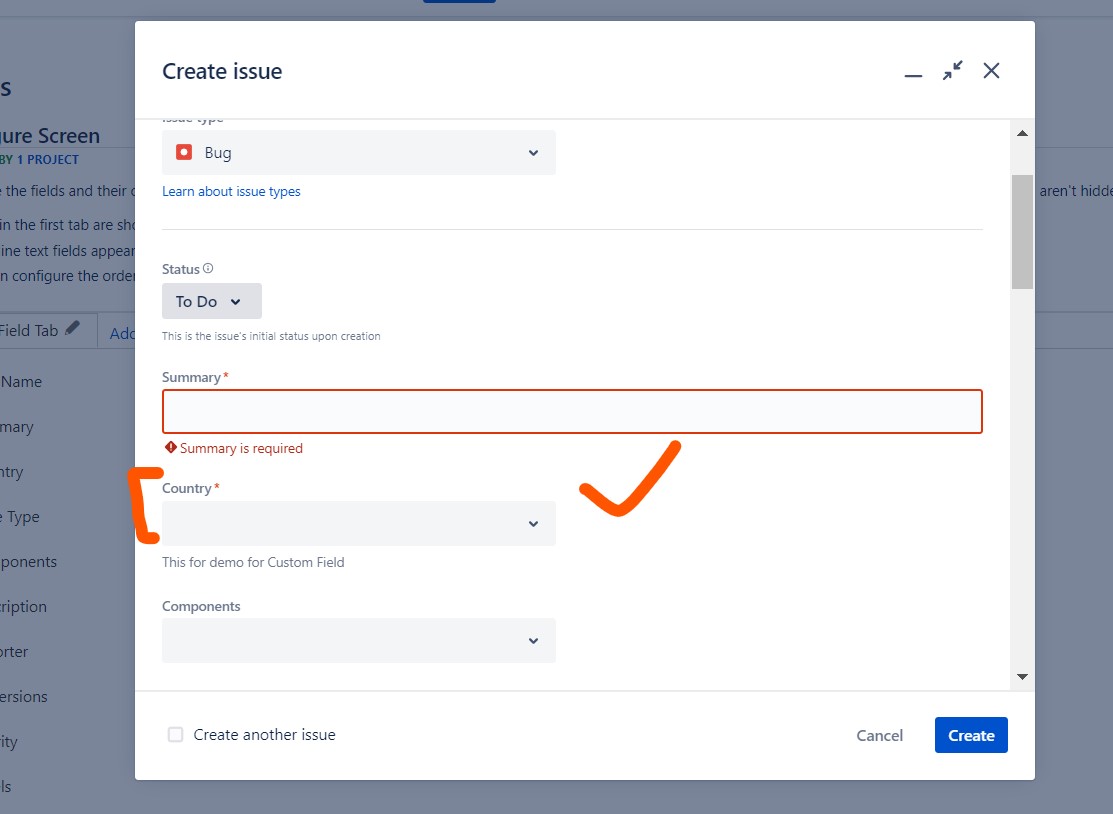
9. Test the Custom Field:
Create or edit an issue in your Jira project to ensure that the custom field is visible and works as expected.


I’m Rajesh Kumar, a DevOps, SRE, DevSecOps, Cloud, and Platform Engineering expert passionate about sharing practical knowledge, real-world experiences, and industry best practices. I have worked at Cotocus and regularly write about technology, travel, investing, health, product reviews, and digital marketing through my various platforms.
I publish technical articles at DevOps School, travel stories at Holiday Landmark, stock market insights at Stocks Mantra, health and fitness guidance at My Medic Plus, product reviews at TrueReviewNow, and SEO and digital marketing strategies at Wizbrand.
Find Trusted Cardiac Hospitals
Compare heart hospitals by city and services — all in one place.
Explore Hospitals
I liked how you explained adding custom fields in Jira in a clear and simple way. The step‑by‑step approach made it easy to follow, even for someone new to Jira.