Creating new issue types in Jira allows you to customize the types of tasks or work items that your project can track. By defining your own issue types, you can tailor Jira to better match your team’s specific workflow and processes. Here’s a step-by-step guide on how to create new issue types in Jira:
Note: You will need administrative or project administrator permissions to create new issue types in Jira.
1. Log in to Jira:
Log in to your Jira instance with the necessary permissions.
2. Access Issue Type Configuration:
Once you’re logged in, follow these steps to access the issue type configuration:
- Click on the gear icon (settings) in the top right corner of the Jira dashboard.
- Under “Jira Settings,” locate and click on “Issues.”
- In the left sidebar, under “Issue Attributes,” click on “Issue Types.”
3. Add a New Issue Type:
To create a new issue type, follow these steps:
- Click on the “Add Issue Type” button. This will open a new window where you can define your new issue type.
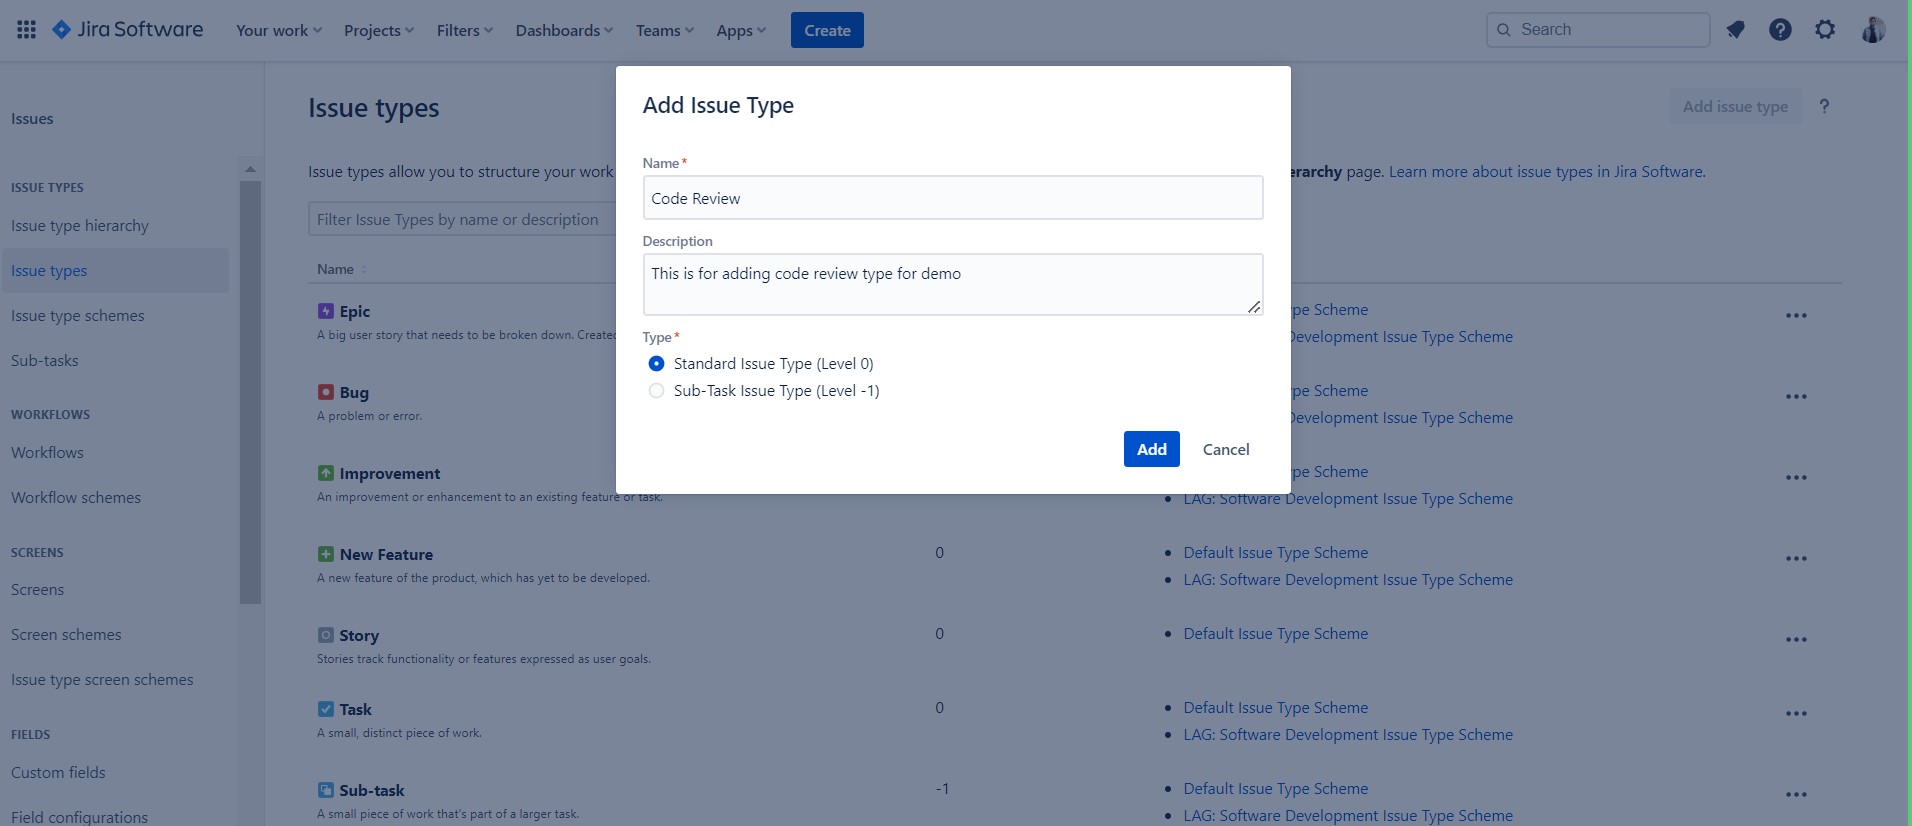
4. Define the New Issue Type:
In the “Add Issue Type” window, you’ll need to provide the following information:
- Name: Give your new issue type a descriptive name. This name should clearly convey the type of work or task it represents, such as “Bug,” “Feature,” or “Change Request.”
- Description (Optional): Add a brief description to help users understand when to use this issue type and its purpose.
- Icon (Optional): You can choose an icon to represent this issue type. Icons are helpful for visually identifying issue types on boards and in search results.
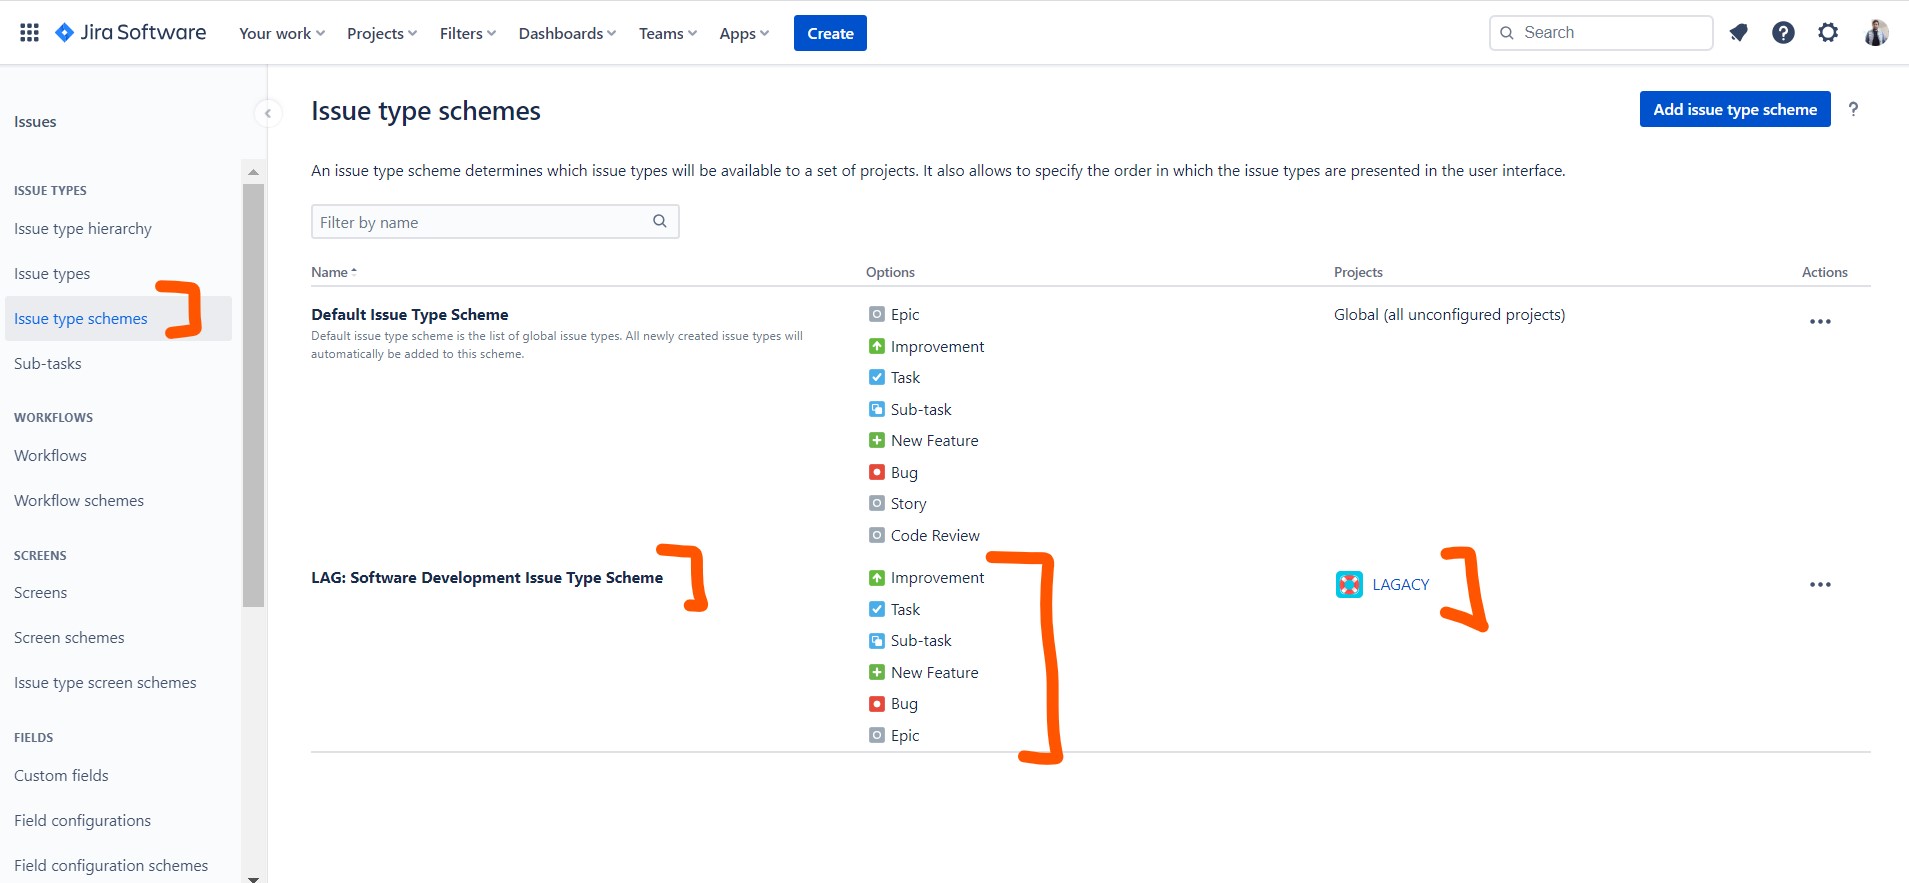
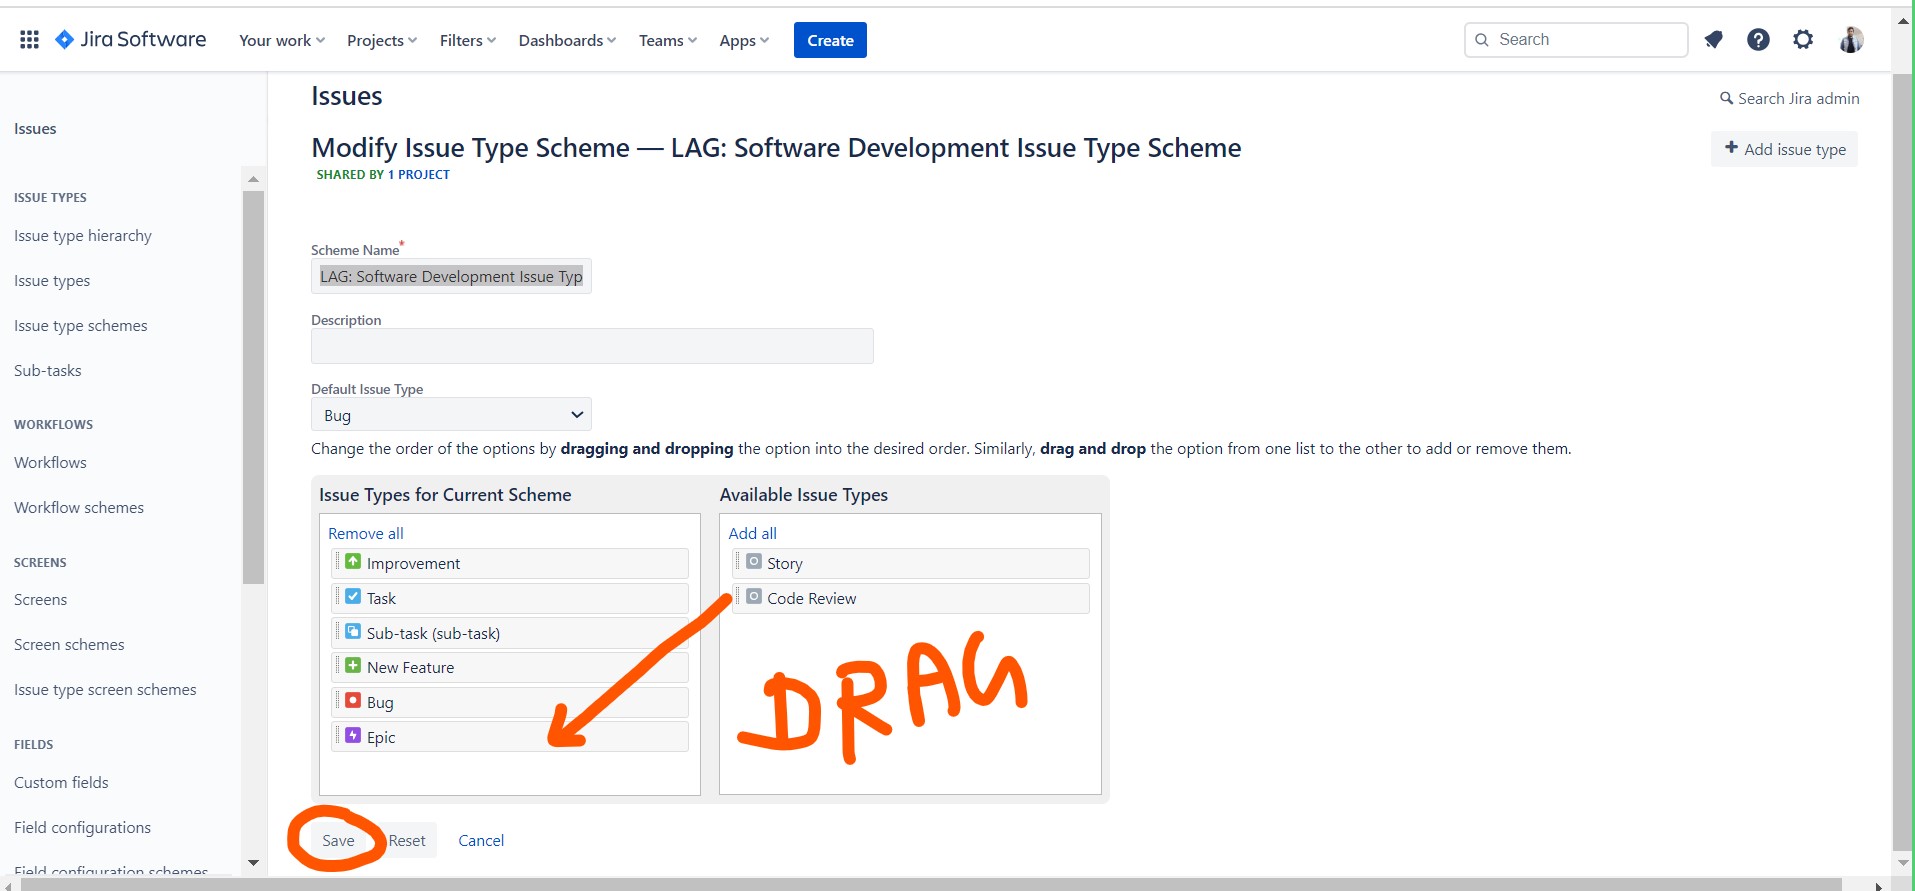
5. Assign to Issue Type Scheme:
Issue types are typically organized into issue type schemes, which are associated with specific projects. Here’s how to assign your new issue type to an issue type scheme:
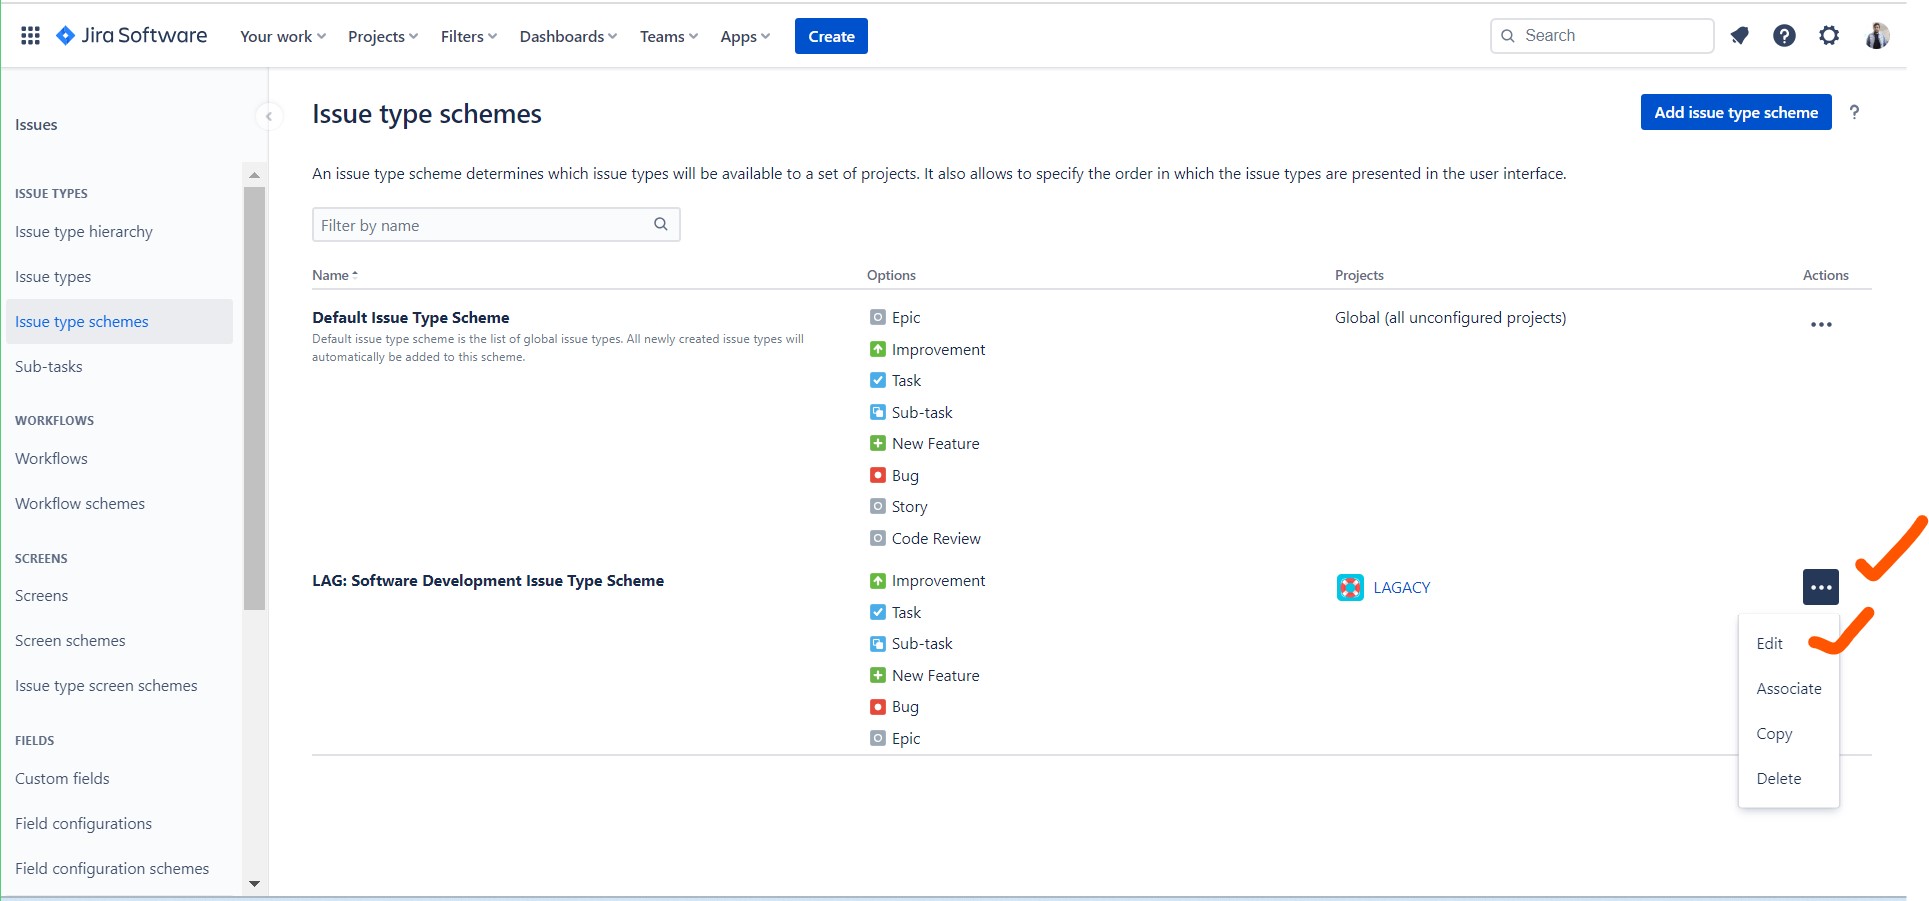
- Under “Assign to Issue Type Scheme,” choose the issue type scheme you want to associate with your new issue type.
- If you want to create a new issue type scheme for this issue type, click the “Create new issue type scheme” link, provide a name for the scheme, and assign your new issue type to it.
6. Set Workflow for the New Issue Type:
Every issue type in Jira is associated with a workflow, which defines the stages and transitions an issue goes through. Here’s how to set the workflow for your new issue type:
- Under “Issue Type Workflow,” select an existing workflow that matches your new issue type’s workflow requirements.
- If you need to create a new workflow or customize an existing one to match your new issue type, you can do so by clicking on the workflow name and editing it separately.
7. Save the New Issue Type:
After providing all the required information and configuring the issue type settings, click the “Add” or “Create” button to save the new issue type.
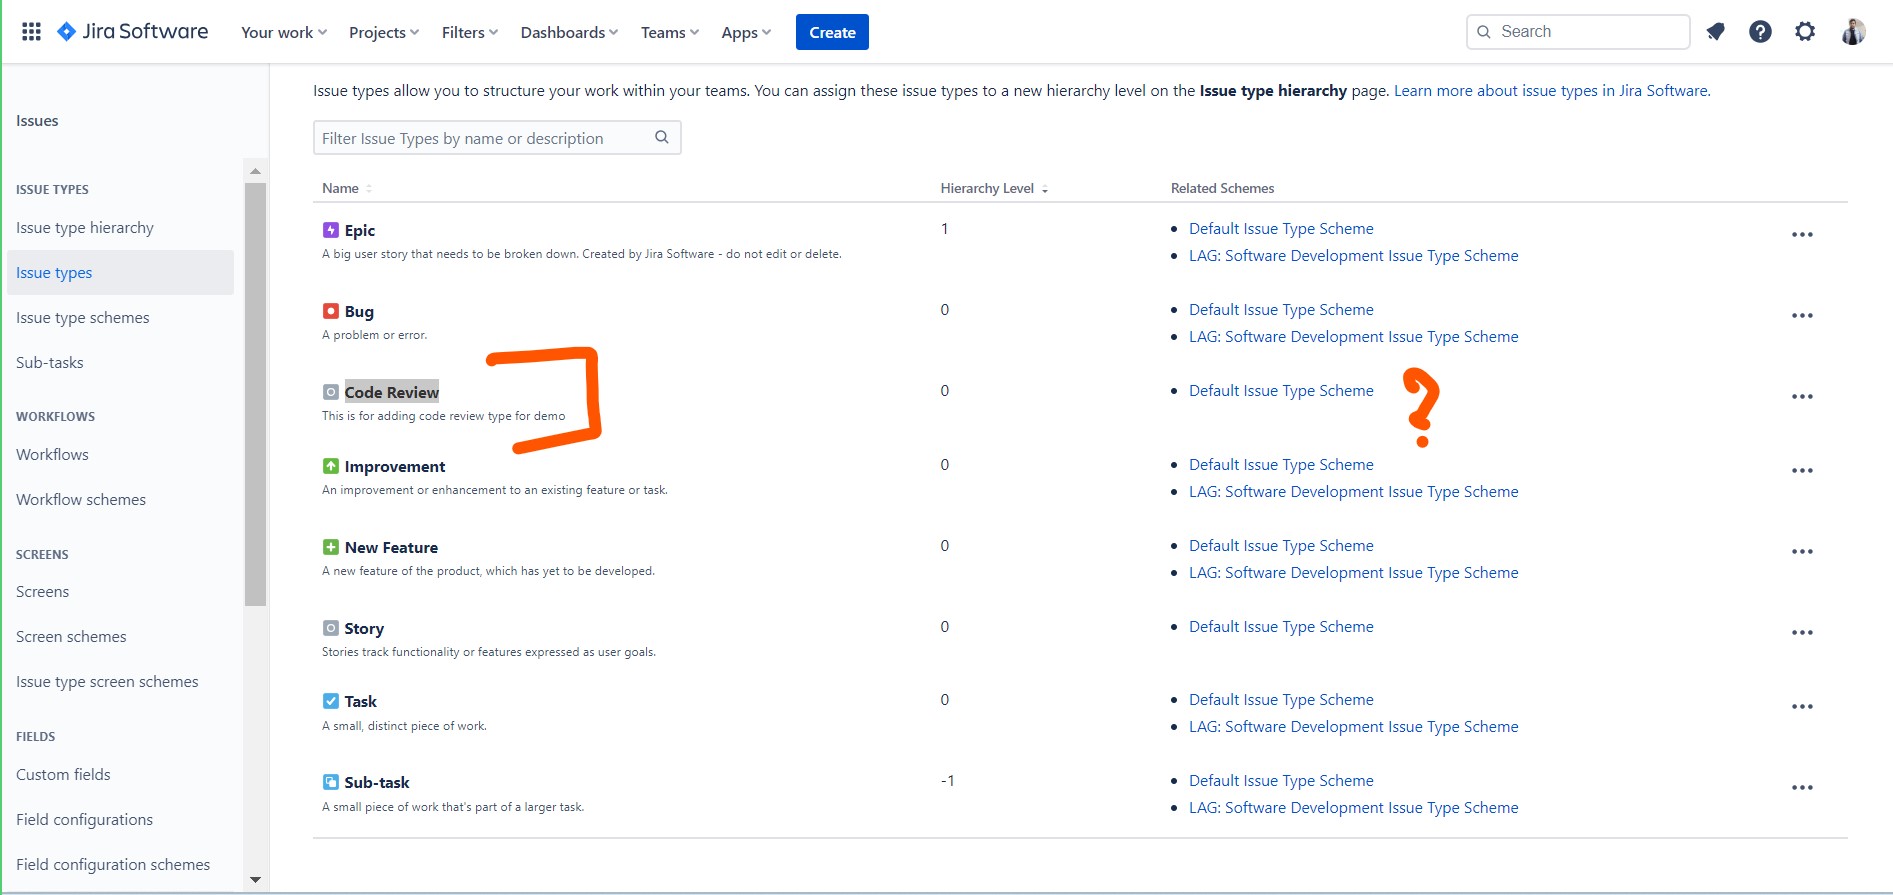
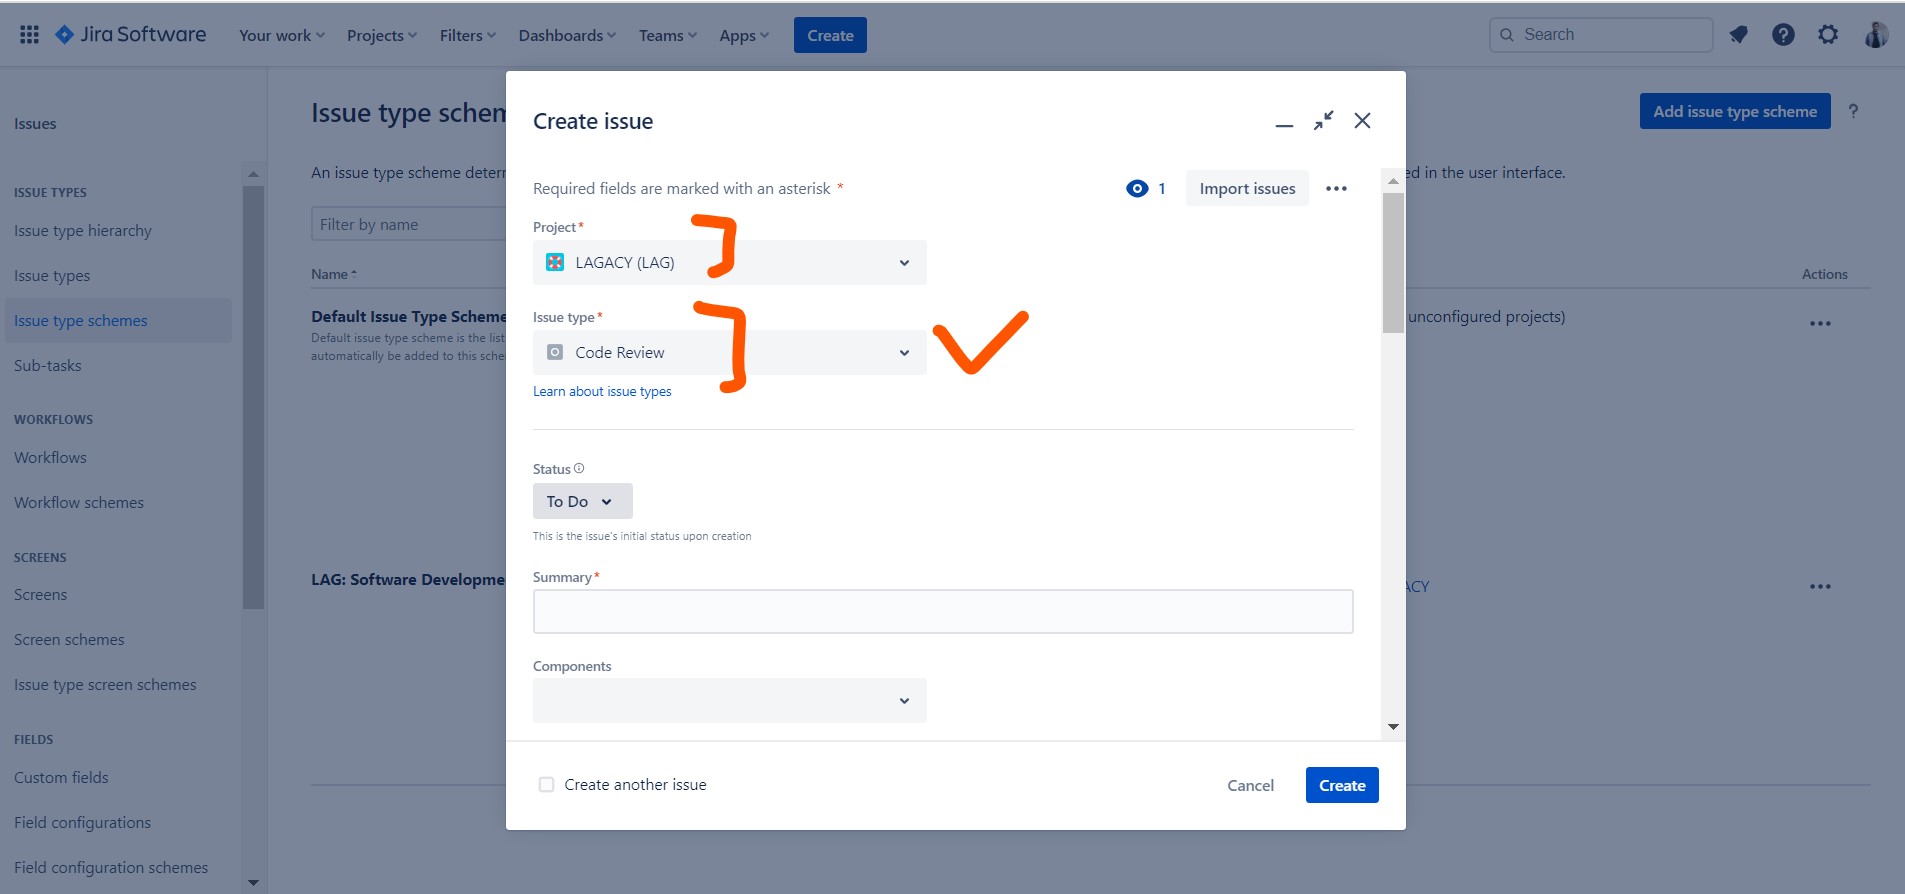
8. Test the New Issue Type:
You can now create issues of the new type within your Jira projects. When creating or editing an issue, you’ll see your new issue type as an option in the issue type dropdown.
I’m Rajesh Kumar, a DevOps, SRE, DevSecOps, Cloud, and Platform Engineering expert passionate about sharing practical knowledge, real-world experiences, and industry best practices. I have worked at Cotocus and regularly write about technology, travel, investing, health, product reviews, and digital marketing through my various platforms.
I publish technical articles at DevOps School, travel stories at Holiday Landmark, stock market insights at Stocks Mantra, health and fitness guidance at My Medic Plus, product reviews at TrueReviewNow, and SEO and digital marketing strategies at Wizbrand.
Find Trusted Cardiac Hospitals
Compare heart hospitals by city and services — all in one place.
Explore Hospitals
The steps for creating new issue types in Jira are explained clearly and simply, which makes it easy to follow even for beginners. This guide is very helpful for organizing projects better. Thanks for sharing!