To enable JMX (Java Management Extensions) in Apache Tomcat on a Windows system, you can follow these step-by-step instructions:
- Open the Tomcat installation directory in Windows Explorer.
- Navigate to the
bindirectory. - Locate the
catalina.batfile and open it in a text editor. - Search for the
set JAVA_OPTSline in thecatalina.batfile. It may look like this:bashCopy codeset JAVA_OPTS=%JAVA_OPTS% <some_other_options> - Add the following options to the
JAVA_OPTSline to enable JMX:bashCopy codeset JAVA_OPTS=%JAVA_OPTS% -Dcom.sun.management.jmxremote ^ -Dcom.sun.management.jmxremote.port=9999 ^ -Dcom.sun.management.jmxremote.ssl=false ^ -Dcom.sun.management.jmxremote.authenticate=falseThe above configuration sets JMX to listen on port9999, disables SSL, and disables authentication. Adjust these values as needed for your specific setup. Note the^symbol at the end of each line, which indicates a line continuation in the Windows batch file. - Save the changes to the
catalina.batfile. - Open a command prompt as an administrator.
- Navigate to the
bindirectory within the Tomcat installation directory. - Execute the following command to start Tomcat:bashCopy code
catalina.bat run - Tomcat will start with JMX enabled on the specified port. You should see log messages indicating the JMX configuration.
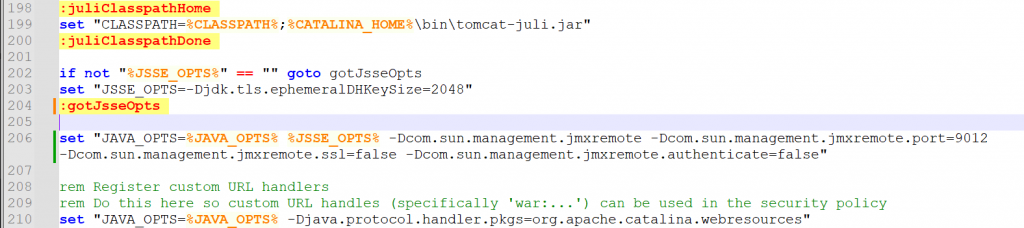
Sample
set "JAVA_OPTS=%JAVA_OPTS% %JSSE_OPTS% -Dcom.sun.management.jmxremote -Dcom.sun.management.jmxremote.port=9012 -Dcom.sun.management.jmxremote.ssl=false -Dcom.sun.management.jmxremote.authenticate=false"Code language: JavaScript (javascript)I’m Rajesh Kumar, a DevOps, SRE, DevSecOps, Cloud, and Platform Engineering expert passionate about sharing practical knowledge, real-world experiences, and industry best practices. I have worked at Cotocus and regularly write about technology, travel, investing, health, product reviews, and digital marketing through my various platforms.
I publish technical articles at DevOps School, travel stories at Holiday Landmark, stock market insights at Stocks Mantra, health and fitness guidance at My Medic Plus, product reviews at TrueReviewNow, and SEO and digital marketing strategies at Wizbrand.
Find Trusted Cardiac Hospitals
Compare heart hospitals by city and services — all in one place.
Explore Hospitals