What are Computer Vision Libraries?

Computer Vision Libraries are software tools and frameworks that provide a set of functionalities for processing, analyzing, and understanding visual data, such as images and videos. These libraries are designed to assist in various computer vision tasks, including image processing, object detection, image segmentation, facial recognition, optical character recognition (OCR), and more. Computer vision libraries abstract the complexity of visual data processing, allowing developers and researchers to build computer vision applications and models more efficiently.
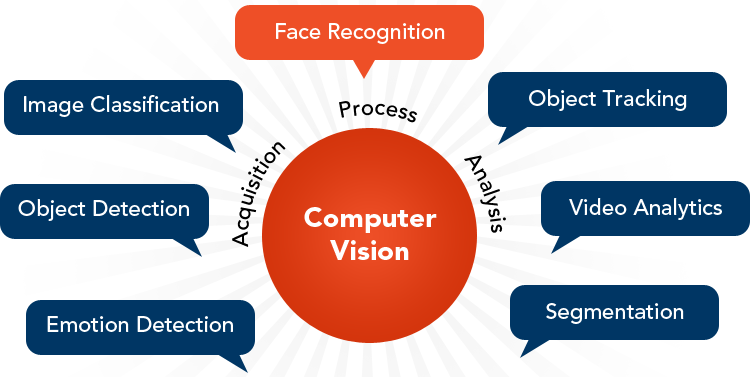
Top 10 use cases of Computer Vision Libraries:
- Object Detection: Detecting and localizing objects within an image or video.
- Image Segmentation: Segmenting an image into multiple regions and identifying different objects.
- Facial Recognition: Identifying and verifying individuals based on their facial features.
- Optical Character Recognition (OCR): Extracting text from images or scanned documents.
- Image Classification: Categorizing images into predefined classes or categories.
- Pose Estimation: Estimating the poses or positions of human bodies or objects in an image.
- Image Restoration: Restoring and enhancing the quality of images affected by noise or distortion.
- Feature Extraction: Extracting visual features from images, such as edges, corners, and keypoints.
- Augmented Reality (AR): Overlaying digital information or virtual objects onto the real-world view.
- Medical Imaging: Analyzing medical images, such as X-rays and MRI scans, for diagnosis and detection of abnormalities.
What are the feature of Computer Vision Libraries?
- Image Processing: Computer vision libraries provide tools for various image processing operations, such as filtering, morphological operations, and color manipulation.
- Feature Detection: They offer algorithms for detecting and extracting visual features, such as corners, edges, and keypoints.
- Object Detection and Recognition: Computer vision libraries provide pre-trained models and tools for object detection and recognition tasks.
- Image Segmentation: They offer algorithms for image segmentation to separate different objects or regions in an image.
- Facial Recognition: Computer vision libraries include tools for building facial recognition systems.
- Optical Character Recognition (OCR): They provide OCR functionalities to extract text from images or scanned documents.
How Computer Vision Libraries Work and Architecture?
The architecture of computer vision libraries varies based on the specific library and its functionalities. However, the general workflow involves:
- Image Input: Visual data, such as images or videos, are provided to the computer vision library for processing.
- Preprocessing: The library may perform preprocessing operations like resizing, normalization, or color conversion.
- Computer Vision Tasks: The library performs specific computer vision tasks, such as object detection, image segmentation, or OCR.
- Output: The processed visual data or the results of the computer vision task are returned as output.
How to Install Computer Vision Libraries?
Installing computer vision libraries typically involves using package managers like pip or conda. Some popular computer vision libraries include OpenCV, PyTorch, TensorFlow, DLIB, and scikit-image.
For example, to install OpenCV using pip, you can use the following command:
pip install opencv-pythonFor PyTorch, you can use:
pip install torch torchvisionFor TensorFlow, you can use:
pip install tensorflowBefore installing a computer vision library, ensure you have the required dependencies and hardware resources, such as GPU drivers (if using GPU acceleration) and libraries for numerical computations.
Please refer to the official documentation and websites of the specific computer vision library you wish to install for detailed and up-to-date installation instructions.
Basic Tutorials of Computer Vision Libraries: Getting Started
Sure! Below are basic tutorials for getting started with Computer Vision Libraries step-by-step:

OpenCV Tutorial
OpenCV (Open Source Computer Vision Library) is a free and open-source library that’s widely used in the field of computer vision. Let’s walk through a simple tutorial to get started with OpenCV.
Installing OpenCV
We need to install it before we can start using OpenCV. The process varies depending on your operating system and programming language, but you can find detailed installation instructions on the OpenCV website.
Loading an Image
Once we have OpenCV installed, we can load an image using the following code:
import cv2

# Load an image
img = cv2.imread('image.jpg')

# Display the image
cv2.imshow('image', img)
cv2.waitKey(0)
cv2.destroyAllWindows()Code language: PHP (php)
This code loads an image file called ‘image.jpg’ and displays it in a window. The cv2.waitKey(0) line tells OpenCV to wait for a key press before closing the window.
Applying Filters
OpenCV also provides a variety of image processing functions, such as filters. Let’s apply a simple filter that converts the image to grayscale:
import cv2

# Load an image
img = cv2.imread('image.jpg')

# Convert the image to grayscale
gray = cv2.cvtColor(img, cv2.COLOR_BGR2GRAY)

# Display the grayscale image
cv2.imshow('gray', gray)
cv2.waitKey(0)
cv2.destroyAllWindows()Code language: PHP (php)
This code uses the cv2.cvtColor() function to convert the image from its original BGR color format to grayscale.
TensorFlow Tutorial
It is an open-source platform for building machine learning models. It’s often used for image recognition and classification tasks. Let’s explore a basic TensorFlow tutorial.
Installing TensorFlow
We first need to install it, to get started with TensorFlow. The installation process varies depending on your operating system and programming language, but you can find detailed instructions on the TensorFlow website.
Loading an Image
We can use TensorFlow to load an image file and convert it into a format that can be used for machine learning:
import tensorflow as tf

# Load an image
img = tf.keras.preprocessing.image.load_img('image.jpg', target_size=(224, 224))

# Modify the image to a numpy array
img_array = tf.keras.preprocessing.image.img_to_array(img)

# Expand the dimensions of the array to create a batch of size 1
img_batch = tf.expand_dims(img_array, axis=0)

# Preprocess the image
img_preprocessed = tf.keras.applications.mobilenet_v2.preprocess_input(img_batch)Code language: PHP (php)
This code loads an image file called ‘image.jpg’, resizes it to 224×224 pixels, and converts it into a numpy array.
Building a Model
Now that we have our preprocessed image, we can use TensorFlow to build a model that can classify the image:
import tensorflow as tf

# Load a pre-trained model
model = tf.keras.applications.MobileNetV2()

# Make a prediction
prediction = model.predict(img_preprocessed)

# Decode the prediction
decoded_prediction = tf.keras.applications.mobilenet_v2.decode_predictions(prediction)

# Print the top prediction
print(decoded_prediction[0][0])Code language: PHP (php)
This code uses a pre-trained MobileNetV2 model to make a prediction on our preprocessed image. The decode_predictions() function converts the prediction into a human-readable format.
PyTorch Tutorial
PyTorch is another popular open-source machine learning library. It’s often used for deep learning tasks, including computer vision. Let’s explore a basic PyTorch tutorial.
Installing PyTorch
To get started with PyTorch, we first need to install it. The installation process varies depending on your operating system and programming language, but you can find detailed instructions on the PyTorch website.
Loading an Image
We can use PyTorch to load an image file and convert it into a format that can be used for deep learning:
import torch
import torchvision.transforms as transforms

# Define the transforms
transform = transforms.Compose([
    transforms.Resize(256),
    transforms.CenterCrop(224),
    transforms.ToTensor(),
    transforms.Normalize(
        mean=[0.485, 0.456, 0.406],
        std=[0.229, 0.224, 0.225]
    )
])

# Load an image
img = Image.open("image.jpg")

# Apply the transforms
img_transformed = transform(img)

# Add a batch dimension
img_batch = img_transformed.unsqueeze(0)Code language: PHP (php)
This code loads an image file called ‘image.jpg’ and applies a series of transforms to it. The resulting image is a PyTorch tensor.
Building a Model
Now that we have our preprocessed image, we can use PyTorch to build a model that can classify the image:
import torch
import torch.nn as nn
import torchvision.models as models

# Load a pre-trained model
model = models.resnet18(pretrained=True)

# Modify the last layer
num_ftrs = model.fc.in_features
model.fc = nn.Linear(num_ftrs, 2)

# Make a prediction
prediction = model(img_batch)

# Get the predicted class
_, predicted = torch.max(prediction.data, 1)

# Print the predicted class
print(predicted.item())Code language: PHP (php)
This code uses a pre-trained ResNet18 model to make a prediction on our preprocessed image. The last layer of the model is modified to output 2 classes (in this case, cats and dogs).
These tutorials will provide you with a foundational understanding of computer vision libraries and how to use them to perform various visual data processing tasks. As you progress, you can delve into more advanced topics and explore additional computer vision tasks and techniques.

👤 About the Author
Ashwani is passionate about DevOps, DevSecOps, SRE, MLOps, and AiOps, with a strong drive to simplify and scale modern IT operations. Through continuous learning and sharing, Ashwani helps organizations and engineers adopt best practices for automation, security, reliability, and AI-driven operations.
🌐 Connect & Follow:
- Website: WizBrand.com
- Facebook: facebook.com/DevOpsSchool
- X (Twitter): x.com/DevOpsSchools
- LinkedIn: linkedin.com/company/devopsschool
- YouTube: youtube.com/@TheDevOpsSchool
- Instagram: instagram.com/devopsschool
- Quora: devopsschool.quora.com
- Email– contact@devopsschool.com
Find Trusted Cardiac Hospitals
Compare heart hospitals by city and services — all in one place.
Explore Hospitals