What is iOS?

iOS, also known as iPhone Operating System, is an operating system developed by Apple Inc. It is specifically designed for Apple’s mobile devices, including the iPhone, iPad, and iPod Touch. It is a closed-source, proprietary operating system known for its user-friendly interface, stability, and seamless integration with Apple’s ecosystem. It is one of the most widely used mobile operating systems globally.
Top Use Cases of iOS:
- Smartphones (iPhone): The primary use case of iOS is running on iPhones, providing users with a wide range of features, apps, and services for communication, entertainment, productivity, and more.
- Tablets (iPad): iOS powers Apple’s iPad devices, making them popular choices for media consumption, productivity, and education.
- App Ecosystem: iOS provides access to the App Store, offering millions of third-party applications for various purposes, including games, social media, utilities, and more.
- Mobile Gaming: iOS is widely used for mobile gaming, with a vast library of high-quality games available on the App Store.
- Health and Fitness: iOS devices offer health and fitness tracking features through the Health app and integration with third-party health-related apps.
- Mobile Payments: Apple Pay, a feature of iOS, allows users to make secure payments using their iPhones or iPads.
- Enterprise Mobility: Many businesses use iOS devices for enterprise mobility, providing employees with mobile productivity tools and secure access to corporate resources.
- Education: iOS devices are widely used in education for digital learning, interactive textbooks, and classroom management.
- Home Automation: iOS devices can control smart home devices through Apple’s HomeKit platform.
- Augmented Reality (AR): iOS devices support AR applications, enabling interactive and immersive experiences.
What are the features of iOS?
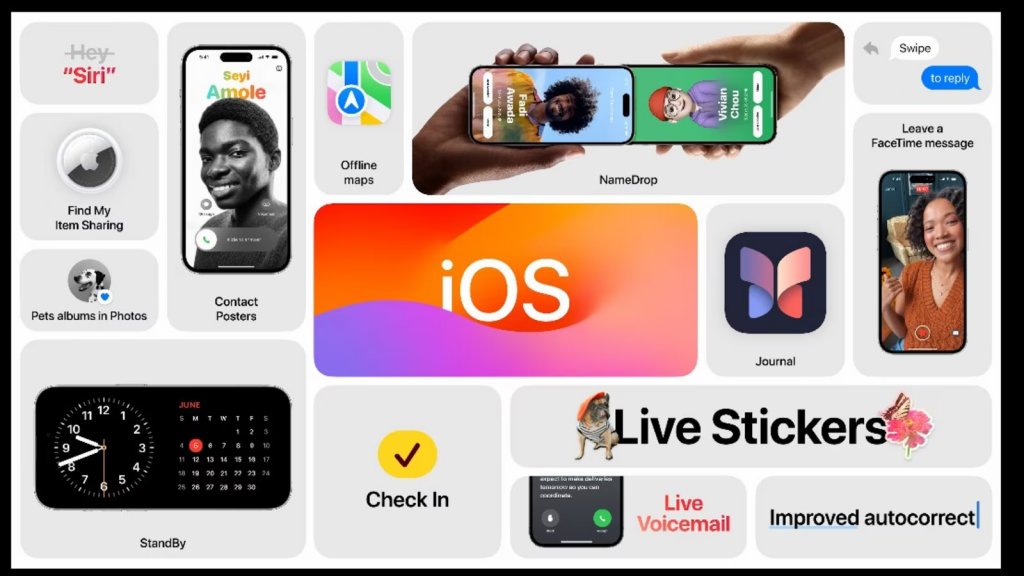
- User Interface (UI): iOS offers a user-friendly and visually appealing interface with intuitive gestures and animations.
- Siri: Apple’s virtual assistant, Siri, allows users to perform tasks using voice commands.
- iCloud: iOS devices are tightly integrated with iCloud, Apple’s cloud storage service, for seamless data synchronization and backups.
- Security: iOS is known for its robust security features, including Touch ID, Face ID, and encryption to protect user data.
- App Store: The App Store provides access to a vast ecosystem of third-party applications for various purposes.
What is the workflow of iOS?
The workflow of iOS app development typically involves the following steps:
- Design and Planning: Define the app’s purpose, features, and user interface. Create wireframes and design mockups.
- Development: Write the app’s code using programming languages like Swift or Objective-C and integrate necessary frameworks and APIs.
- Testing: Test the app for bugs, functionality, and user experience.
- App Store Submission: Prepare the app for submission to the App Store, including creating an App Store listing and providing app screenshots and metadata.
- App Store Review: Apple’s App Store team reviews the app for compliance with guidelines and policies.
- Deployment: Once approved, the app is released to the App Store for users to download and install.
How iOS Works & Architecture?
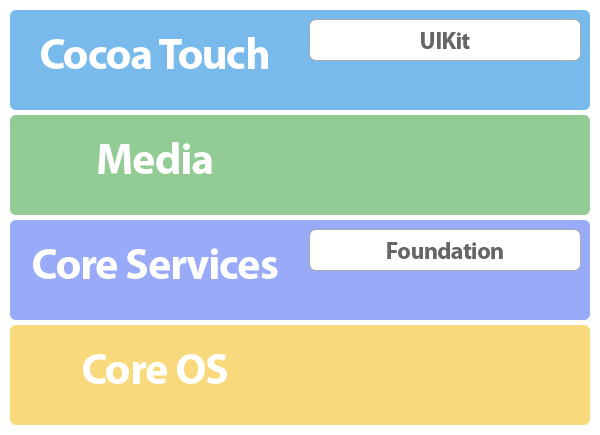
iOS follows a layered architecture, with components like the kernel, frameworks, and applications. The core of iOS is based on Darwin, an open-source operating system. The user interface is managed by the UIKit framework, and apps are sandboxed for security and stability.
How to Install and Configure iOS?
iOS comes pre-installed on Apple’s mobile devices like iPhone, iPad, and iPod Touch. Users do not need to install or configure iOS separately. However, users may update iOS to the latest version by navigating to a few options “Settings” > “General” > “Software Update” and following the prompts.
For developers, iOS app development requires Xcode, Apple’s Integrated Development Environment (IDE), which can be downloaded from the Mac App Store. Developing and testing iOS apps also require enrolling in Apple’s Developer Program and obtaining necessary certificates and provisioning profiles.
Fundamental Tutorials of iOS: Getting Started Step by Step
Developing iOS applications involves using Xcode, Apple’s Integrated Development Environment (IDE), and the Swift programming language. Below is a step-by-step fundamental tutorial to get started with iOS app development:

Step-by-Step Fundamental Tutorial of iOS App Development:
Step 1: Set Up Your Development Environment
- Ensure you have a Mac computer running macOS.
- Go to Mac App Store & from their download and install Xcode.
- Launch Xcode and sign in with your Apple ID.
Step 2: Create a New Xcode Project
- By Clicking “Create a new Xcode project” or go to “File” > “New” > “Project in the Xcode.”
- Choose the “App” template that matches the type of iOS app you want to create (e.g., Single View App, Tabbed App).
- Provide a unique Product Name and other necessary details for your project.
Step 3: Design the User Interface (UI)
- Choose the “Main.storyboard” file from the Xcode Project Navigator.
- Use Interface Builder to design the app’s user interface by dragging and dropping UI elements from the Object Library.
- Customize the appearance and layout of UI elements using the Attributes Inspector.
Step 4: Write Swift Code for App Functionality
- In the Xcode Editor, Open the “ViewController.swift” file.
- Write Swift code to implement the app’s functionality and respond to user interactions.
- Use Xcode’s auto-complete feature to help write Swift code efficiently.
Step 5: Test the App on a Simulator
- Select a simulator device from the Xcode toolbar.
- Click the “Run” button in Xcode to build and run the app on the selected simulator.
- Test the app’s functionality and UI interactions on the simulator.
Step 6: Debug and Fix Issues
- Use Xcode’s debugger to identify and fix any issues or bugs in your code.
- Pay attention to any error messages or warnings provided by Xcode.
Step 7: Test the App on a Physical Device (Optional)
- Connect your iOS device to your Mac using a USB cable.
- In Xcode, select your device from the device list in the Xcode toolbar.
- Click the “Run” button to install and run the app on your device.
Step 8: Deploy the App to Testers (Optional)
- Enroll in the Apple Developer Program to get access to additional developer resources.
- Create distribution certificates and provisioning profiles to prepare the app for testing or distribution.
- Use TestFlight for beta testing or App Store Connect for app submission.
Step 9: Continue Development and Refinement
- Continuously improve and refine your app based on user feedback and testing.
- Add new features, optimize performance, and ensure a smooth user experience.
Step 10: Submit the App to the App Store (Optional)
- If you’re ready to publish your app, follow Apple’s guidelines for app submission.
- Prepare all necessary app metadata, screenshots, and promotional materials.
- Submit your app through App Store Connect for review and approval.
Congratulations! You have completed the fundamental tutorial for iOS app development using Xcode and Swift. This should give you a solid foundation to start building your own iOS applications. Remember to explore Apple’s documentation, tutorials, and developer forums for further learning and support. Happy coding!

👤 About the Author
Ashwani is passionate about DevOps, DevSecOps, SRE, MLOps, and AiOps, with a strong drive to simplify and scale modern IT operations. Through continuous learning and sharing, Ashwani helps organizations and engineers adopt best practices for automation, security, reliability, and AI-driven operations.
🌐 Connect & Follow:
- Website: WizBrand.com
- Facebook: facebook.com/DevOpsSchool
- X (Twitter): x.com/DevOpsSchools
- LinkedIn: linkedin.com/company/devopsschool
- YouTube: youtube.com/@TheDevOpsSchool
- Instagram: instagram.com/devopsschool
- Quora: devopsschool.quora.com
- Email– contact@devopsschool.com
Find Trusted Cardiac Hospitals
Compare heart hospitals by city and services — all in one place.
Explore Hospitals