What is Jupyter Notebook?

Jupyter Notebook is an open-source web application that allows you to create and share documents that contain live code, equations, visualizations, and narrative text. It’s widely used by data scientists, researchers, educators, and analysts for interactive data analysis, research, documentation, and collaborative work. Jupyter supports multiple programming languages, making it versatile for various tasks.
Top 10 use cases of Jupyter Notebook:
Here are the top 10 use cases of Jupyter Notebook:
- Data Analysis and Visualization: Jupyter Notebook is commonly used for exploratory data analysis, where users can write and execute code to analyze datasets and create visualizations to uncover insights.
- Machine Learning Prototyping: Data scientists often use Jupyter to prototype machine learning models, from data preprocessing and feature engineering to model training and evaluation.
- Data Cleaning and Transformation: Jupyter allows users to write code to clean and transform messy or raw data into usable formats.
- Interactive Documentation: Jupyter notebooks can include narrative text, explanations, and documentation alongside code and visualizations, making it easy to create interactive documents that explain complex concepts.
- Scientific Research: Researchers use Jupyter for conducting experiments, simulations, and data analysis in various scientific fields, including physics, biology, astronomy, and more.
- Education and Learning: Jupyter Notebook is used for teaching programming, data science, and other technical subjects. Students can run code snippets, visualize data, and experiment with concepts.
- Reproducible Research: Jupyter’s combination of code, data, and narrative makes it ideal for sharing and reproducing research results, as others can execute the code and verify the findings.
- Data Exploration and Hypothesis Testing: Analysts can use Jupyter to interactively explore data, generate hypotheses, and test them through code-based experiments.
- Dashboard Prototyping: Jupyter Notebook can be used to create interactive dashboards and reports, allowing users to manipulate visualizations and parameters in real-time.
- Collaborative Work: Teams can collaborate on Jupyter notebooks, making changes, adding insights, and sharing results within a shared environment.
- Demonstrations and Presentations: Jupyter Notebook can be used to create live code demonstrations and interactive presentations for workshops, conferences, and meetings.
- Web Scraping and Data Collection: Jupyter can be used to write code for web scraping, data collection, and API interactions, aiding in data acquisition.
Jupyter Notebook’s versatility, interactivity, and support for multiple programming languages make it a powerful tool for a wide range of tasks involving code execution, data analysis, visualization, and documentation. It fosters a collaborative and interactive environment, enabling users to combine code and narrative seamlessly.
What are the feature of Jupyter Notebook?
- Interactive Execution: Jupyter Notebook allows you to execute code interactively, enabling immediate feedback and exploration.
- Multi-language Support: Jupyter supports various programming languages such as Python, R, Julia, and more, making it versatile for different tasks.
- Rich Text Integration: You can include formatted text, images, LaTeX equations, and HTML elements in your notebooks to provide context and explanations.
- Visualizations: Jupyter notebooks support the integration of various visualization libraries, allowing you to create charts, graphs, and interactive visual representations of data.
- Data Exploration: You can use notebooks to analyze datasets, explore patterns, and gain insights through code-based exploration.
- Code Modularity: Notebooks are divided into cells, allowing you to organize and structure your code into smaller, manageable units.
- Collaboration: Jupyter supports sharing and collaborative editing, enabling multiple users to work on the same notebook simultaneously.
- Version Control: Notebooks can be stored in version control systems like Git, allowing you to track changes and collaborate effectively.
- Widget Integration: Jupyter supports interactive widgets that allow users to manipulate variables and parameters in real-time, enhancing interactivity.
- Export Options: Notebooks can be exported to various formats such as HTML, PDF, and slides, making it easy to share and present your work.
How Jupyter Notebook Works and Architecture?

1. Web Interface:
Jupyter Notebook provides a web-based interface that allows you to create, edit, and execute notebooks using your web browser.
2. Kernel: A kernel is a computational engine that executes the code in a specific programming language. Each notebook is associated with a kernel that handles code execution and communication with the notebook interface.
3. Notebook Document Format:
A Jupyter notebook is saved as a JSON document with a .ipynb extension. This document contains the code, output, text, and metadata for each cell in the notebook.
4. Cells: Notebooks are organized into cells, which can be of two main types: code cells and markdown cells. Code cells contain executable code, while markdown cells contain text and explanations.
5. Code Execution:
When you run a code cell, the associated kernel executes the code and produces output, which can be displayed below the cell. The output can include text, visualizations, and error messages.
6. Rich Text and Markdown:
Markdown cells support rich text formatting using Markdown syntax, allowing you to create headings, lists, links, images, equations, and more.
7. Output Capture:
The output of code execution, such as printed text or visualizations, is captured and displayed below the respective code cell.
8. Interactivity:
Interactive widgets can be used to create dynamic elements in notebooks, enabling users to manipulate variables and parameters without changing the code.
9. Collaboration:
Jupyter supports real-time collaboration, allowing multiple users to work on the same notebook simultaneously, making it suitable for collaborative data analysis and research.
10. Server-Client Architecture:
Jupyter follows a client-server architecture. The Jupyter server manages notebook creation, execution, and communication with kernels. Users interact with the server through a web browser.
11. Notebook Execution Lifecycle:
When you run a notebook, the server sends code snippets to the kernel for execution. The kernel processes the code, stores variables’ states, and produces output. The server renders the output and displays it in the notebook interface.
12. Kernels: Kernels are separate processes that execute code within notebooks. Each programming language has its associated kernel, which communicates with the notebook interface and handles code execution.
Overall, Jupyter Notebook’s architecture allows for an interactive and flexible environment where code execution, documentation, and visualizations are seamlessly integrated, promoting a collaborative and dynamic data analysis experience.
How to Install Jupyter Notebook?
There are two methods to install Jupyter Notebook:
- Using Anaconda
Anaconda is a distribution of Python that includes Jupyter Notebook and many other popular Python packages for scientific computing and data science. To install Anaconda, go to the Anaconda website: https://www.anaconda.com/products/individual and download the installer for your operating system. Once downloading the installer, run it and apply the live-screen instructions.
- Using pip
pip is the Python package manager. To install Jupyter Notebook using pip, open a command prompt and type the following command:
pip install jupyterOnce Jupyter Notebook is installed, you can start it by typing the following command in the command prompt:
jupyter notebookThis will open a web browser window with the Jupyter Notebook interface.
Here are the detailed steps on how to install Jupyter Notebook using Anaconda and pip:
Installing Jupyter Notebook using Anaconda
- Go to the Anaconda website: https://www.anaconda.com/products/individual and download the installer for your operating system.
- Run the installer and apply the given instructions over the on-screen.
- Once the installation is complete, open a command prompt and type the following command to verify that Jupyter Notebook is installed:
jupyter notebook --versionInstalling Jupyter Notebook using pip
- Open a command prompt.
- Type the below command to install pip:
python -m pip install --upgrade pip- Once pip is installed, type the following command to install Jupyter Notebook:
pip install jupyter- To verify that Jupyter Notebook is installed, type the following command:
jupyter notebook --versionBasic Tutorials of Jupyter Notebook: Getting Started

The following are the basic steps of Jupyter Notebook:
- Create a new Jupyter Notebook
To create a new Jupyter Notebook, open a terminal window and navigate to the directory where you want to create the notebook. Then, type the following command:
jupyter notebookThis will open a web browser window with the Jupyter Notebook interface.
- Write code in a Jupyter Notebook
Jupyter Notebooks are made up of cells. Each cell can contain either text or code. To write code in a cell, click on the cell and start typing. The cell will be in edit mode. Once you are finished typing, press Shift+Enter to run the code.
- Add text to a Jupyter Notebook
To add text to a Jupyter Notebook, click on a cell and start typing. The cell will be in edit mode. You can format your text by applying Markdown syntax. For example, to create a heading, you would type:
# This is a headingCode language: PHP (php)To add an image, you would type:
Code language: CSS (css)- Run a Jupyter Notebook
To run a Jupyter Notebook, click on the cell that contains the code you want to run and press Shift+Enter. The code will be executed and the output will be displayed in the cell below.
- Save a Jupyter Notebook
To save a Jupyter Notebook, click on the File menu and select Save. The notebook will be saved in the current directory.
- Share a Jupyter Notebook
To share a Jupyter Notebook, you can export it as a PDF or HTML file. You can also publish it to a web server.
Here are some additional tips for using Jupyter Notebook:
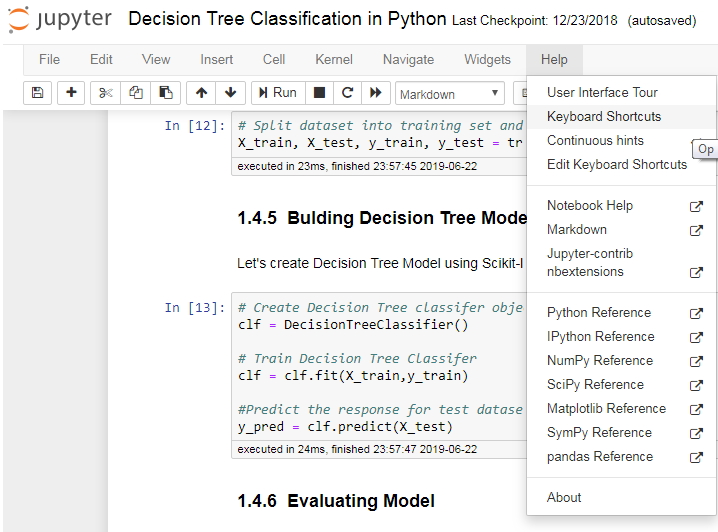
- Use the keyboard shortcuts to navigate around the notebook and run code.
- Apply Markdown syntax to design your text.
- Add images and other media to your notebooks.
- Organize your notebooks into folders.
- Use version control to track changes to your notebooks.
What is Jupyter kernel?
In Jupyter Notebooks, a kernel is the computational engine that executes the code you write in each notebook cell. Essentially, it’s the backend that runs your code, processes the output, and enables interactions within the Jupyter environment. Each kernel is specific to a particular programming language, and Jupyter can support multiple languages through various kernels.
Key Aspects of Jupyter Kernels
- Language-Specific Execution:
- Kernels allow Jupyter Notebooks to execute code written in specific programming languages. For example, the IPython kernel executes Python code, but Jupyter also supports kernels for R, Julia, Scala, and many other languages.
- Interactive Computing:
- Kernels allow for real-time, interactive computing. When you run code in a cell, the kernel processes it and immediately returns the result, allowing you to experiment with code and see the results instantly.
- Code Execution and State Retention:
- A kernel maintains the state of your code throughout the session. For example, variables defined in one cell remain available in subsequent cells, making it possible to build up a workflow step-by-step without re-running all previous code.
- Error Handling:
- If there’s an error in your code, the kernel captures it and displays the error message directly in the notebook. This makes debugging easier, as you can troubleshoot issues and adjust your code in real-time.
- Multiple Kernels in Jupyter:
- Jupyter Notebooks support a wide range of kernels beyond Python, including R (IRkernel), Julia, and others, which users can install to work with different languages in the Jupyter environment.
How Kernels Work in Jupyter
- When you open a notebook, Jupyter launches a kernel instance. This kernel runs in the background, waiting for you to execute code.
- When you execute a cell, the kernel processes the code in that cell and sends the output back to the notebook interface.
- The kernel maintains a session state, so as long as the kernel is running, it retains all defined variables, functions, and imported libraries until it’s manually restarted or closed.
Types of Kernels in Jupyter Notebooks
- Python (IPython) Kernel:
- The most common kernel for Jupyter is the IPython kernel, which runs Python code. This kernel provides rich functionality with Jupyter Notebook, such as plotting, data manipulation, and integration with machine learning libraries.
- Other Language Kernels:
- Jupyter supports a wide array of language kernels beyond Python, which can be installed based on your requirements:
- R Kernel (
IRkernel): For running R code. - Julia Kernel: For running Julia code.
- Apache Toree Kernel: For Scala, Spark, and other JVM-based languages.
- R Kernel (
- Jupyter supports a wide array of language kernels beyond Python, which can be installed based on your requirements:
- Kernel Management:
- You can manage the kernel directly from the Jupyter Notebook interface:
- Restart Kernel: Clears all variables and restarts the session.
- Interrupt Kernel: Stops the kernel from executing if you need to halt the code in the middle of execution.
- Change Kernel: If you have multiple kernels installed, you can switch to another language kernel for a notebook.
- You can manage the kernel directly from the Jupyter Notebook interface:
Common Kernel Operations in Jupyter Notebooks
- Restart and Clear Output: Restarts the kernel and clears the output of all cells, which is helpful when re-running the notebook from scratch.
- Shutdown Kernel: Stops the kernel, ending the session. You would typically shut down kernels not in use to conserve memory.
- Kernel Indicators: In the Jupyter Notebook interface, a filled or empty circle next to the kernel name indicates whether it’s busy or idle.
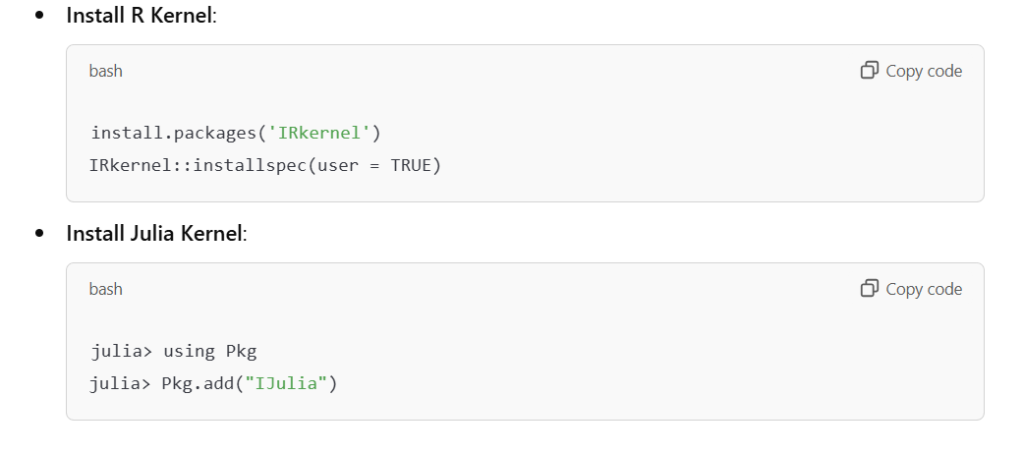
Installing Additional Kernels
To add new kernels, you can use the specific commands for the desired language. For example:
- Install R Kernel:
install.packages('IRkernel') IRkernel::installspec(user = TRUE) - Install Julia Kernel:
julia> using Pkg julia> Pkg.add("IJulia")
Summary
A Jupyter kernel is the computational core of a Jupyter Notebook. It executes code, maintains the state, and allows Jupyter to support different programming languages. Managing and understanding kernels is fundamental for effective Jupyter Notebook usage, as they directly impact the execution flow and resource management in your notebook environment.

👤 About the Author
Ashwani is passionate about DevOps, DevSecOps, SRE, MLOps, and AiOps, with a strong drive to simplify and scale modern IT operations. Through continuous learning and sharing, Ashwani helps organizations and engineers adopt best practices for automation, security, reliability, and AI-driven operations.
🌐 Connect & Follow:
- Website: WizBrand.com
- Facebook: facebook.com/DevOpsSchool
- X (Twitter): x.com/DevOpsSchools
- LinkedIn: linkedin.com/company/devopsschool
- YouTube: youtube.com/@TheDevOpsSchool
- Instagram: instagram.com/devopsschool
- Quora: devopsschool.quora.com
- Email– contact@devopsschool.com
Find Trusted Cardiac Hospitals
Compare heart hospitals by city and services — all in one place.
Explore Hospitals