What is Objective-C?
Objective-C is a general-purpose, object-oriented programming language that was originally developed in the early 1980s. It is an extension of the C programming language with Smalltalk-style object-oriented programming features. Objective-C was primarily used for macOS and iOS application development and was the primary language for building applications on Apple platforms for many years. While it has been largely superseded by Swift as the primary language for Apple ecosystem development, Objective-C is still relevant, especially in maintaining legacy codebases.
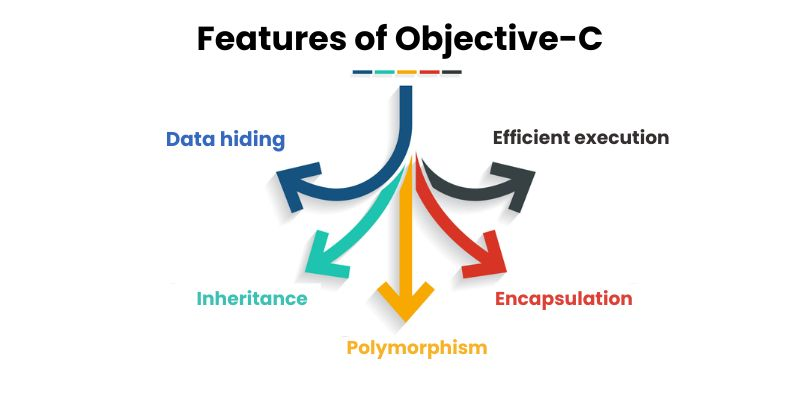
Key Features of Objective-C:
- Object-Oriented: Objective-C is an object-oriented language, supporting principles such as encapsulation, inheritance, and polymorphism.
- Dynamic Typing: Objective-C is dynamically typed, allowing the developer to change the class of an object at runtime.
- Message Passing: In Objective-C, method calls are expressed as message-passing between objects. This is a distinctive feature of the language.
- Compatibility with C: Objective-C is a strict superset of the C programming language, meaning that C code can be used in Objective-C without modification.
- Automatic Reference Counting (ARC): Objective-C uses Automatic Reference Counting for memory management, automating the process of memory allocation and deallocation.
What is top use cases of Objective-C?
- iOS App Development:
- Objective-C was the primary language for iOS app development before the introduction of Swift. Many early iOS applications were written in Objective-C.
- Although Swift is now the recommended language for iOS development, Objective-C is still relevant for maintaining and updating existing apps written in the language.
- macOS App Development:
- Objective-C has been traditionally used for developing applications for macOS, including desktop applications and utilities.
- Cocoa and Cocoa Touch Frameworks:
- Objective-C is closely associated with the Cocoa and Cocoa Touch frameworks, which provide a set of APIs for building applications on macOS and iOS, respectively.
- Legacy Codebases:
- Many existing codebases, especially those created before the introduction of Swift, are written in Objective-C. Maintenance and updates to these projects may involve working with Objective-C code.
- Cross-Platform Development:
- Objective-C code can be used in cross-platform development, leveraging its compatibility with C. However, modern cross-platform frameworks may provide more convenient alternatives.
- Embedded Systems:
- Objective-C can be used in embedded systems development, especially in scenarios where C compatibility is essential.
- Game Development:
- While not as prevalent as languages like C++ in game development, Objective-C has been used in the development of macOS and iOS games.
- Scripting and Automation:
- Objective-C can be used for scripting and automation tasks on macOS, interacting with the operating system and applications.
- Scientific and Academic Projects:
- Objective-C might be used in certain scientific or academic projects, depending on specific requirements and constraints.
While Swift has become the language of choice for new projects in the Apple ecosystem, Objective-C remains relevant for maintaining and updating existing codebases. Developers working with Apple platforms may encounter Objective-C when dealing with legacy systems or older projects.
What are feature of Objective-C?
Features of Objective-C:
- Object-Oriented Programming: Objective-C is an object-oriented programming language, allowing developers to model real-world entities using objects and classes.
- Dynamic Typing: Objective-C is dynamically typed, meaning the type of an object can be determined at runtime. This provides flexibility but requires careful handling of types during development.
- Message Passing: Method invocations in Objective-C are expressed as message-passing between objects. This dynamic approach allows for more flexibility in the program’s structure.
- Compatibility with C: Objective-C is a strict superset of the C programming language, enabling developers to seamlessly integrate C code into Objective-C projects.
- Automatic Reference Counting (ARC): Objective-C uses Automatic Reference Counting for memory management, automatically handling the allocation and deallocation of memory.
- Interoperability with C++: Objective-C++ allows developers to use C++ code alongside Objective-C, enabling integration with C++ libraries and components.
- Categories and Extensions: Objective-C supports categories and extensions, allowing developers to add methods to existing classes without subclassing. This promotes code organization and modularity.
- Key-Value Coding (KVC) and Key-Value Observing (KVO): Objective-C provides mechanisms for accessing object properties using key-value pairs. KVO allows objects to observe changes in the properties of other objects.
- Cocoa and Cocoa Touch Frameworks: Objective-C is closely associated with the Cocoa framework on macOS and the Cocoa Touch framework on iOS. These frameworks provide a rich set of APIs for building user interfaces and interacting with the operating system.
- Protocols: Objective-C supports protocols, which define sets of methods that a class can choose to adopt. Protocols provide a way to achieve multiple inheritance and define common behavior.
What is the workflow of Objective-C?
- Project Setup:
- Create a new Xcode project for macOS or iOS development.
- Choose the appropriate project template based on the type of application (e.g., macOS app, iOS app).
- Write Code in Objective-C:
- Develop application logic using Objective-C syntax.
- Define classes, methods, and properties to represent the structure of the application.
- Interface Design:
- Design the user interface using Interface Builder in Xcode.
- Connect UI elements to Objective-C code using outlets and actions.
- Implementation of Business Logic:
- Implement the business logic of the application by writing methods in Objective-C.
- Use the Cocoa or Cocoa Touch frameworks for tasks such as data handling, file management, and networking.
- Memory Management:
- Manage memory manually or use Automatic Reference Counting (ARC) to handle memory management automatically.
- Testing:
- Write unit tests for Objective-C classes and methods to ensure code correctness.
- Use Xcode’s testing framework to run tests and identify issues.
- Debugging:
- Apply Xcode’s debugging tools to identify and solve bugs in the code.
- Utilize breakpoints, the debugger console, and visual debugging tools.
- Build and Compilation:
- Build the project to compile the Objective-C code into machine-readable binary code.
- Check for any build errors and resolve them.
- Running on Simulator or Device:
- Play the application on a simulator for testing or deploy it to a physical device.
- Monitor the application’s behavior and performance.
- Optimization:
- Analyze the performance of the application using profiling tools in Xcode.
- Optimize code for better performance and responsiveness.
- Version Control:
- Apply version control systems (e.g., Git) to track changes in the codebase.
- Collaborate with team members using version control.
- Deployment:
- Ready the application for distribution by configuring settings in Xcode.
- Submit the application to the App Store (iOS/macOS) or distribute it through other channels.
This workflow provides a general overview of the steps involved in developing an application using Objective-C and Xcode. The specifics may vary based on the type of project, platform (iOS or macOS), and the development requirements.
How Objective-C Works & Architecture?
Objective-C is an object-oriented programming language that was primarily used for developing iOS and macOS applications. It is a dynamic runtime language, meaning that objects and their methods are not bound to specific classes until the program is executed. Objective-C follows a messaging-based architecture, where objects communicate by sending messages to each other.
Key Components of Objective-C Architecture:
- Classes: Classes are blueprints for objects, defining their properties and methods.
- Objects: Objects are instances of classes, encapsulating data and behavior.
- Messages: Messages are requests sent from one object to another, evoking specific methods.
- Methods: Methods are the implementations of messages, defining what happens when a message is received.
- Categories: Categories allow extending existing classes without modifying their original source code.
- Protocols: Protocols define interfaces that classes can adopt to provide specific functionalities.
Objective-C Runtime:
Objective-C relies on a runtime environment that manages object creation, memory allocation, and message dispatch. The runtime is responsible for resolving messages to the appropriate methods based on the receiver object’s class and its implementation.
Objective-C’s Messaging Mechanism:
Message sending is the fundamental mechanism of interaction between objects in Objective-C. When an object sends a message to another object, the runtime dynamically determines the appropriate method to invoke based on the receiver’s class and the message’s name. This allows for flexible and dynamic behavior.
How Objective-C Works in Practice:
- Object Creation: Objects are created using the
allocandinitmethods.allocallocates memory for the object, andinitinitializes its properties. - Message Sending: Objects send messages using the dot notation (e.g.,
receiverObject.messageName). The runtime resolves the message to the appropriate method based on the receiver’s class. - Method Execution: The invoked method performs the desired action, potentially modifying the object’s state or interacting with other objects.
- Memory Management: Objective-C uses automatic reference counting (ARC) for memory management. ARC tracks the number of references to an object and automatically deallocates it when there are no remaining references.
How to Install and Configure Objective-C?
Installing and configuring Objective-C depends on the development platform you’re using. Following is a step-by-step guide for both macOS and Windows:
Installing Objective-C on macOS (Xcode):
- Download Xcode: Xcode is the integrated development environment (IDE) for developing macOS and iOS applications. It includes the Objective-C compiler and other essential tools. You can download Xcode from the Mac App Store.
- Launch Xcode: Once Xcode is installed, launch it from the Applications folder or using Spotlight search.
- Create a Project: In Xcode, create a new project by selecting “File” > “New” > “Project…” from the menu bar. Choose “App” for iOS or “macOS App” for macOS development.
- Select Language: Ensure the language is set to “Objective-C” in the project settings. The target platform should also be correctly chosen (iOS or macOS).
- Write Objective-C Code: Create source files (.m) for implementing Objective-C classes and methods. These files can be created using Xcode’s File Manager or an external text editor.
- Build and Run the Project: Build the project using Xcode’s build commands or buttons. Once built, you can run the application using the simulator or a connected device.
Installing Objective-C on Windows (GNUstep):
- Install GNUstep Core: GNUstep Core is a free and open-source implementation of the GNUstep framework, which provides a development environment for Objective-C on Windows. You can download and install GNUstep Core from the GNUstep website.
- Install MinGW: MinGW is a collection of GNU development tools for Windows. It provides the necessary compiler and runtime libraries for Objective-C development. You can download and install MinGW from the MinGW website.
- Set Up Environment Variables: Configure the environment variables to point to the MinGW and GNUstep installations. This allows the Objective-C compiler and other tools to locate the necessary libraries.
- Write Objective-C Code: Create source files (.m) for implementing Objective-C classes and methods. These files can be generated using a text editor.
- Compile and Run the Project: Use the GNUstep compiler (ggnustep) to compile your Objective-C code into executable files. Once compiled, you can run the application using the GNUstep runtime environment.
Fundamental Tutorials of Objective-C: Getting started Step by Step
The following is a step-by-step guide for getting started with Objective-C. This tutorial assumes you have Xcode installed, as it’s the official integrated development environment (IDE) for Objective-C development on macOS and iOS.
Step 1: Install Xcode
Download and install Xcode from the Mac App Store. Xcode includes the necessary tools and resources for Objective-C development.
Step 2: Create a New Project
Open Xcode and create a new project:
- Click on “Create a new Xcode project.”
- Choose a template based on your platform (iOS App, macOS App, etc.).
- Choose a template (e.g., “Single View App”) and press “Next.”
Step 3: Set Up Your Project
- Enter a name for your project.
- Choose your organization identifier (usually in reverse domain style, like
com.example). - Choose the project’s location and language (Objective-C).
- Press “Next” and choose a location to save your project.
Step 4: Explore the Xcode Interface
Get familiar with the Xcode interface, including the Navigator, Editor, Utility area, and Toolbar.
Step 5: Write Your First Objective-C Code
Open the default ViewController.m file in the Editor. Restore the existing code with a simple “Hello, World!” program:
#import "ViewController.h"

@interface ViewController ()

@end

@implementation ViewController

- (void)viewDidLoad {
    [super viewDidLoad];
    // Do any additional setup after loading the view.

    NSLog(@"Hello, World!");
}

@end
Step 6: Run Your App
- Choose a simulator (e.g., iPhone 12) from the device selection dropdown.
- Click the “Run” button (a ▶️ icon) in the top-left corner.
- Observe the simulator launch, and you should see “Hello, World!” printed in the console.
Step 7: Create a User Interface (Optional)
- Open the Main.storyboard file in the Editor.
- Draw a “Label” from the Object Library to the view controller.
- Change the label’s text to “Hello, Objective-C!” using the Attributes Inspector.
Step 8: Connect UI to Code (Optional)
- Switch back to the ViewController.h file.
- Declare an IBOutlet for the label:
#import <UIKit/UIKit.h>

@interface ViewController : UIViewController

@property (weak, nonatomic) IBOutlet UILabel *helloLabel;

@endCode language: HTML, XML (xml)
Step 9: Update Code to Use UI (Optional)
- Switch to the ViewController.m file.
- Update the
viewDidLoadmethod to set the label’s text:
- (void)viewDidLoad {
    [super viewDidLoad];
    // Do any additional setup after loading the view.

    self.helloLabel.text = @"Hello, Objective-C!";
}Code language: JavaScript (javascript)
Step 10: Run Your App Again
- Click the “Run” button.
- Observe the simulator, and you should see the updated label with “Hello, Objective-C!”
Congratulations! You’ve completed a basic Objective-C tutorial covering setting up a project, writing Objective-C code, and working with a simple user interface. Continue exploring Objective-C by learning more about classes, methods, and object-oriented programming concepts. The Objective-C documentation is a helpful resource for further learning.

Find Trusted Cardiac Hospitals
Compare heart hospitals by city and services — all in one place.
Explore Hospitals
This blog gives a clear and practical guide on creating an S3 bucket and accessing objects step by step. I like how it explains the process in a simple way, making it easy for beginners to follow. It’s a helpful read for anyone starting with AWS S3 and learning basic storage operations