We have seen that build runners can be very handy. Even though most build runners can be replaced with an equivalent command using the command-line runner, build runners come with the convenience of easily setting up build steps, along with the necessary agent requirements and parameters.
Meta-Runners provide a straightforward way to create custom build runners. Meta-Runners can be thought of as a way to avoid duplications in build steps across build configurations.
Note
While templates can be used to create and maintain build configurations that are very similar, Meta-Runners can be used across build configurations that perform the same build steps. Moreover, a build configuration can only be based on one template, but it can make use of multiple Meta-Runners.
In Chapter 3, Getting Your CI Up and Running, we created the deploy-to-test build configuration that deploys the Django application to Heroku. Using this build configuration as an example, we can see how we can extract a Meta-Runner Deploy To Heroku that can be used by any build configuration that wants to deploy to Heroku.
Recall that the deploy-to-test build configuration had a simple command-line runner that executed the following commands:
git remote add heroku git@heroku.com:django-ci-example.git git push heroku master
To create a generic Meta-Runner out of this, we need to provide a way to push to any remote, rather than just git@heroku.com:django-ci-example.git.
Note
Deploying to Heroku using remotes needs the ssh keys to be set up on the agent. The example used here just illustrates Meta-Runners and may not be ideal for production use.
As mentioned in Chapter 6, TeamCity for Ruby Projects, we can use a gem such as heroku-headless (https://github.com/moredip/heroku-headless).
As expected, we will do this by extracting the remote out into a build parameter. The command-line runner will have the following as the Custom Script to be run:
git remote add heroku %heroku.remote% git push heroku master
We will provide the value for the %heroku.remote% parameter in the Build Parameters section of the build configuration.
Now we are ready to create a Meta-Runner from this build configuration. This can be done by clicking on the Extract Meta-Runner button in the right-hand side bar of the build configuration settings page. This brings up the Extract Meta-Runner dialog, which is shown in the following screenshot:
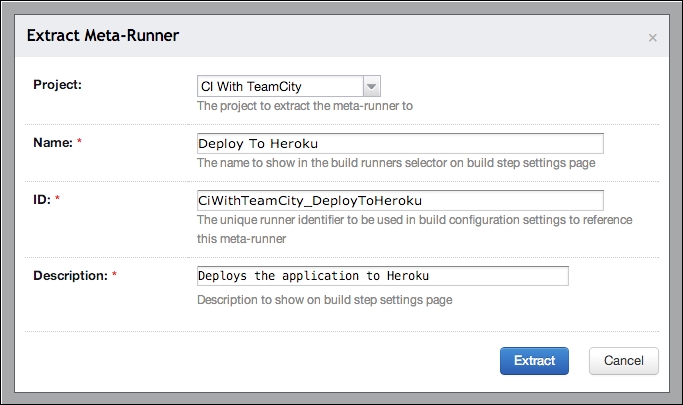
In the dialog, we give a name to the Meta-Runner. This is the name that will appear in the Runner Type field when configuring a build step for a build configuration.
Click on Extract to create the Meta-Runner. Once the Meta-Runner is created, we can see it listed in the Meta-Runners tab on the project administration page. We can also edit the Meta-Runner to fine-tune it as desired.
The following screenshot shows the edit page of the Deploy To Heroku Meta-Runner that we just created:
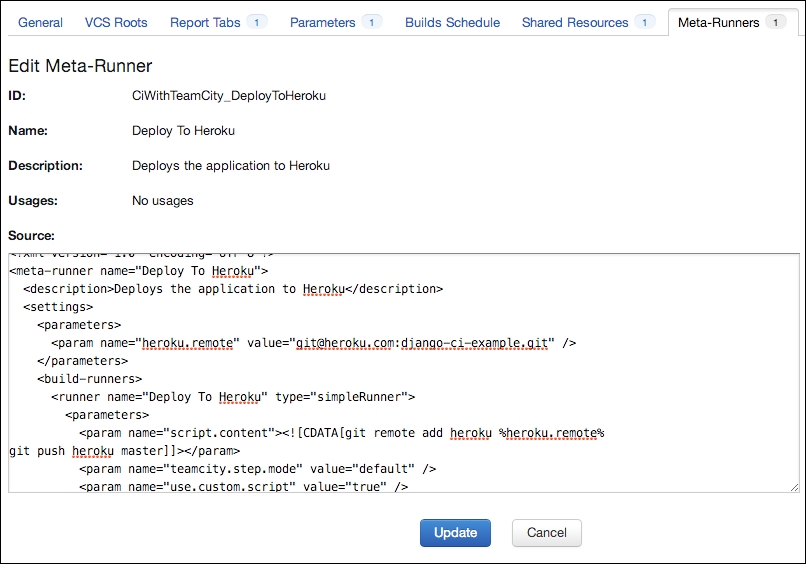
The Meta-Runner extracts all the parameters and steps defined in the build configuration. We can edit the Meta-Runner to have only the necessary parameters and steps.
We can now use the Meta-Runner that we created pretty much like a normal build runner. We will remove the existing build step in the deploy-to-test build configuration (from which we extracted the Meta-Runner) and add a Deploy To Heroku Meta-Runner-based build step.
In the New Build Step page, for the Runner type field, the newly created Deploy To Heroku Meta-Runner is available, as shown in the following screenshot:
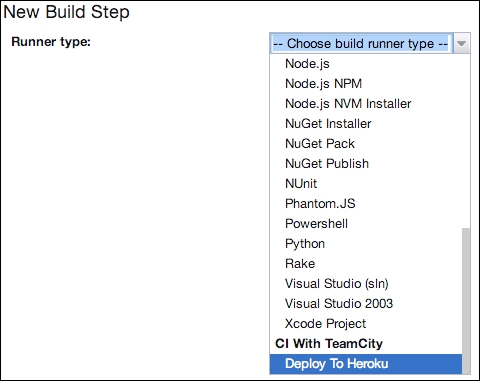
Once we choose the Deploy To Heroku Meta-Runner, we can see that the heroku.remote parameter is one of the fields to be configured. Since we created the Meta-Runner with the heroku.remote parameter with the value git@heroku.com:django-ci-example.git, that remote is available by default. The Deploy To Heroku runner configuration page is shown in the following screenshot:
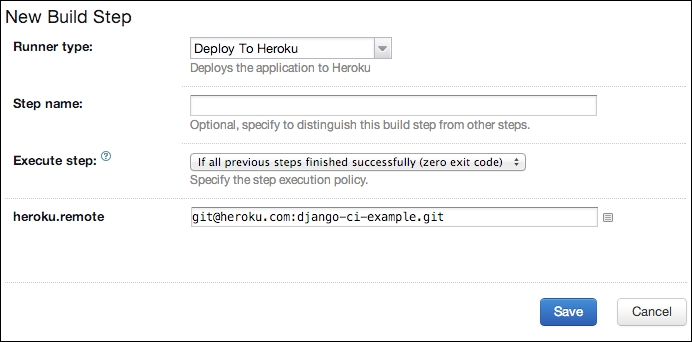
We can click on Save to add the build step. The new build step, based on the Deploy To Heroku Meta-Runner, will function in the same way as the previous build step based on the command-line runner.
Note
Of course, the value of Meta-Runners becomes more apparent when we create them out of multiple build steps. The same set of steps that may be repeated across multiple configurations can be extracted into Meta-Runners.
Reference Book – Learning Continuous Integration with TeamCity by Learning Continuous Integration with TeamCity
- How to remove sensitive warning from ms office powerpoint - July 14, 2024
- AIOps and DevOps: A Powerful Duo for Modern IT Operations - July 14, 2024
- Leveraging DevOps and AI Together: Benefits and Synergies - July 14, 2024


