
How to test Chef recipes/cookbooks on your workstation with VAGRANT and VirtualBox using Test Kitchen
Install Test Kitchen, VAGRANT and VirtualBox:
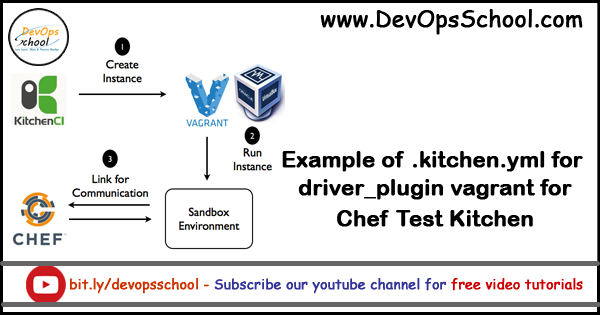
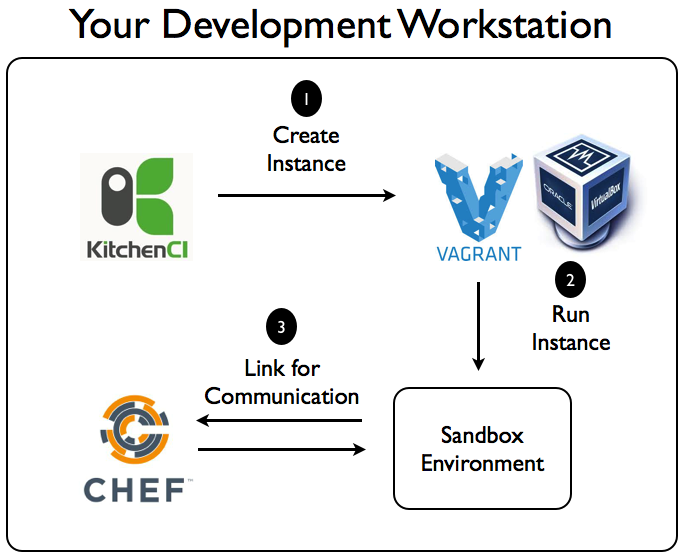
Chef Test Kitchen: Test Kitchen is a testing tool that can execute your CHEF recipes on one or more platforms in isolation. A driver plugin architecture is used which lets you run your recipes on various cloud providers and virtualization technologies.
$ gem install test-kitchen
Virtualbox: VirtualBox is powerful Cross-platform Virtualization Software for x86-based systems. “Cross-platform” means that it can be installed on Windows, Linux, Mac OS X and Solaris x86 computers.
$ sudo apt-get install virtualbox
VAGRANT: VAGRANT not only creates virtual machines, it mainly automates the work of setting up development environment.
$ sudo apt-get install vagrant
Step 1 – You can create kitchen.yml file in the chef-repo directory (as shown below) or in specific cookbook directory.
$ kitchen init
Step 2 – Add the below mentioned content to the kitchen.yml file, in this file you can configure basic details like driver name (vagrant or docker), provisioner, base OS image, memory and recipe name.
Step 3 – To create VAGRANT machine use below-mentioned command:
$ kitchen list
$ kitchen create
Step 4 – To execute recipe on the VAGRANT virtual machine, use the below-mentioned command:
$ kitchen converge
Step 5 – To login to the VAGRANT vm, use kitchen login command as shown below:
$ kitchen login
Step 6 – And after testing if you want to delete the setup i.e. vagrant vm, use the command mentioned-below:
$ kitchen destroy
I’m Rajesh Kumar, a DevOps, SRE, DevSecOps, Cloud, and Platform Engineering expert passionate about sharing practical knowledge, real-world experiences, and industry best practices. I have worked at Cotocus and regularly write about technology, travel, investing, health, product reviews, and digital marketing through my various platforms.
I publish technical articles at DevOps School, travel stories at Holiday Landmark, stock market insights at Stocks Mantra, health and fitness guidance at My Medic Plus, product reviews at TrueReviewNow, and SEO and digital marketing strategies at Wizbrand.
Find Trusted Cardiac Hospitals
Compare heart hospitals by city and services — all in one place.
Explore Hospitals