Step 1 – Install JDK
Step 2 – Install & Start Tomcat
Step 3 – Install your apps
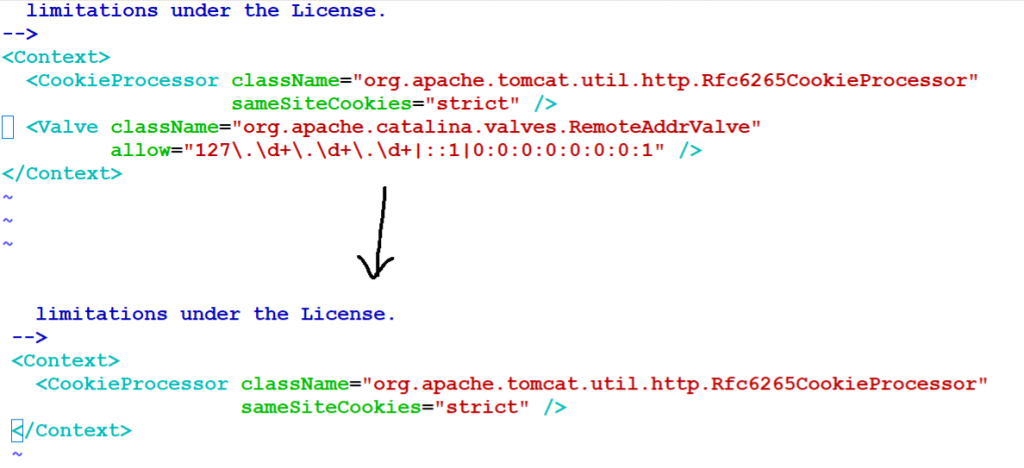
Lets use Tomcat’s default example app only. You may have permission issues for accessing http://18.210.16.76:8080/examples/ which can be fixed by following commands below
$ cd /opt/apache-tomcat-9.0.82/webapps/examples
$ find . -name context.xml
$ vi ./META-INF/context.xml
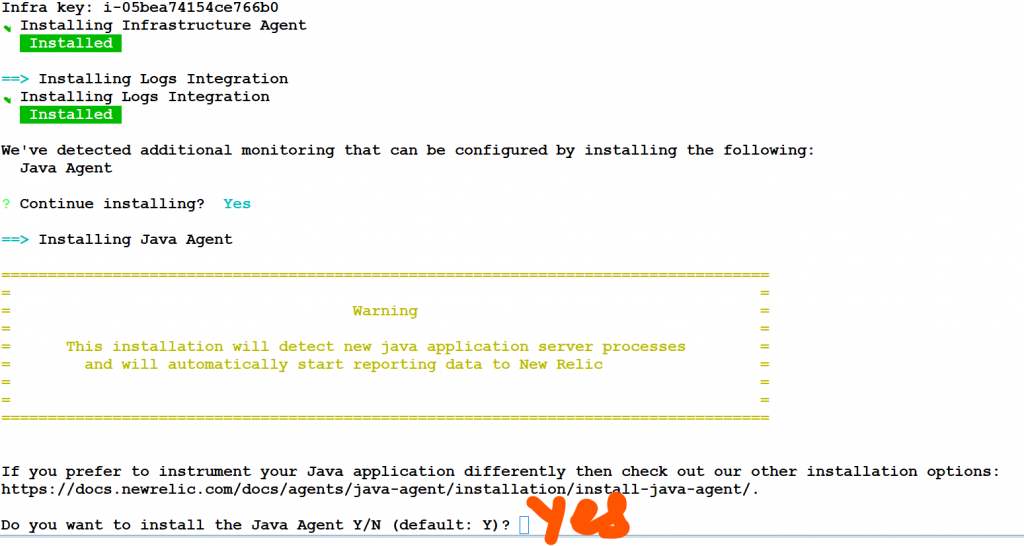
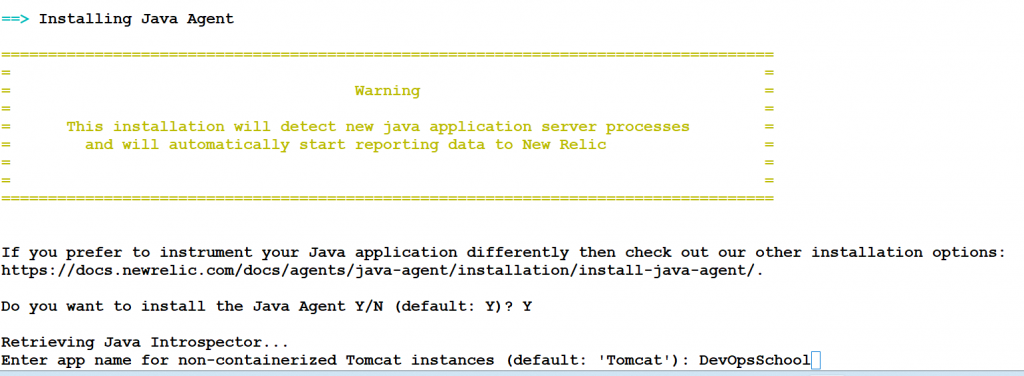
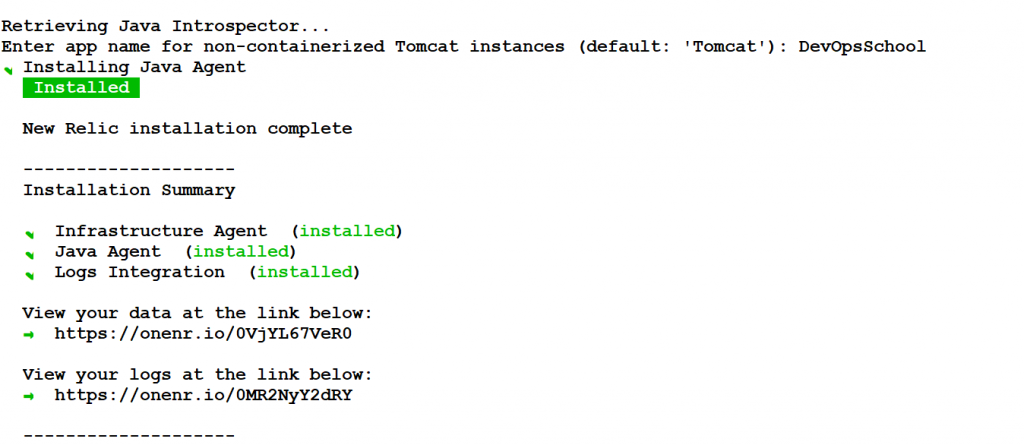
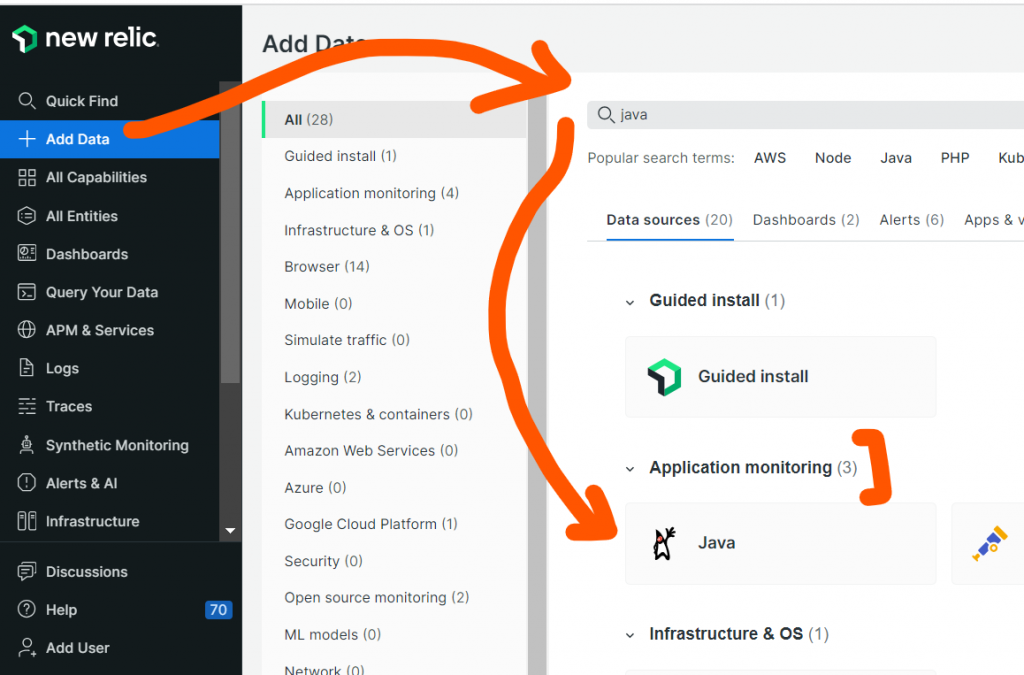
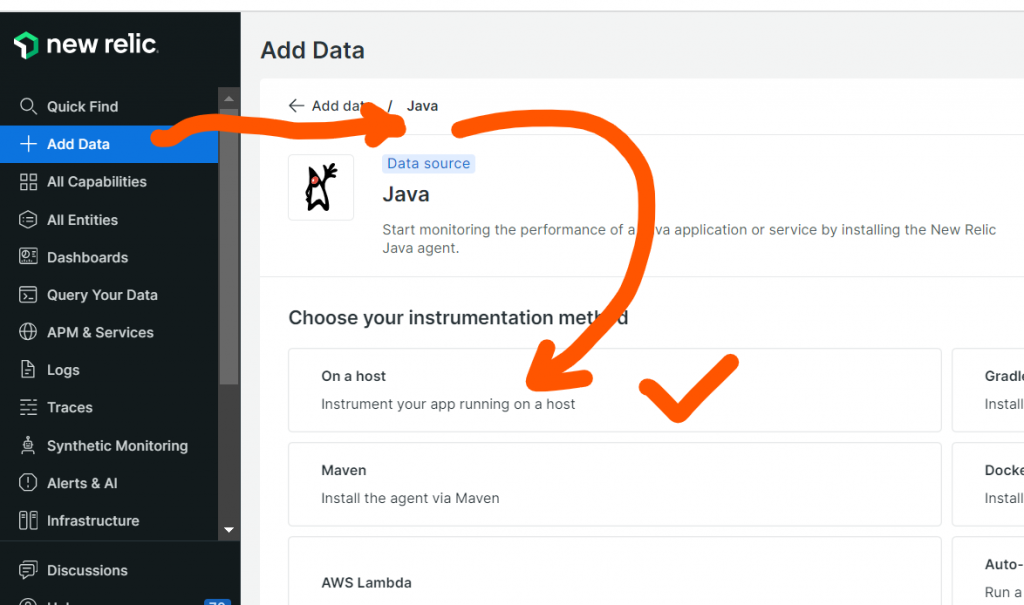
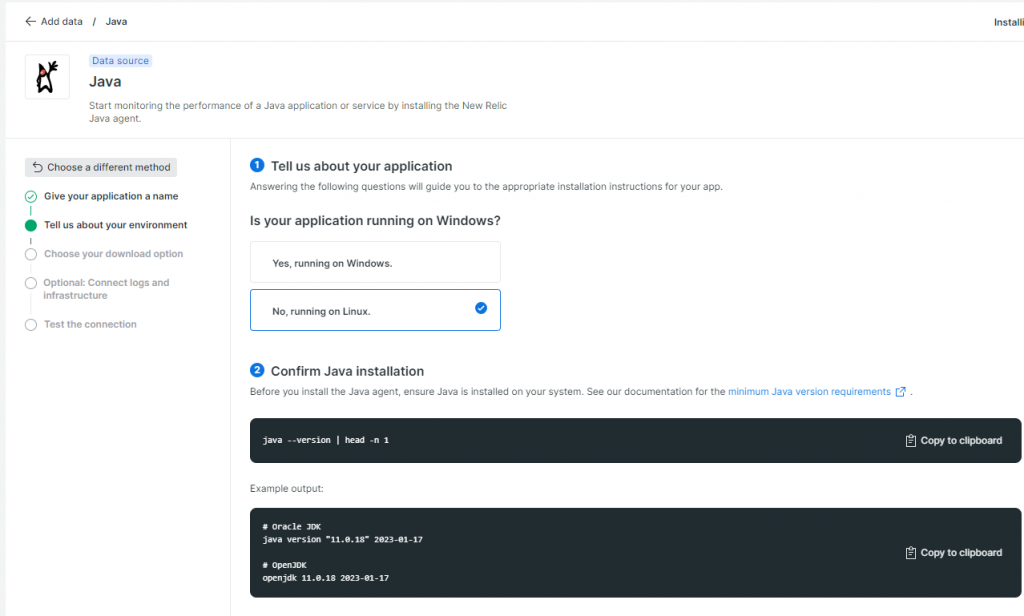
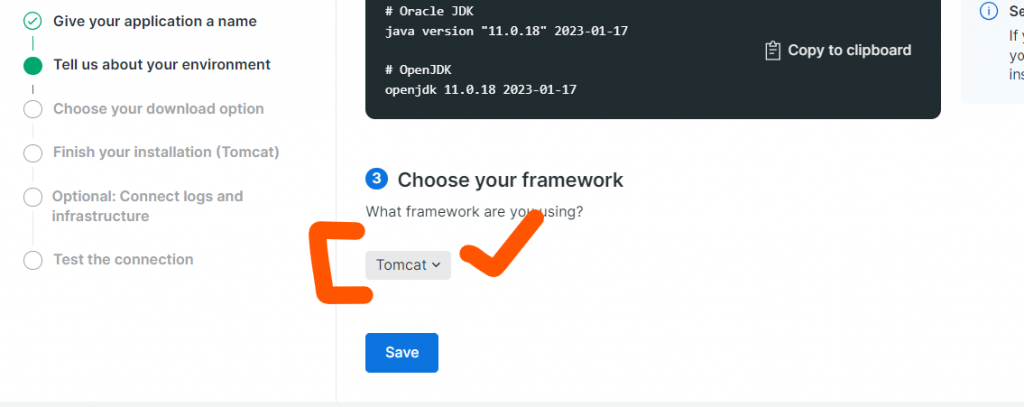
Step 4 – Install NewRelic Infra Agent & APM Agent
NewRelic Infra Agent would detect the Tomcat and Java automatically and try to configure APM Java Agent as per the image as below;
root@ip-172-31-58-86:/etc/newrelic-infra/integrations.d# ls
docker-config.yml  java-dynamic-attach.yml

root@ip-172-31-58-86:/etc/newrelic-infra/integrations.d# more java-dynamic-attach.yml
integrations:
  - name: java-dynamic-attach
    exec: ./dynamic-attach.sh
    working_dir: /etc/newrelic-java
    interval: 60s
    timeout: 1200s
    integration_user: root

root@ip-172-31-58-86:/etc/newrelic-infra/integrations.d#
Code language: PHP (php)
Step 5 -(Manual) Install NewRelic APM Java Agent

Alternative

curl -Ls https://download.newrelic.com/install/newrelic-cli/scripts/install.sh | bash && sudo NEW_RELIC_API_KEY=NRAK-32EHABRB7444 NEW_RELIC_ACCOUNT_ID=3404444 /usr/local/bin/newrelic install -n java-agent-installerCode language: JavaScript (javascript)
Manual way to set Newrelic APM Agent in Tomcat
$ cd /opt
$ curl -O https://download.newrelic.com/newrelic/java-agent/newrelic-agent/current/newrelic-java.zip
$ unzip newrelic-java.zip
$ cd newrelic
$ mv newrelic.yml newrelic.yml-bkp
$ vi newrelic.yml # COPY PASTE from Download newrelic.yml
$ chmod -R 755 .
$ cd /opt/
$ cd apache-tomcat-9.0.73
$ cd bin
$ vi setenv.sh
export CATALINA_OPTS="$CATALINA_OPTS -javaagent:/opt/newrelic/newrelic.jar"
$ ./shutdown.sh
$ ./startup.sh
$ ps -eaf | grep newrelic.jarCode language: PHP (php)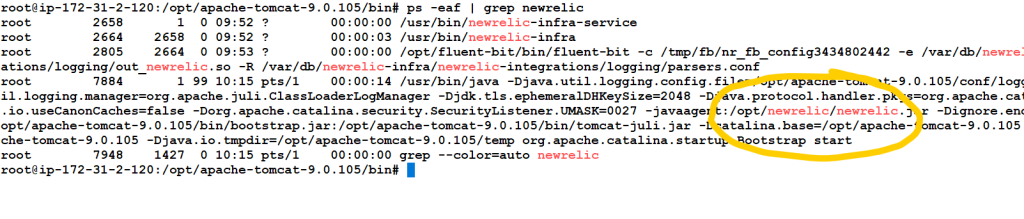
The CATALINA_OPTS environment variable is used to set Java options for the Tomcat server. The option -javaagent:/opt/newrelic/newrelic/newrelic.jar is used to load the New Relic Java agent, which enables monitoring of your Tomcat application using New Relic APM.
If you are looking for other options to set in CATALINA_OPTS to configure the New Relic Java agent, some common options include:
-Dnewrelic.config.file=<path to newrelic.yml>: This option can be used to specify the path to the New Relic configuration file, which contains settings such as application name, license key, and logging configuration.-Dnewrelic.environment=<environment name>: This option can be used to specify the name of the environment in which your application is running, such as “production” or “staging”.-Dnewrelic.appname=<application name>: This option can be used to specify the name of your application as it will appear in the New Relic APM dashboard.-Dnewrelic.verbose=true: This option can be used to enable verbose logging for the New Relic Java agent.-Dnewrelic.config.log_file_path=<path to log file>: This option can be used to specify the path to the New Relic log file.
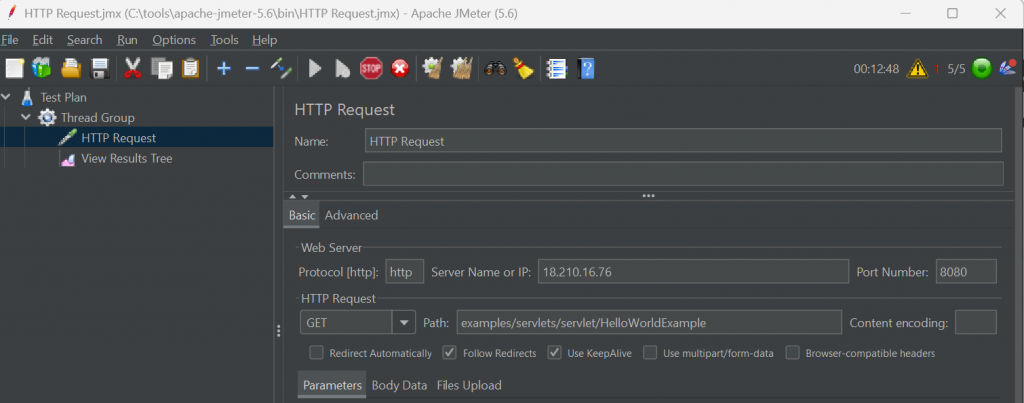
Step 6 – Access the apps
You may create a Traffic on App using Jmeter as below;
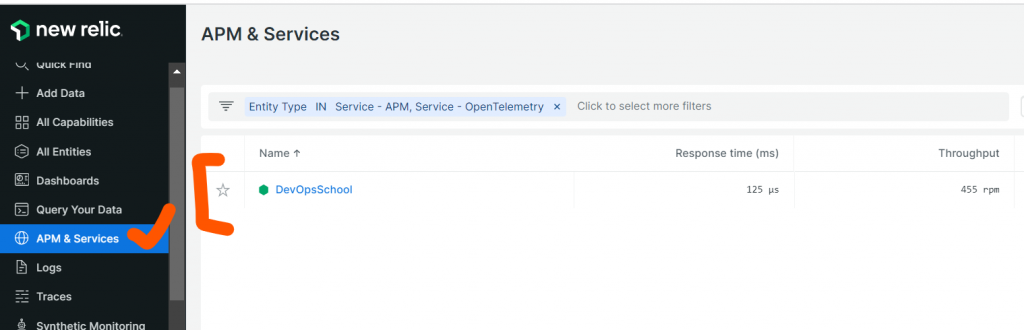
Step 7 – Verify a APM apps on NewRelic Dashboard
I’m Rajesh Kumar, a DevOps, SRE, DevSecOps, Cloud, and Platform Engineering expert passionate about sharing practical knowledge, real-world experiences, and industry best practices. I have worked at Cotocus and regularly write about technology, travel, investing, health, product reviews, and digital marketing through my various platforms.
I publish technical articles at DevOps School, travel stories at Holiday Landmark, stock market insights at Stocks Mantra, health and fitness guidance at My Medic Plus, product reviews at TrueReviewNow, and SEO and digital marketing strategies at Wizbrand.
Find Trusted Cardiac Hospitals
Compare heart hospitals by city and services — all in one place.
Explore Hospitals