
Installing Icinga Director on an Ubuntu system involves several steps, primarily focused on ensuring that your system meets the prerequisites, installing Icinga Director, and integrating it with Icinga 2 and Icinga Web 2. Here’s a step-by-step guide to help you through the process:
Prerequisites
- Icinga 2: Ensure Icinga 2 is installed and running on your Ubuntu system.
- Icinga Web 2: Ensure Icinga Web 2 is installed and operational as Icinga Director is a module for Icinga Web 2.
- Database: Icinga Director requires a database. MySQL or MariaDB is recommended. Ensure that the database service is installed and running.
Step 1: Install Required Packages
First, you need to install PHP and other necessary packages that Icinga Director depends on:
sudo apt update
sudo apt install php php-cli php-gd php-xml php-bcmath php-mbstring php-json php-curl php-zip git
Step 2: Download Icinga Director
You can clone the Icinga Director from its GitHub repository. It’s advisable to get the latest stable version:
REFERENCE – https://icinga.com/docs/icinga-director/latest/doc/02-Installation/Ubuntu/
cd /usr/share/icingaweb2/modules
sudo git clone https://github.com/Icinga/icingaweb2-module-director.git director
sudo git checkout $(git describe --tags `git rev-list --tags --max-count=1`)
Code language: JavaScript (javascript)
Step 3: Set up Permissions
Ensure the web server user (usually www-data on Ubuntu) owns the Icinga Web 2 modules directory:
sudo chown -R www-data:www-data /usr/share/icingaweb2/modules/director
Step 4: Prepare the Database
Create a database and user for Icinga Director:
sudo mysql -u root -p

CREATE DATABASE director;
GRANT ALL PRIVILEGES ON director.* TO 'director'@'localhost' IDENTIFIED BY 'your_password';
FLUSH PRIVILEGES;
EXIT;
Code language: PHP (php)
Step 5: Enable the Icinga Director Module
Enable the module in Icinga Web 2 by creating the configuration file:
sudo icingacli module enable director
Code language: JavaScript (javascript)
Step 6: Configure Icinga Director
Log into your Icinga Web 2 interface. Go to the Configuration tab, then Modules, and select Director. You will need to click on “Create Schema” and then add the database resource you created.
Step 7: Run the Kickstart Wizard
The Icinga Director provides a Kickstart Wizard to automate the initial setup. Run the Kickstart Wizard from the Icinga Web 2 interface under the Director module settings. You’ll need to provide the Icinga 2 API credentials and the database details you set up earlier.
Step 8: Check Icinga Director Functionality
After completing the setup, navigate through the Director module in Icinga Web 2 to ensure it’s functioning correctly. Begin configuring hosts, services, and check commands as required.
Configure Director
Before doing anything lets configure Director, we will need to add the director database as a new resource and run it wizard.
- Create a new resource for the Icinga Director database via the
Configuration → Application → Resourcesmenu. Please make sure that you configureutf8as encoding. - Select
Icinga Directordirectly from the main menu and you will be taken to the kickstart wizard. Follow the instructions and you are done!
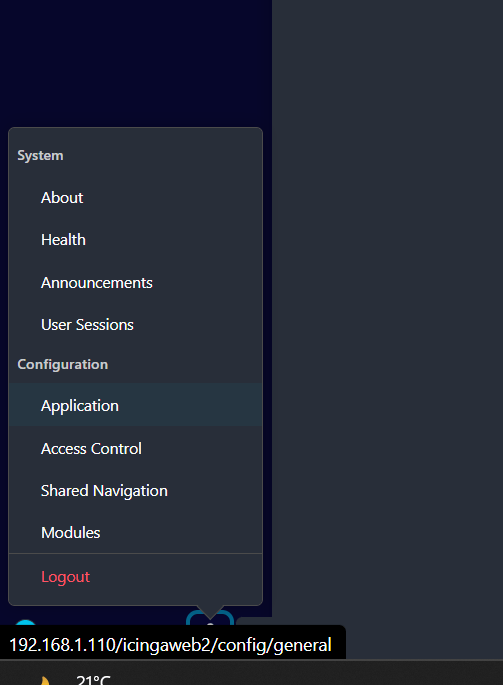

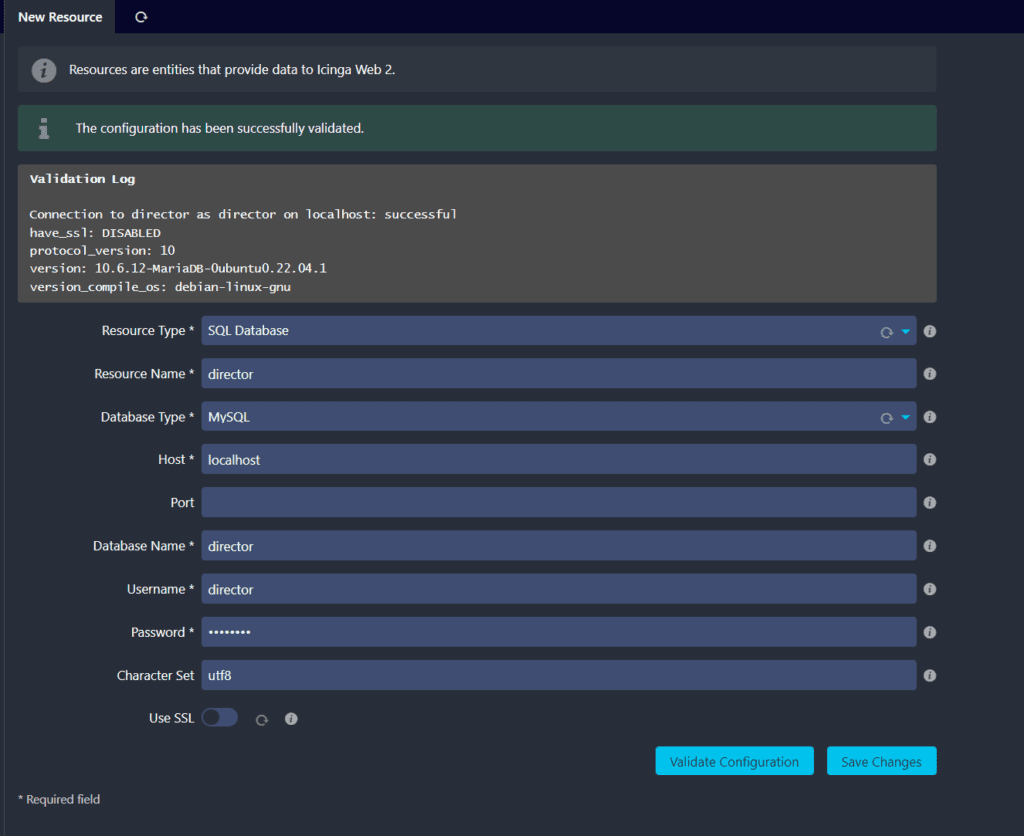
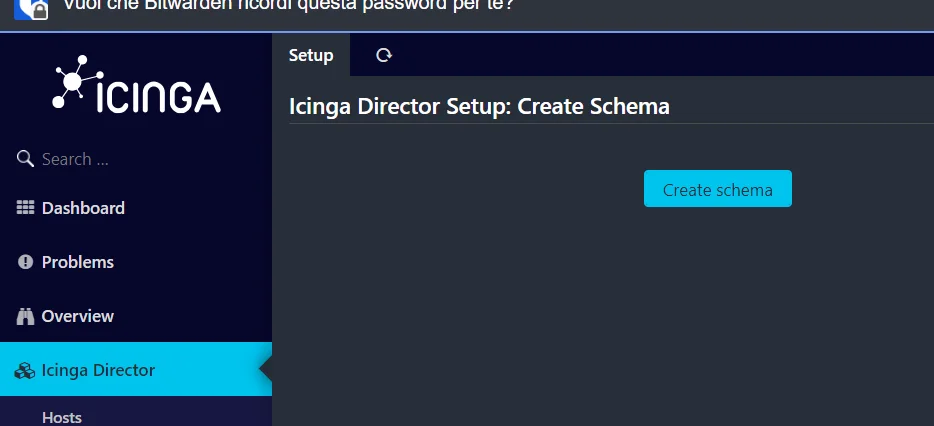
Now you can enable the Director by choosing this new resource as a target. You will then be asked to create the schema.
After schema has been created you will find multiple deployments pending that need to be pushed to the database.
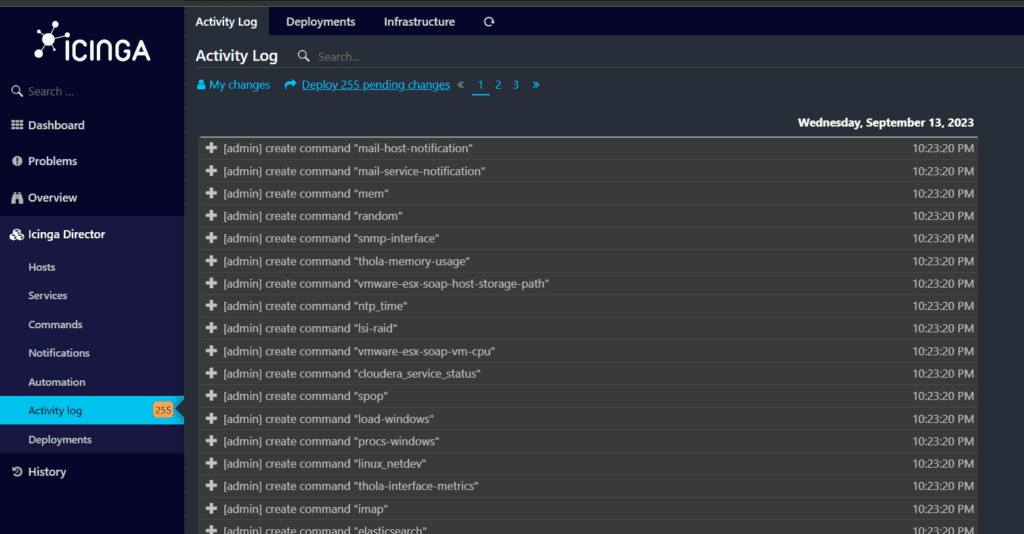
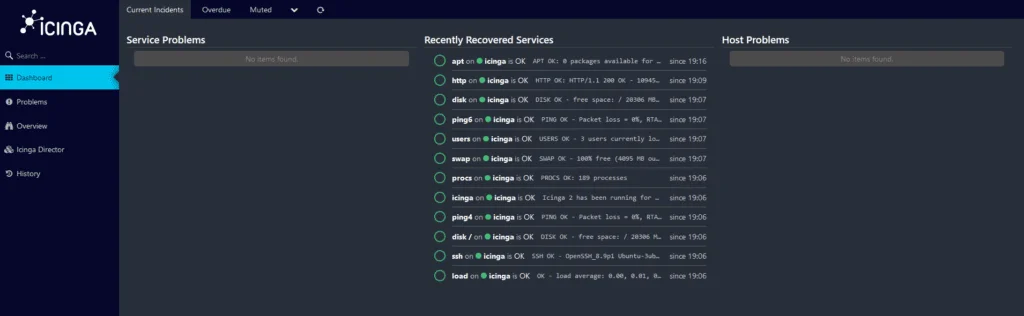
Click on Deploy and that’s it! The system is installed and ready for action.

I’m Rajesh Kumar, a DevOps, SRE, DevSecOps, Cloud, and Platform Engineering expert passionate about sharing practical knowledge, real-world experiences, and industry best practices. I have worked at Cotocus and regularly write about technology, travel, investing, health, product reviews, and digital marketing through my various platforms.
I publish technical articles at DevOps School, travel stories at Holiday Landmark, stock market insights at Stocks Mantra, health and fitness guidance at My Medic Plus, product reviews at TrueReviewNow, and SEO and digital marketing strategies at Wizbrand.
Find Trusted Cardiac Hospitals
Compare heart hospitals by city and services — all in one place.
Explore Hospitals