There are two methods of getting SHA-1 key, but First one is not working for Windows user. So, if you are a Windows user then go for 2nd Method.
Update:- On Android Studio Latest version(on 24 Sept 2021) 2020.3.1 for Windows 64-bit (912 MiB), Step 2 will not Work. So, go for Step 3.
1. Using Keytool
Open a terminal and run the keytool the utility provided with Java to get the SHA-1 fingerprint of the certificate. You should get both the release and debug certificate fingerprints.
Note:- If you are not able to get your SHA-1 key using Keytool then Follow the below Method, in this method you will definitely get your SHA-1 key.
2. Using Gradle’s Signing Report
You can also get the SHA-1 of your signing certificate by Gradle signingReport. But for that, you have to follow some steps.
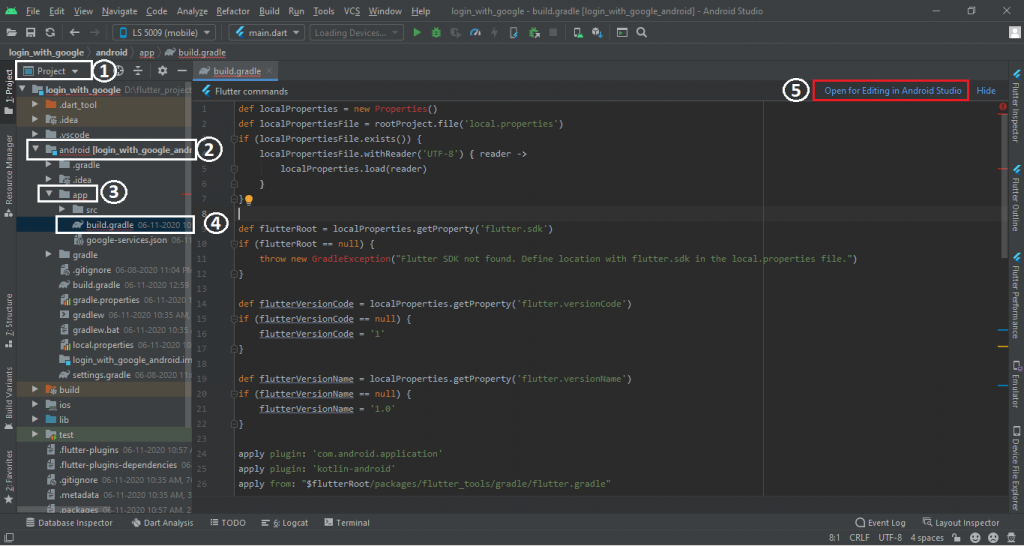
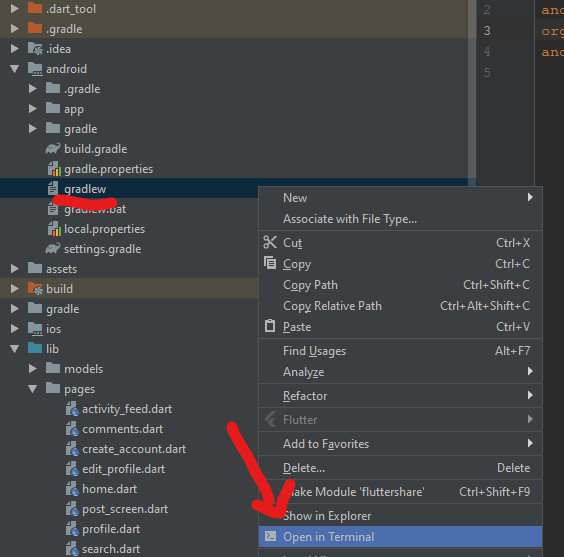
Step 1: – First of all => open your project in Android Studio and open the project. =>In the project, go to the android/app directory where you find build.gradle file. => Open it. => After opening, you’ll find an Open for Editing in Android Studio option, Click on it and open it in a new Tab. See the Below Image.
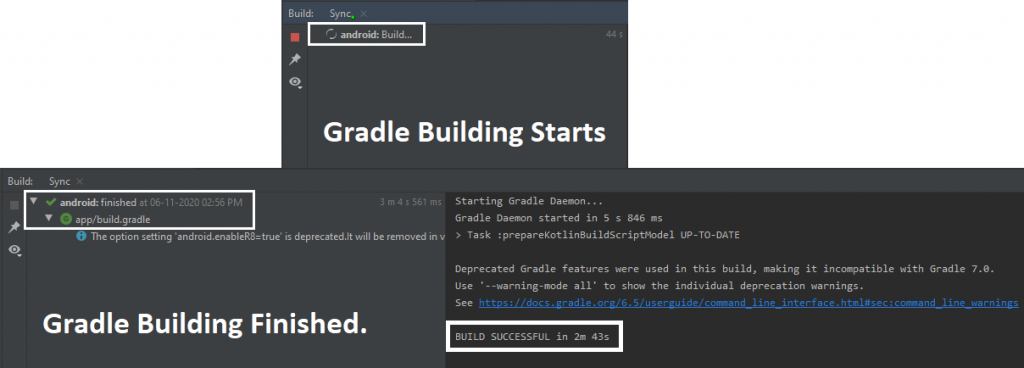
Step 2 :- After opening the file in the new tab, Wait for some time until Gradle Build Model Process Completes.
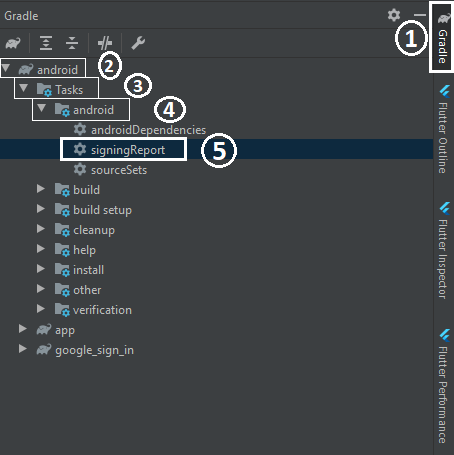
=> After Build Successful, go to the upper-right section where you find the Gradle option. Click On it. => After that Open Android->Tasks->android and Double click on signingReport. See the Below Image For Help.
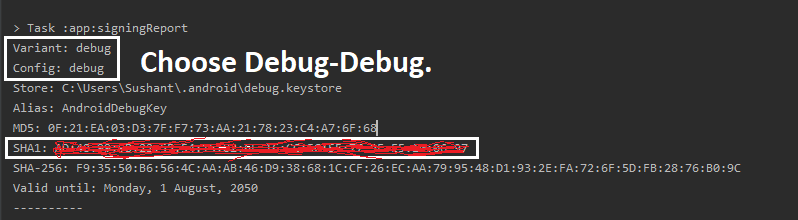
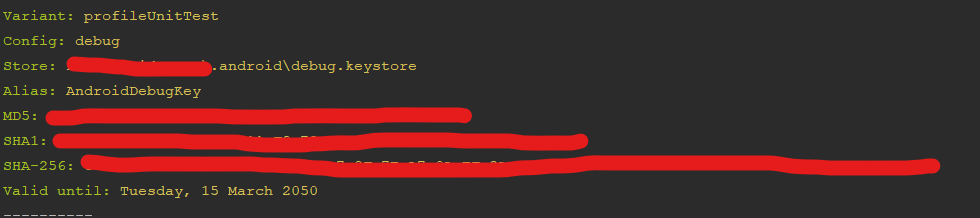
Step 3:- After Clicking on it, you’ll get a List of SHA-1 Keys but you have to choose Debug-Debug SHA-1 Key and copy and paste it on your Firebase. See the Below Image:-
With MotoShare.in, you can book a bike instantly, enjoy doorstep delivery, and ride without worries. Perfect for travelers, professionals, and adventure enthusiasts looking for a seamless mobility solution.
Find Trusted Cardiac Hospitals
Compare heart hospitals by city and services — all in one place.
With MotoShare.in, you can book a bike instantly, enjoy doorstep delivery, and ride without worries. Perfect for travelers, professionals, and adventure enthusiasts looking for a seamless mobility solution.
What is Flutter? Flutter is an open-source UI software development toolkit developed by Google. It is applied for building natively compiled applications for mobile, web, and desktop…
ERROR PlatformException(sign_in_failed, com.google.android.gms.common.api.ApiException: 10: , null, null) SOLUTION The following solution works in the flutter project: Step 1: Generate SHA1 and SHA256 keys. (Don’t know how to…
ERROR SOLUTION There are Two Solutions for this error Use Alternative Package Do some changes in .pub-cache Use Alternative Package I switched from searchable_dropdown to search_choices and…
Error SOLUTION Here is what I found on StackOverflow Source (Stackoverflow):- https://stackoverflow.com/questions/69312392/how-to-resolve-error-the-getter-body1-isnt-defined-for-the-class-texttheme To fix this issue you have to make some changes to Two files C:/src/flutter/.pub-cache/hosted/pub.dartlang.org/place_picker-0.9.19-nullsafety/lib/widgets/rich_suggestion.dart 2….
The problem is caused by missing .iml project files. These files are added automatically to the .gitignore file but they should not. To fix it: Delete .idea folder. Create a new temporary Flutter…