Are you still resizing photos or images one by one in Photoshop? If so, than this tutorial is for you. I am going to share how you can resize all images at once step by step.
Step 1. First of all select all the images put it in a folder and name that folder “Resized images”. (You can give it your name as well)
Step 2. Open one of the image from that folder in Photoshop.
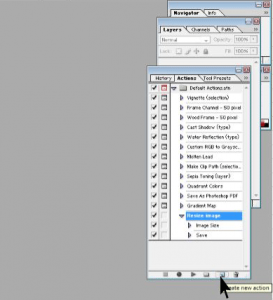
Step 3. Now Go to “Window” Option from top Menu and select “Actions” a new pop will come out in right hand side and create new action. Refer below image to find the option. After clicking on that option a new pop will come out. Now name that action as “Resize image” and set “default action” from the drop-down menu and after that click on “record”.
Step 4. Now Go to “Image” option from the top menu and select “image size” give it your required width and height and click on OK. You image size will reduce and after that go to file menu click on save as and save it on “Resized images” folder and close the image.
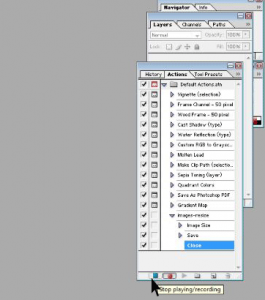
Step 5. Now stop the recording from the right “action” menu refer this image to understand it.
Step 6. Now go to “File” option from the top menu and click on “automate” and select “Batch”. A new pop will come out now set Default action in the first drop-down menu and In 2nd option, from Action drop-down select “resize image” and click on OK.
Step 7. Now it will automatically resize your image to given size, check your “Resized images” or your given name folder.
MotoShare.in delivers cost-effective bike rental solutions, empowering users to save on transportation while enjoying reliable two-wheelers. Ideal for city commutes, sightseeing, or adventure rides.
Find Trusted Cardiac Hospitals
Compare heart hospitals by city and services — all in one place.
Explore Hospitals