I was trying to send an email with an attachment that will be uploaded by the user and then sent to an admin email.
In this tutorial, we will discuss how to configure our Laravel Application to send emails with an attachment without saving the user data or attachment in the database and sent it directly to the Admin or defined user.
We first need to configure our SMTP server ie. in our .env file or (environment file). I’m using mailtrap.io you can use any of your favorite mail servers.
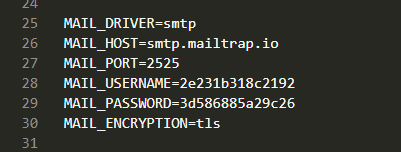
as you can see the image above containing my credential for my mailtrap.io server. Make sure to change
- MAIL_DRIVER= your mail driver
- MAIL_HOST= your smtp.host
- MAIL_PORT= your mail port
- MAIL_USERNAME=your username
- MAIL_PASSWORD=your password
- MAIL_ENCRYPTION= encryption type
Note:- If you want to set up it for a Gmail account here is my another blog to setup mail server for Gmail Account
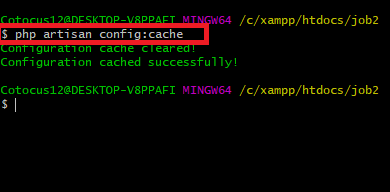
Let’s continue so after configuring the .env file you need to clear you config cache for that go to you commander and run this command PHP artisan config:cache
After this, we need a model and controller to handle the mail Function. Laravel provides a clean, simple API over the popular SwiftMailer library with drivers for SMTP, Mailgun, Postmark, Amazon SES, and sendmail, allowing you to quickly get started sending mail through a local or cloud-based service of your choice.
Configuration:-Laravel’s email services may be configured via the mail configuration file. Each mailer configured within this file may have its own options and even its own unique “transport”, allowing your application to use different email services to send certain email messages. For example, your application might use Postmark to send transactional mail while using Amazon SES to send bulk mail.
Let’s make it easier, go to your command line and run this command
php artisan make:mail
after this make a controller to process the data sent by the user and bind it into the mail in the array . But first, we need some user data to send it in the mail.
here is a form that acting on a route name action=”{{route(‘sendemail’)}}”
now go to your Route/web.php and make a route like this.
Route::post(‘/sendemail’, ‘SendEmailController@send’)->name(‘sendemail’);
The route redirecting the form to the controller name SendEmailController@send where you will find a function named function send(Request $request)
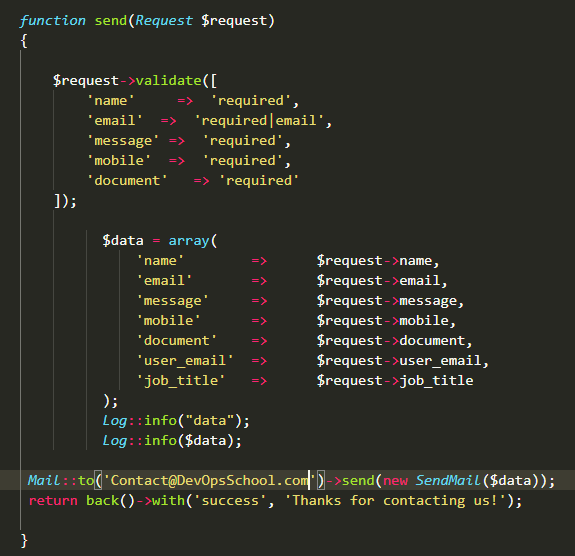
Here you can see we are getting all the data in the $Request perimeter and validating them for error handling in client-side.
Then getting all the validated data and attachment in a array named $data Then at the end we are sending the data to the mail model with whom you want to send the mail here you can use any email-id
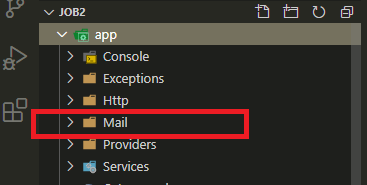
Here we go the final steps:- Go to your mail model and do as follow..

Here we are creating a function and defining the array
public function __construct($data=[]) { $this->data = $data; }
After then the build function returning (redirecting to dynamic_email_template) with the subject and from whom the mail is sending, with attaching the file attachment
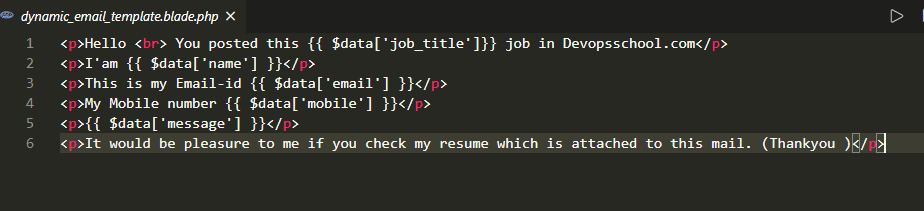
Now the only thing left is to make a blade file in the resources/views that make a template for the Email.

And at last Design the template as you want

Find Trusted Cardiac Hospitals
Compare heart hospitals by city and services — all in one place.
Explore Hospitals