
Adding a Helm repository in OpenShift is a common step to manage and deploy Helm charts in your OpenShift cluster. OpenShift supports Helm CLI out of the box, and also provides an Operator (Helm Chart Repository CRD) to centrally manage chart repositories visible in the OpenShift Web Console’s Developer Catalog.
Below, you’ll find two ways:
- A. Using the Helm CLI (User-level, CLI only)
- B. Adding a Helm Chart Repository for the OpenShift Web Console (Admin-level, visible in Catalog)
A. Add a Helm Repository via CLI (User-level, CLI only)
This lets you use any public Helm repo (e.g., Bitnami, Jetstack) in your terminal, similar to Kubernetes.
Step 1. Install the Helm CLI
- Download: https://helm.sh/docs/intro/install/
- On OpenShift nodes (optional), but most users install locally.
Step 2. Add a Repository
helm repo add bitnami https://charts.bitnami.com/bitnamiCode language: JavaScript (javascript)- Replace
bitnamiand URL with your desired repo.
Step 3. Update Repositories
helm repo updateStep 4. List Charts
helm search repo bitnamiStep 5. Install a Chart into OpenShift
Make sure you’re logged into your OpenShift cluster:
oc login ... # login if needed
helm install my-mongodb bitnami/mongodb --namespace=my-namespaceCode language: PHP (php)
That’s it!
You can now install, upgrade, or uninstall Helm charts using the CLI.
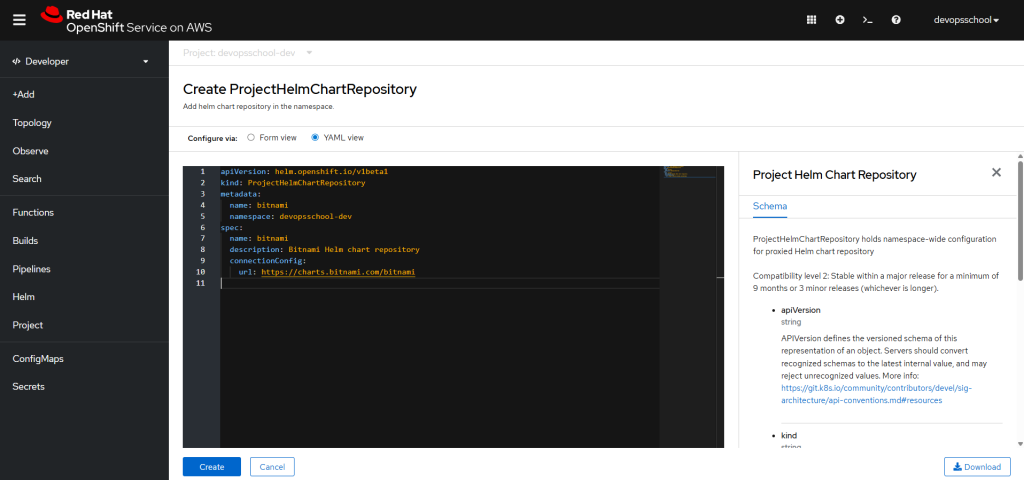
B. Add Helm Chart Repository for the OpenShift Web Console Catalog (Admin-level)
This is required if you want all users to browse and deploy charts from a repo using the OpenShift Web Console (Developer Catalog).
Step 1. Log in as a cluster-admin
oc login -u kubeadmin -p <password> https://api.<cluster-domain>:6443Code language: HTML, XML (xml)Step 2. Create a Project (Optional)
oc new-project devopsschool-devCode language: JavaScript (javascript)Step 3. Apply the ProjectHelmChartRepository YAML
Create a file called bitnami-helm-repo.yaml:
apiVersion: helm.openshift.io/v1beta1
kind: ProjectHelmChartRepository
metadata:
  name: bitnami
  namespace: devopsschool-dev
spec:
  name: bitnami
  description: Bitnami Helm chart repository
  connectionConfig:
    url: https://charts.bitnami.com/bitnami
Code language: JavaScript (javascript)
You can use any name/namespace. The
url:should be your chart repo URL.
Step 4. Apply the YAML
oc apply -f bitnami-helm-repo.yamlCode language: CSS (css)Step 5. Check in the Web Console
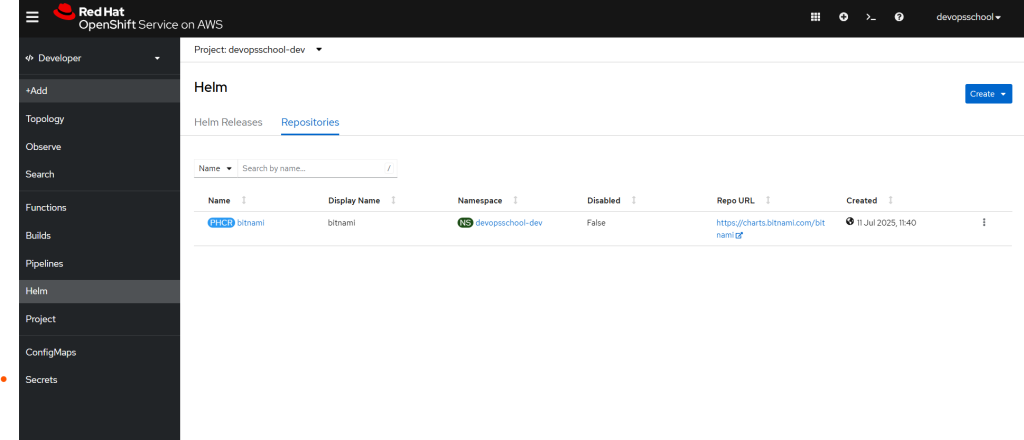
- Go to Developer → +Add → Helm Chart
- You should see the Bitnami charts available for install!
Troubleshooting & Tips
- You need the Helm Operator installed by default in OpenShift 4.x+.
- To add a repo cluster-wide (all namespaces), use a
HelmChartRepositoryresource, notProjectHelmChartRepository. - For private repositories, add authentication fields under
connectionConfig.
Summary Table
| Method | Scope | Use Case |
|---|---|---|
| Helm CLI | Per-user (CLI only) | Quick install, dev/test, CI/CD |
| ProjectHelmChartRepository | Namespace (Web UI & CLI) | Org-wide, dev teams, UI Catalog |
| HelmChartRepository | Cluster-wide | All projects, company-wide |
References

I’m Rajesh Kumar, a DevOps, SRE, DevSecOps, Cloud, and Platform Engineering expert passionate about sharing practical knowledge, real-world experiences, and industry best practices. I have worked at Cotocus and regularly write about technology, travel, investing, health, product reviews, and digital marketing through my various platforms.
I publish technical articles at DevOps School, travel stories at Holiday Landmark, stock market insights at Stocks Mantra, health and fitness guidance at My Medic Plus, product reviews at TrueReviewNow, and SEO and digital marketing strategies at Wizbrand.
Find Trusted Cardiac Hospitals
Compare heart hospitals by city and services — all in one place.
Explore Hospitals