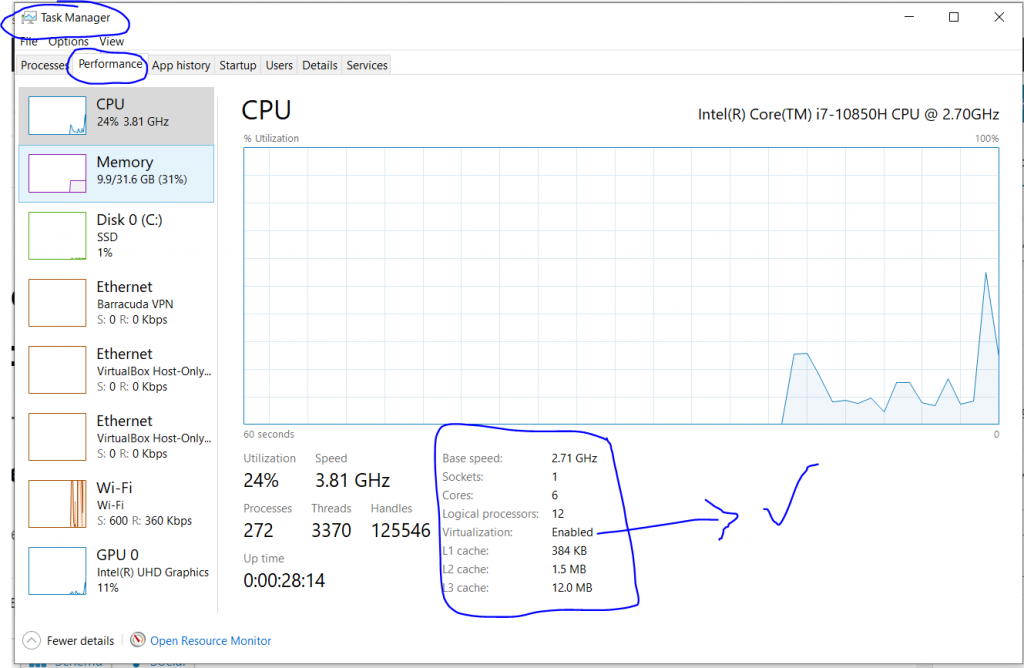
Method 1 – Using task Manager
If you have Windows 10 or Windows 8 operating system, the easiest way to check is by opening up Task Manager->Performance Tab. You should see Virtualization as shown in the below screenshot. If it is enabled, it means that your CPU supports Virtualization and is currently enabled in BIOS.
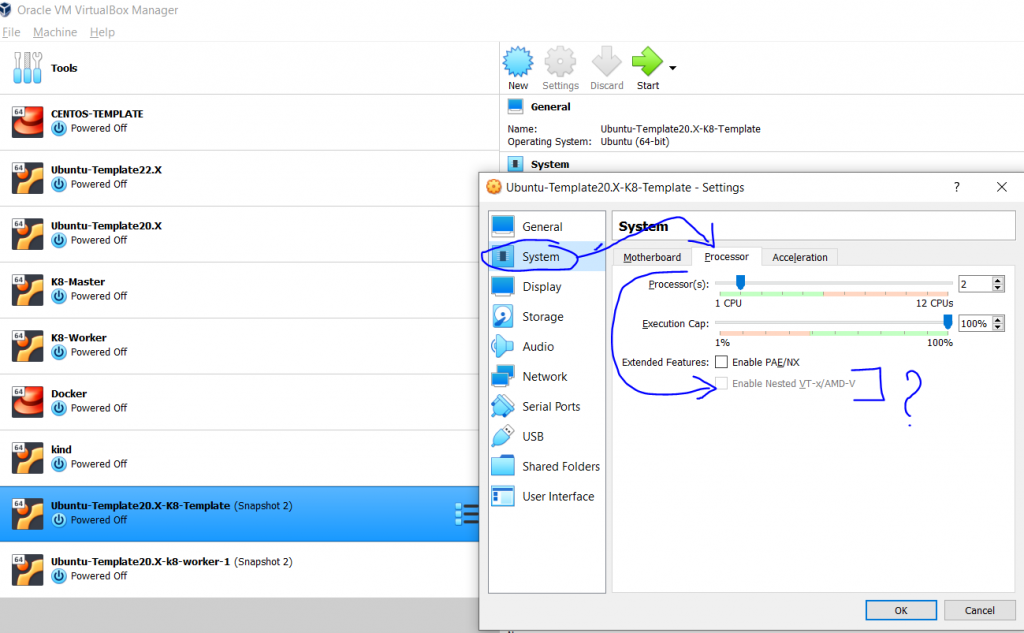
Method 2 – Checking in VMs Directly
Method 3 – using command “systeminfo”
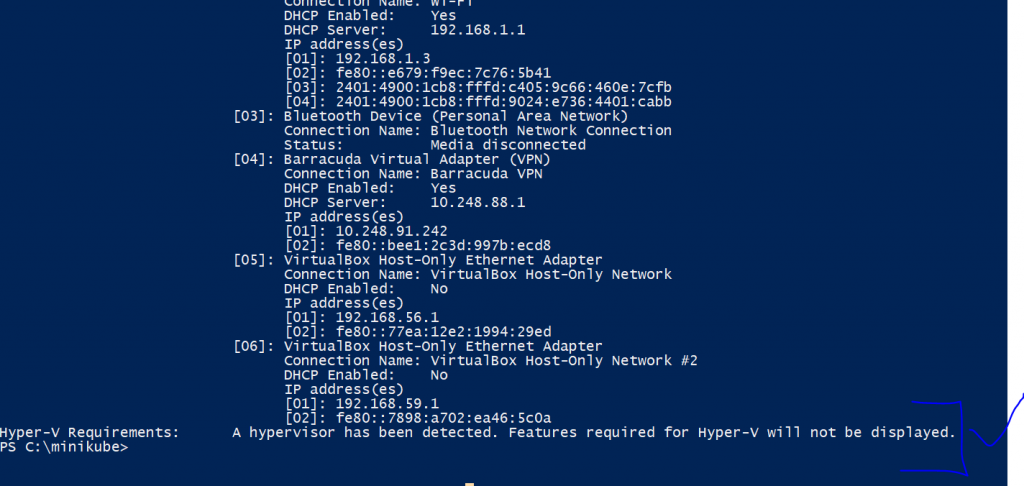
If instead you see ‘A hypervisor has been detected. Features required for Hyper-V will not be displayed’, that means Hyper-V is enabled on the system. Removing the Hyper-V feature should be enough but if Secure Boot is enabled, you’ll be prevented from removing Hyper-V because some Windows security features depend on virtualization.
Virtualbox enable nested vtx/amd-v greyed out
Execute this:

$ VBoxManage modifyvm <VirtualMachineName> --nested-hw-virt on
Code language: HTML, XML (xml)I’m Rajesh Kumar, a DevOps, SRE, DevSecOps, Cloud, and Platform Engineering expert passionate about sharing practical knowledge, real-world experiences, and industry best practices. I have worked at Cotocus and regularly write about technology, travel, investing, health, product reviews, and digital marketing through my various platforms.
I publish technical articles at DevOps School, travel stories at Holiday Landmark, stock market insights at Stocks Mantra, health and fitness guidance at My Medic Plus, product reviews at TrueReviewNow, and SEO and digital marketing strategies at Wizbrand.
Find Trusted Cardiac Hospitals
Compare heart hospitals by city and services — all in one place.
Explore Hospitals