Here’s a detailed step-by-step tutorial for each option in the GitLab Plan Section (GitLab Cloud, v18.0) — tailored for project planning, agile workflows, documentation, and requirements management.
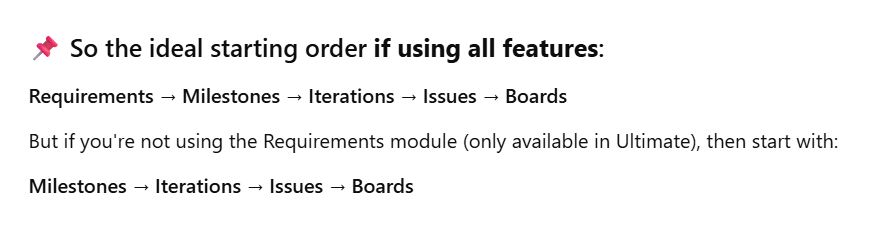
Recommended Planning Flow in GitLab (when starting a project)
| Step | Phase | GitLab Feature | Purpose |
|---|---|---|---|
| 1️⃣ | Define WHAT needs to be built | 🟩 Requirements | Capture business, product, or regulatory needs. (Ultimate only) |
| 2️⃣ | Plan HOW and WHEN to deliver | 🟦 Milestones | Group deliverables into release or delivery goals (like v1.0, Sprint 1) |
| 3️⃣ | Timebox into cycles | 🟨 Iterations | Sprint-style cadences within milestones (Premium+) |
| 4️⃣ | Break down into actionable work | 🟧 Issues | Tasks, bugs, enhancements linked to iterations/milestones |
| 5️⃣ | Visualize & track | 🟪 Issue Boards | Kanban-style tracking, filtered by label, assignee, milestone, iteration |
🧭 Practical Real-World Sequence
✅ When to Start with Requirements:
- Product-led development
- Regulated domains (finance, healthcare, aerospace)
- Want formal validation/testing of features
✅ When to Start with Milestones:
- Feature list is informal or evolving
- Milestone = release or sprint (without strict formal requirements)
✅ When to Start with Issues:
- You’re working in a fast prototype or MVP mode
- Immediate backlog execution without long-term roadmap
🧭 Step-by-Step Tutorial: GitLab Cloud – Plan Section (GitLab 18.0)
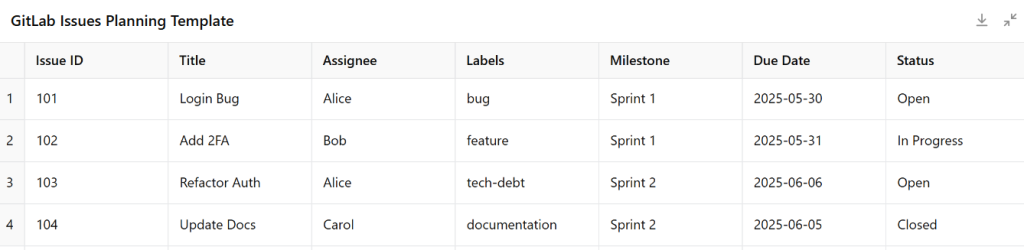
📝 1. Issues – Track Bugs, Tasks, Features
✅ Purpose:
Track unit-level work like bugs, user stories, enhancements.
🚀 Steps:
- Go to your GitLab project.
- Click
Plan→Issues. - Click “New Issue”.
- Fill in:
- Title: “Fix login bug”
- Description: Markdown supported. You can add checklist:
- [ ] Reproduce bug- [ ] Fix session token - Assign to a team member
- Add Labels, Milestone, Due Date
- Optional: use slash commands in comments:
/assign @devuser/label ~bug ~frontend/estimate 3h
💡 Tips:
- Link issues to Merge Requests via keywords in MR:
Closes #123 - Use time tracking:
/spend 2h,/estimate 4h
🧮 2. Issue Boards – Agile Kanban Views
✅ Purpose:
Track status (To Do, In Progress, Done) visually using drag-and-drop.
🚀 Steps:
- Go to
Plan→Issue Boards. - By default, you’ll see one board. Click Edit Board or New Board to create a new one.
- Add Lists based on Labels (e.g.):
To Do→~todoDoing→~doingDone→~done
- Drag issues from one list to another to update status (updates the label automatically).
- Use filters for Assignee, Milestone, Iteration.
💡 Tips:
- Create separate boards for different teams or epics.
- Use label automation in
.gitlab-ci.ymlto auto-update status.
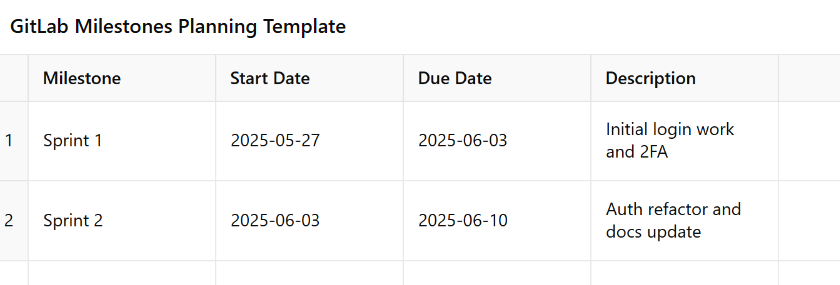
📅 3. Milestones – Track Progress by Release or Goal
✅ Purpose:
Bundle issues under a goal or time window (e.g., Sprint 5, Release v1.0).
🚀 Steps:
- Navigate to
Plan→Milestones. - Click New Milestone.
- Add:
- Title: “Release v1.0”
- Start Date / Due Date
- Description
- While creating/editing issues, assign them to this milestone.
- Return to Milestones list to view:
- Issue completion progress bar
- Open vs closed issues
- Burnup chart
💡 Tips:
- Use milestones for product releases or monthly OKRs.
- Combine with boards or iterations.
🔁 4. Iterations – Agile Sprint Planning (Premium+)
NOTE – Creating a Iteration can be done at GROUP level only. Not at the project Level
✅ Purpose:
Timeboxed cycles (sprints) for iterative development.
🚀 Steps:
Requires GitLab Premium or Ultimate
- Navigate to
Plan→Iterations. - Click New Iteration or Create Cadence for auto-generated recurring sprints.
- Fill in:
- Title: “Sprint 11”
- Start Date / End Date
- Optional: description
- Assign issues to this iteration.
- View iteration velocity, completed issues, and upcoming work.
💡 Tips:
- Use weight in issues for sprint capacity planning.
- Combine with Issue Boards filtered by iteration.
📚 5. Wiki – Built-in Documentation System
SAMPLE – https://gist.github.com/devops-school/f8a88b7305f5ace9b3e9aad0d01b9ccd
✅ Purpose:
Document project usage, architecture, onboarding, etc.
🚀 Steps:
- Navigate to
Plan→Wiki. - Click Create your first page (or “New Page”).
- Add:
- Title: “Getting Started”
- Content: Markdown supported
- Commit message
- Save page.
- Use
[link text](PageTitle)for internal wiki linking.
💡 Tips:
- Use
_sidebar.mdto create a custom navigation panel. - Git-backed: clone/edit Wiki via Git.
📋 6. Requirements – Track Formal Product Requirements (Ultimate)
✅ Purpose:
Define and manage structured requirements, linked to validation/testing.
🚀 Steps:
Requires GitLab Ultimate
- Navigate to
Plan→Requirements. - Click New Requirement.
- Add:
- Title: “User must log in with 2FA”
- Description: Clearly define acceptance criteria
- Link this requirement to:
- Issues
- Merge Requests
- Validation jobs (via CI test results)
- Track test results in GitLab to mark requirement as passed/failed.
💡 Tips:
- Best for regulated industries (healthcare, finance).
- Combine with CI pipeline and test reports to automate validation.
✅ Summary Table
| Menu Option | Use Case | Feature Tier | Key Actions |
|---|---|---|---|
| Issues | Task, bug, feature tracking | Free | Create, assign, label, time tracking |
| Issue Boards | Kanban/scrum task board | Free | Drag-drop, list by label or milestone |
| Milestones | Group by deadline/release | Free | Track sprint or release progress |
| Iterations | Agile sprints | Premium+ | Timeboxed recurring cadences |
| Wiki | Documentation | Free | Markdown-based, Git-backed |
| Requirements | Product validation | Ultimate | Define, trace, validate system requirements |
Results
Step-by-Step: How to Create Iterations in GitLab
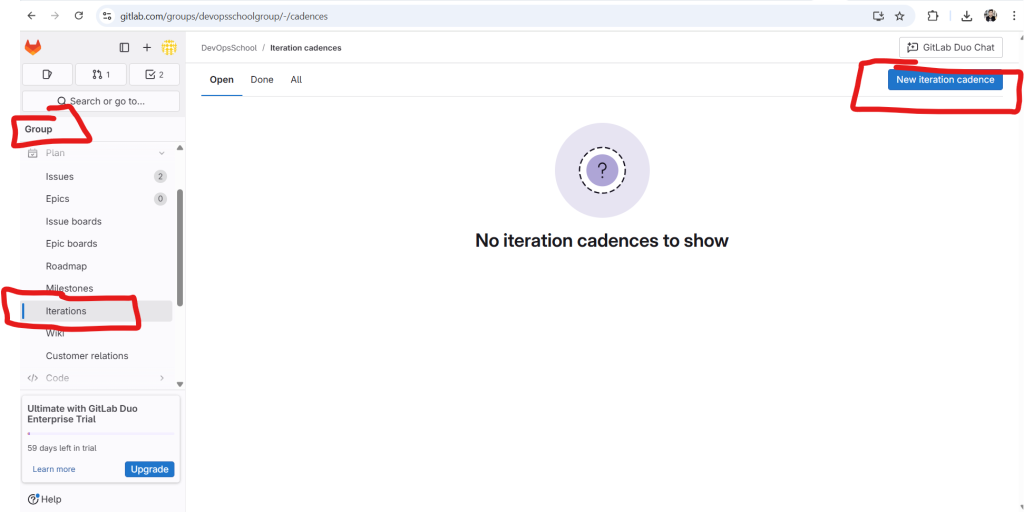
Thanks for the screenshot! You’re on the Iterations page in GitLab Cloud, but seeing “No iteration cadences to show” and no visible “Create Iteration” button. This confusion is common — here’s the clarification:
✅ How Iterations Work in GitLab (v18.0)
In GitLab, you must first create an Iteration Cadence — only then can you define individual iterations (sprints).
🧭 Step-by-Step: How to Create Iterations in GitLab
🔐 Prerequisites:
- Iterations require GitLab Premium or Ultimate (you’re currently on an Enterprise Trial, so you’re eligible!)
- You must have Owner or Maintainer permissions in the group/project.
✅ Step 1: Navigate to Group-Level Iterations (not just project-level)
Iterations must be created at the group level (even if visible in a project).
In your URL:
https://gitlab.com/groups/devopsschoolgroup/-/iterations
Code language: JavaScript (javascript)
OR
- Go to:
Group > Plan > Iterations - If you see: “No iteration cadences to show”
👉 Click “New Iteration Cadence” (usually in upper-right, may be hidden under⋮menu on some screens).
✅ Step 2: Create Iteration Cadence
- Cadence name: “Bi-weekly Sprint”
- Start date: (e.g., today)
- Duration: 1 or 2 weeks (common in agile)
- Automatic scheduling: Optional, enables rolling iterations
- Click Create Cadence
✅ Step 3: Add or Auto-generate Iterations
Once cadence is created:
- You can manually add iterations (with name, start & end dates), or
- Enable Auto-scheduling in cadence → GitLab will create recurring sprints.
✅ Step 4: Assign Issues to Iterations
- Go to any issue → Edit
- Find the Iteration field → Select from dropdown
Now you can use Iterations in:
- Boards (filter by iteration)
- Issue analytics
- Burndown/velocity charts (Premium+)
💡Troubleshooting
| Symptom | Fix |
|---|---|
| “No iteration cadences to show” | You’re likely in project-level view. Go to group-level Plan > Iterations |
| No “New Cadence” button | Ensure you’re an Owner/Maintainer at group level and using Premium+ |
| Iteration not visible in issue | Confirm cadence is active and current iteration overlaps with today’s date |
DevOpsSchool Markdown Reference
SAMPLE – https://gist.github.com/devops-school/f8a88b7305f5ace9b3e9aad0d01b9ccd
I’m Rajesh Kumar, a DevOps, SRE, DevSecOps, Cloud, and Platform Engineering expert passionate about sharing practical knowledge, real-world experiences, and industry best practices. I have worked at Cotocus and regularly write about technology, travel, investing, health, product reviews, and digital marketing through my various platforms.
I publish technical articles at DevOps School, travel stories at Holiday Landmark, stock market insights at Stocks Mantra, health and fitness guidance at My Medic Plus, product reviews at TrueReviewNow, and SEO and digital marketing strategies at Wizbrand.
Find Trusted Cardiac Hospitals
Compare heart hospitals by city and services — all in one place.
Explore Hospitals