How to Login with Facebook, GOOGLE and twitter in Laravel?
Step 1. Firstly, Create a new Project in Laravel, so open git bash. Write down the following command:-
$ composer create-project --prefer-dist laravel/laravel multilogin "5.8.*"Code language: JavaScript (javascript)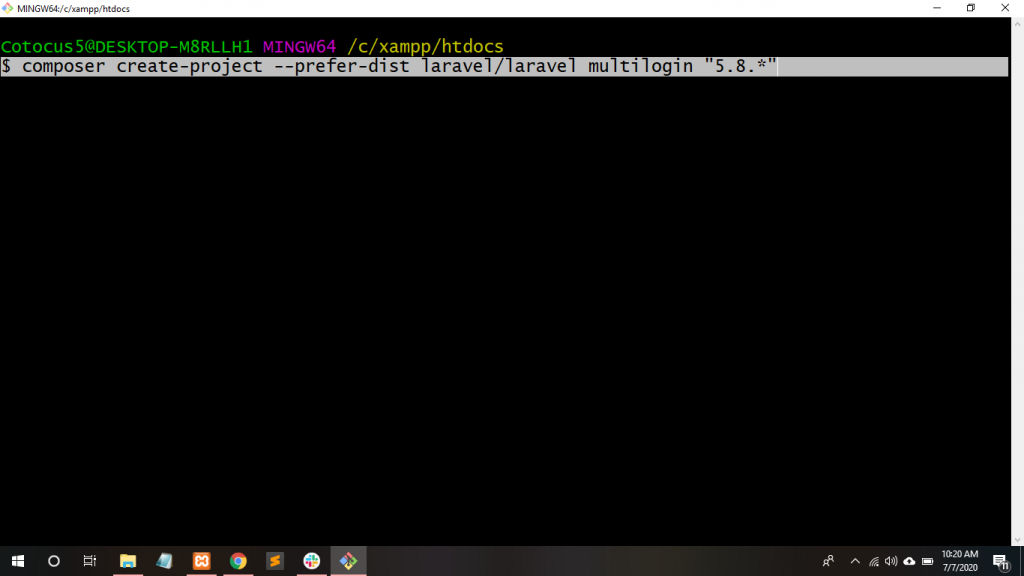
Step 2. Now, Move to project directory on git Bash, so write down the following command:-
$ cd multilogin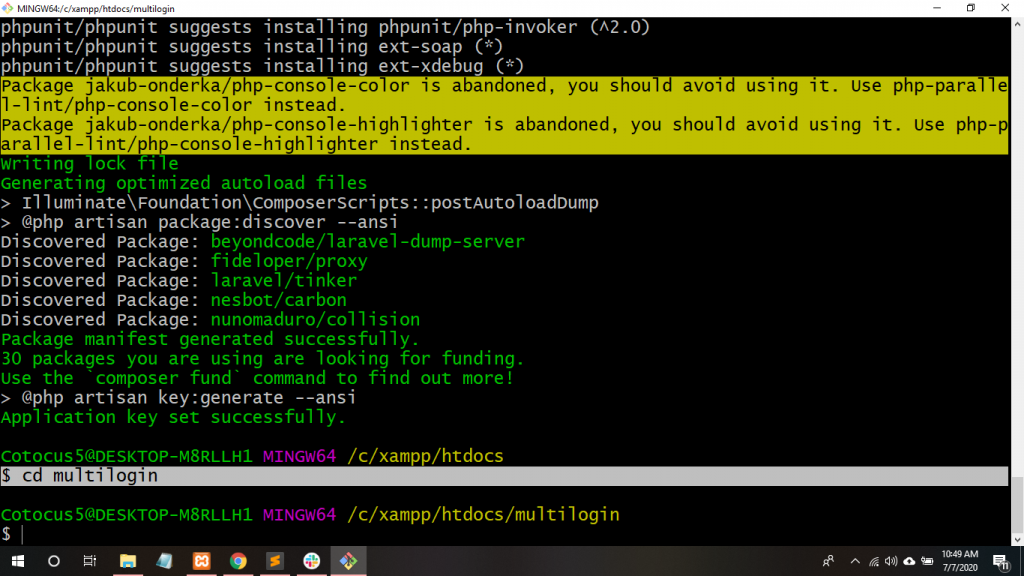
Step 3. Now, install the package of Socialite in git Bash use of composer which provides the interface to OAuth authentication with Google, Facebook, Twitter, and so on. Therefore, write down the following command:
$ composer require laravel/socialiteCode language: JavaScript (javascript)Step 4. So, Create a Database for this and Go to XAMPP server->phpMyAdmin->Click New Database-> multilogin.
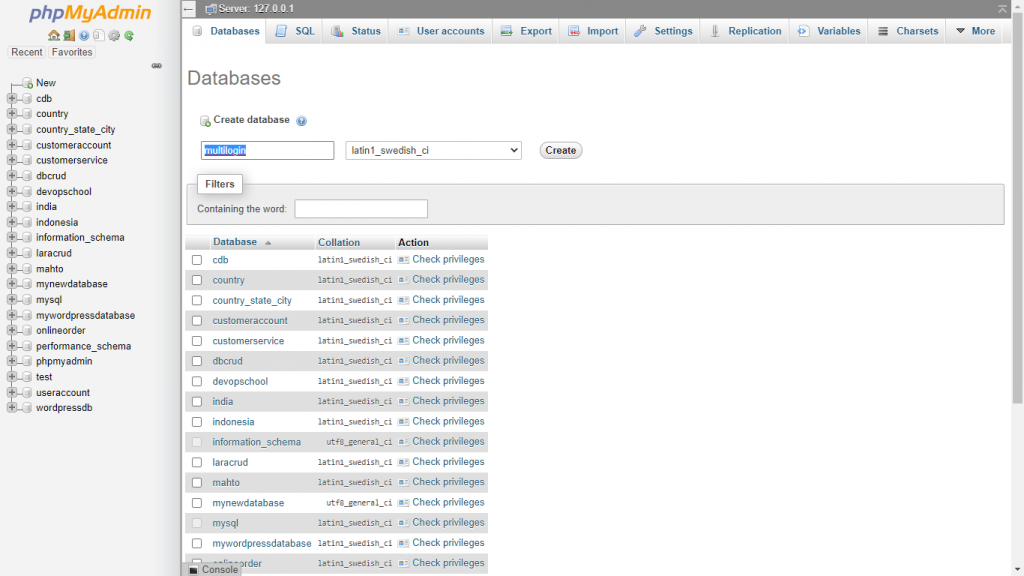
Mysql Database connection Laravel
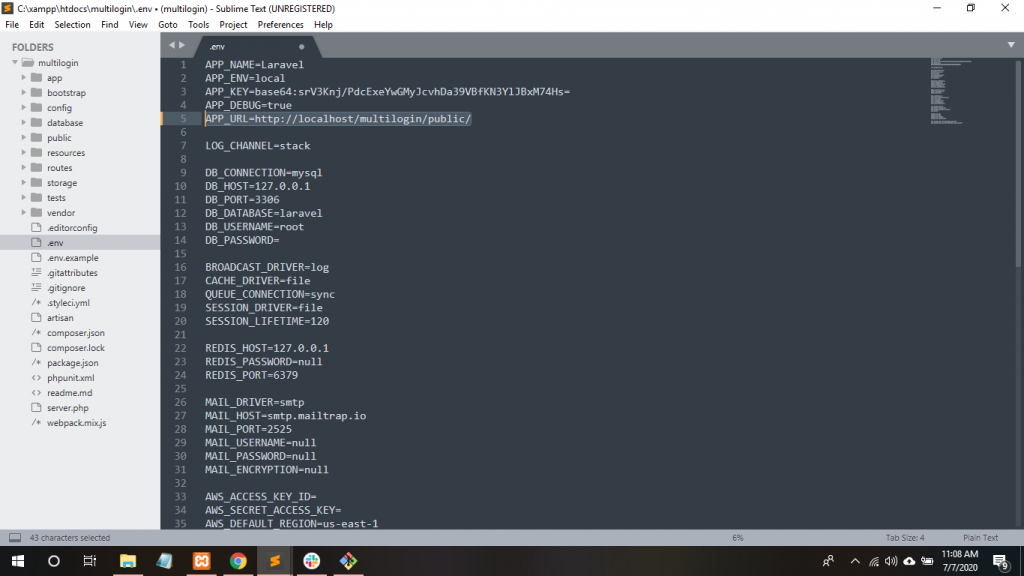
Step 5. Now, Go to .env file to set the project path and give the project DB_DATABASE name and DB_USERNAME name.

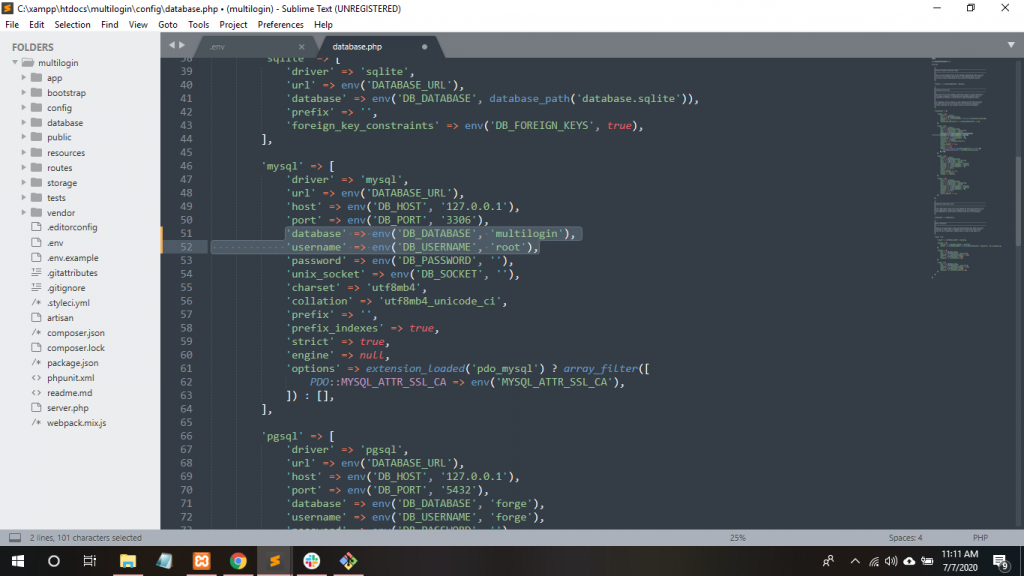
Step 6. Now, Go to config/database.php give the project DB_DATABASE name and DB_USERNAME name.
Step 7. So, Create the user authentication scaffolding and write down this command:
php artisan make:authCode language: CSS (css)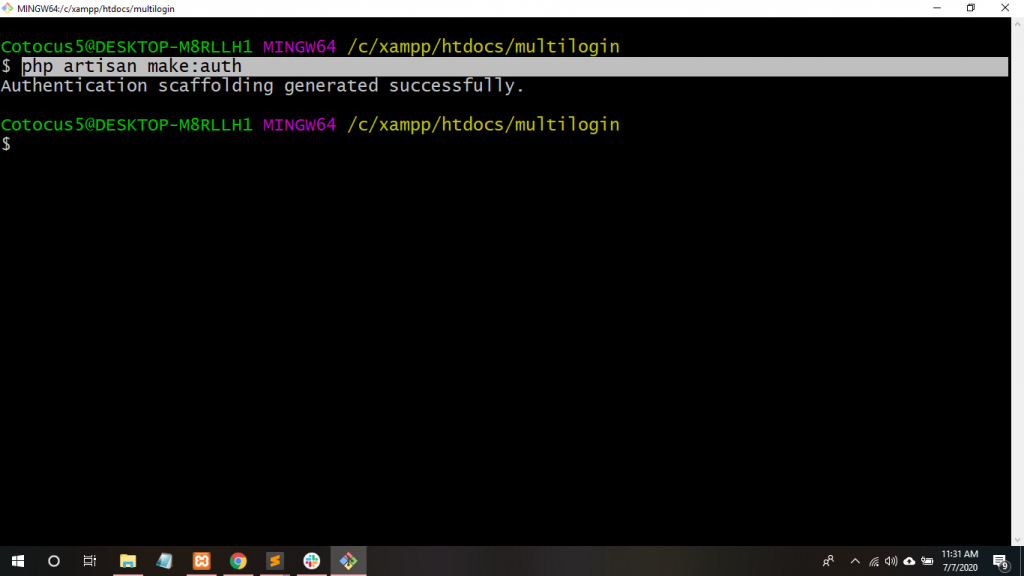
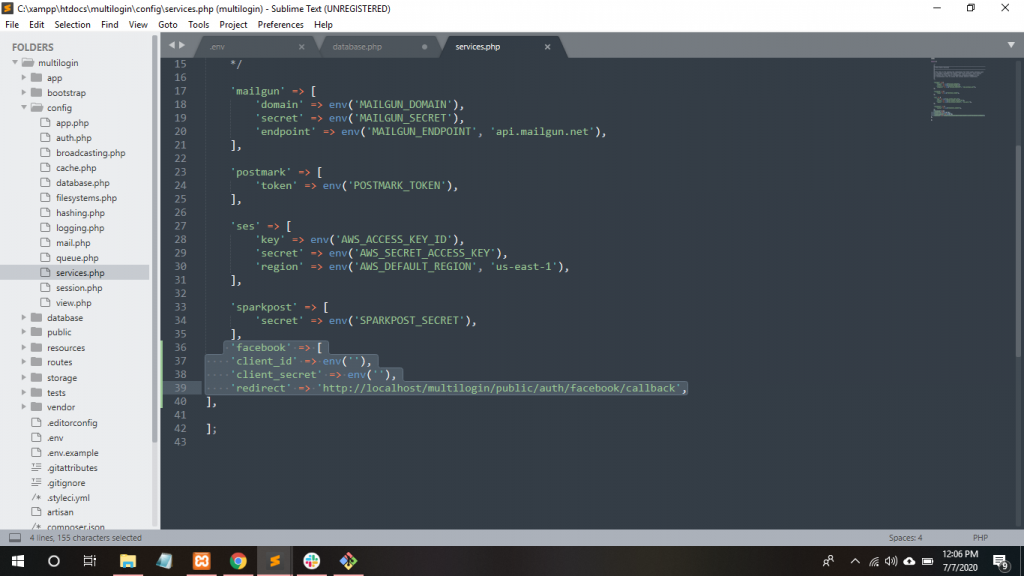
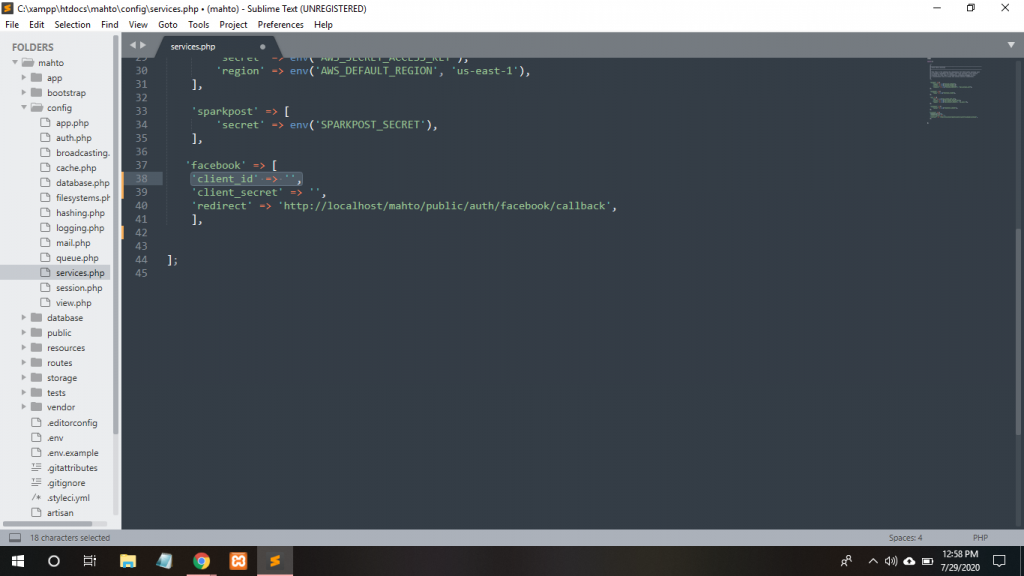
Step 8. Now, add credentials for the OAuth services in your project config/services.php configuration file. First, we’ll use the Facebook key here.
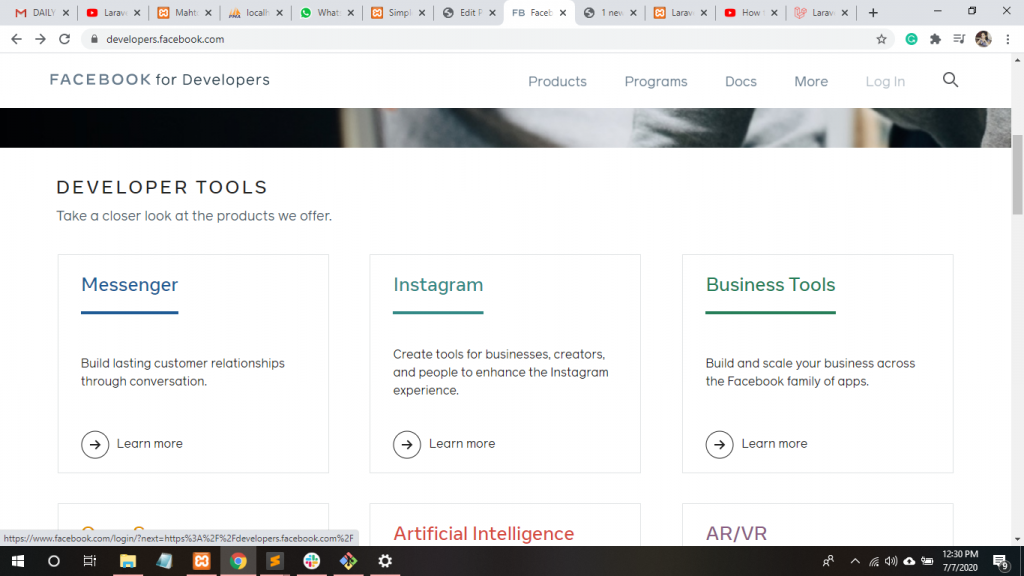
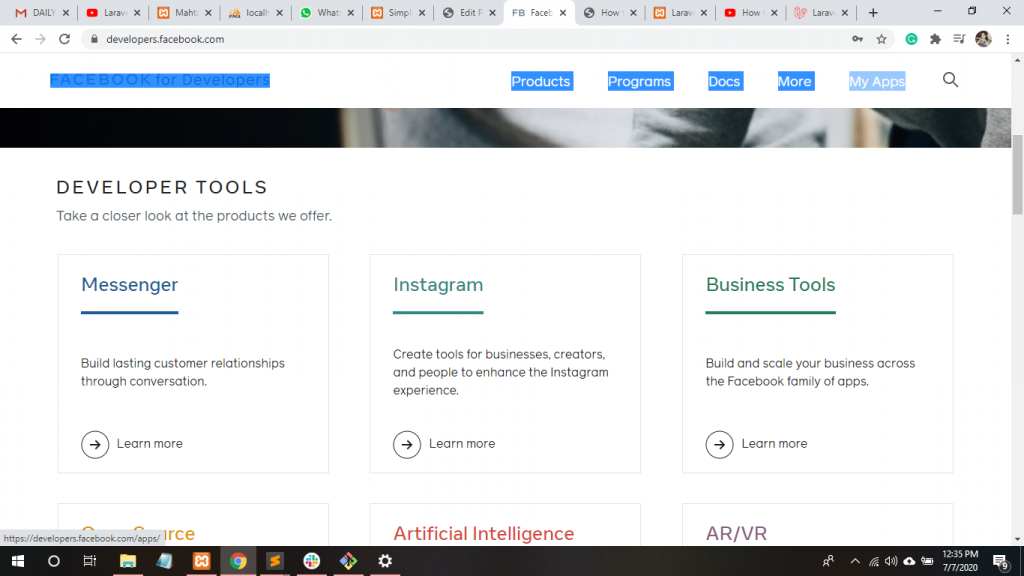
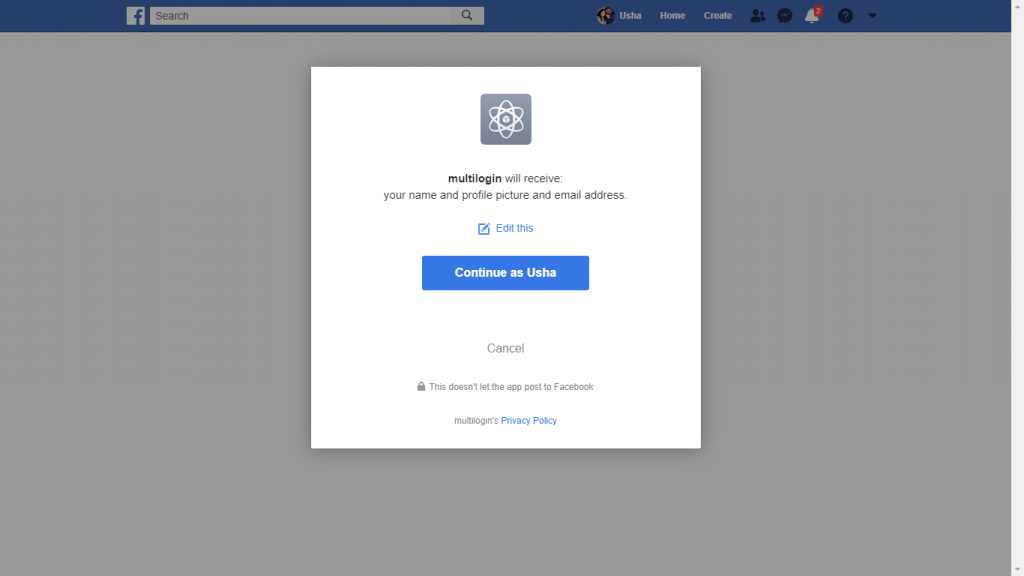
Step 9. So, Go to this URL https://developers.facebook.com to generate client_id and client_secret of Facebook. Click Login Button and Log in with Facebook.

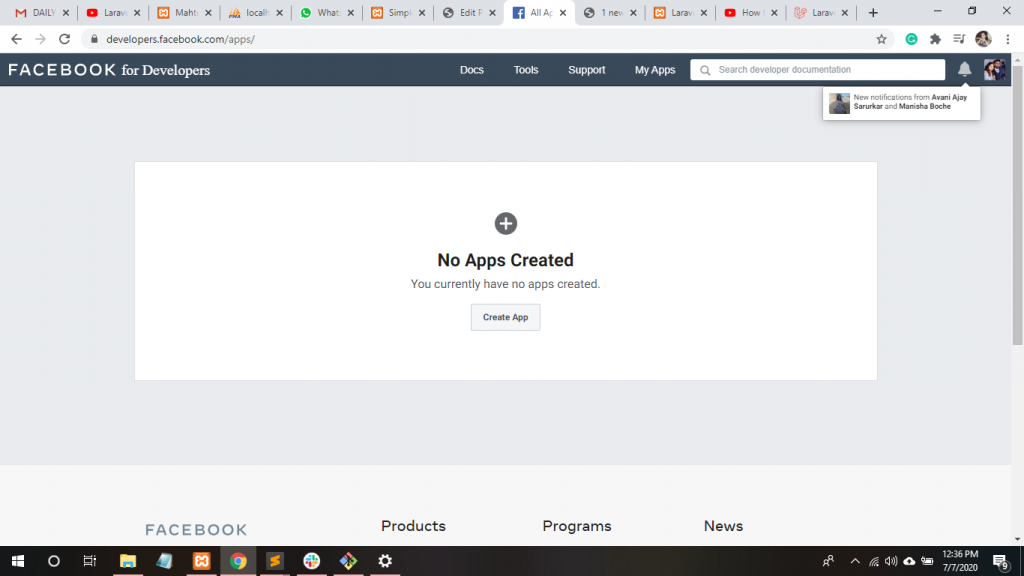
Step 10. Click My Apps.
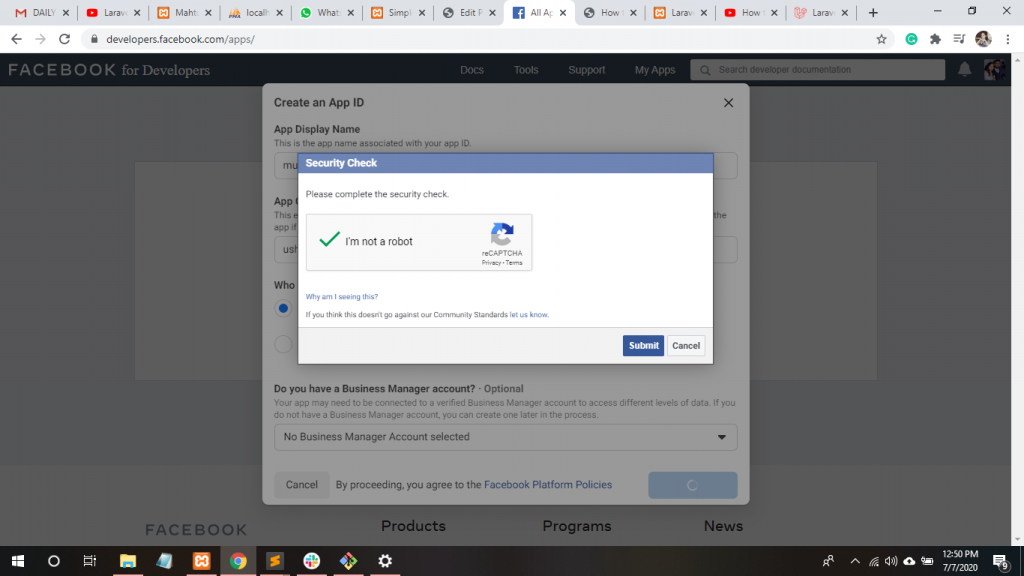
Step 11. After that, Click on Create App button.
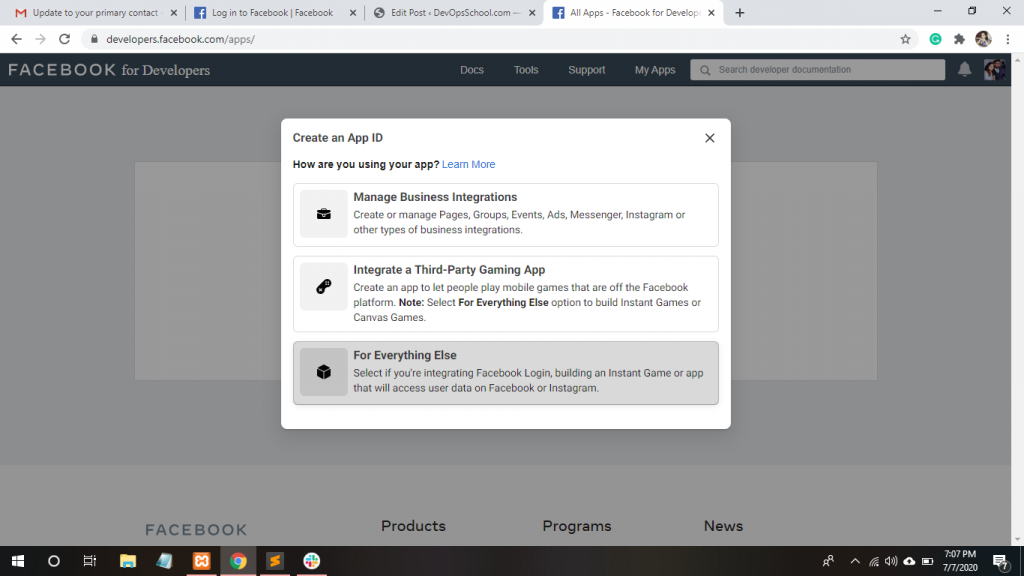
Step 12. Now, Click the third one option or as your required.
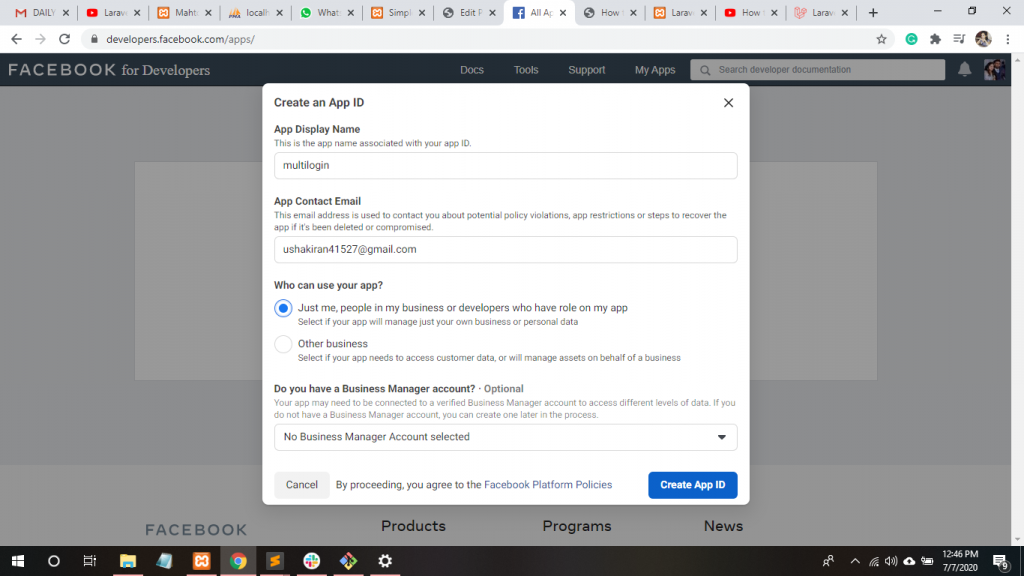
Step 13. Firstly, fill the App Name and Check on who can use your app according to your required.
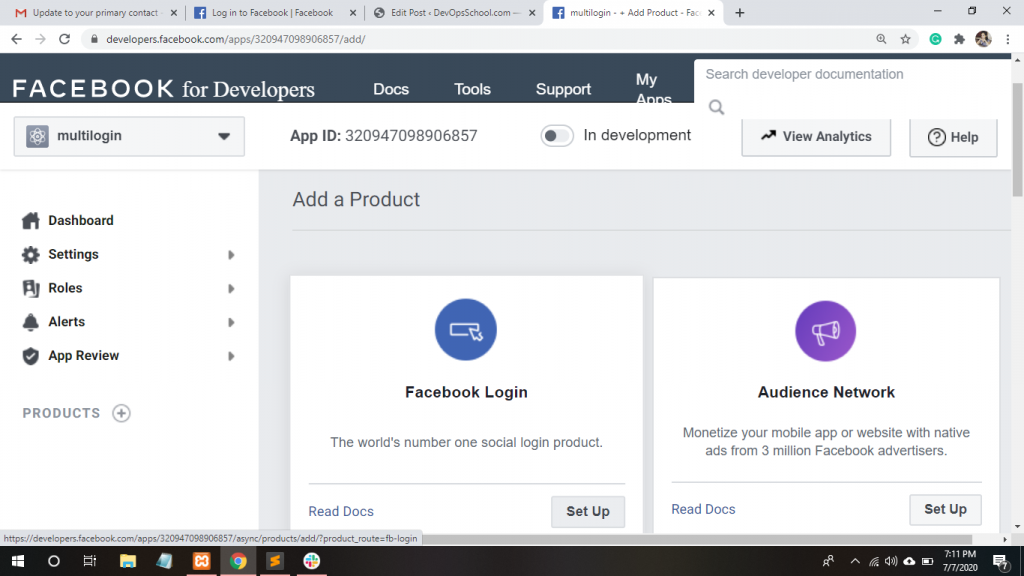
Step 14. Now, Add Product to your App and Click Set Up button of Facebbok Login.
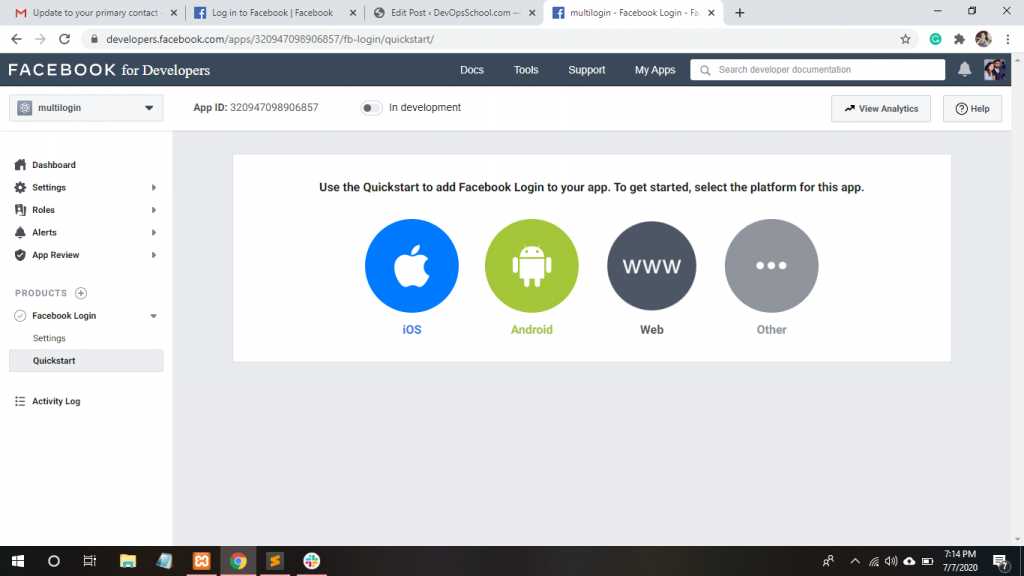
Step 15. Click on WWW .
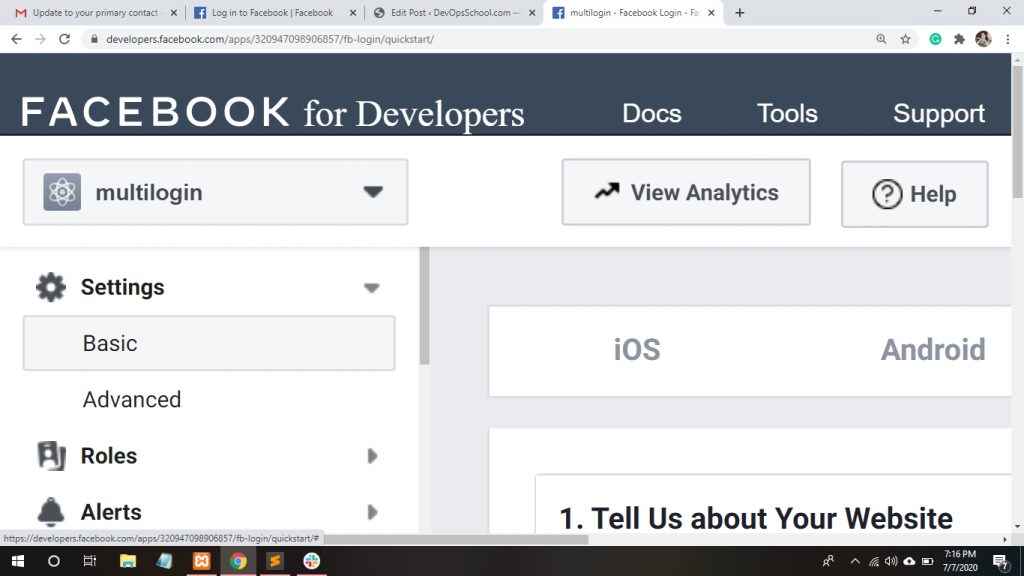
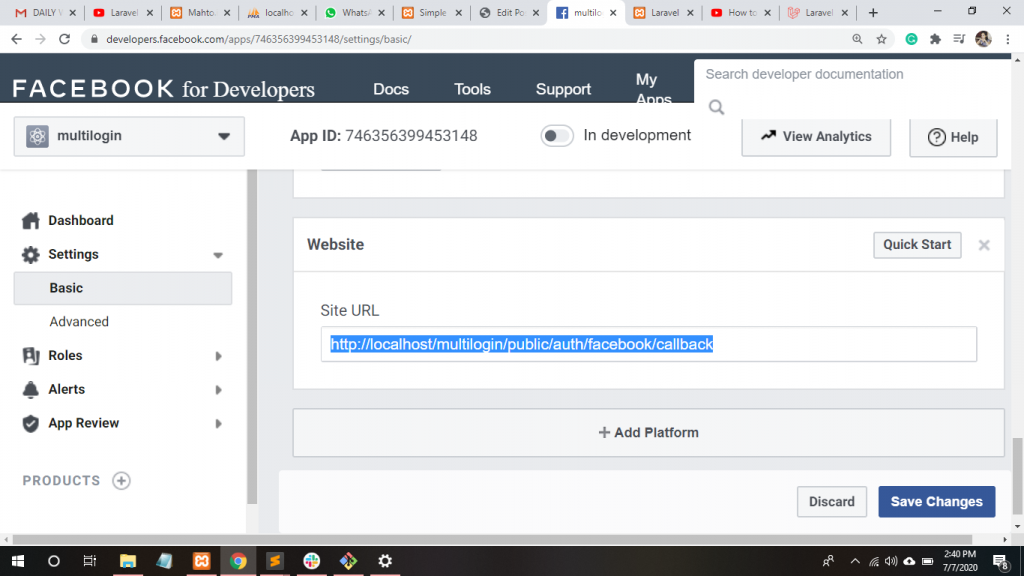
Step 16. Click on Settings -> Basic.
Step 17. After that, Click on Facebook Login -> Settings.
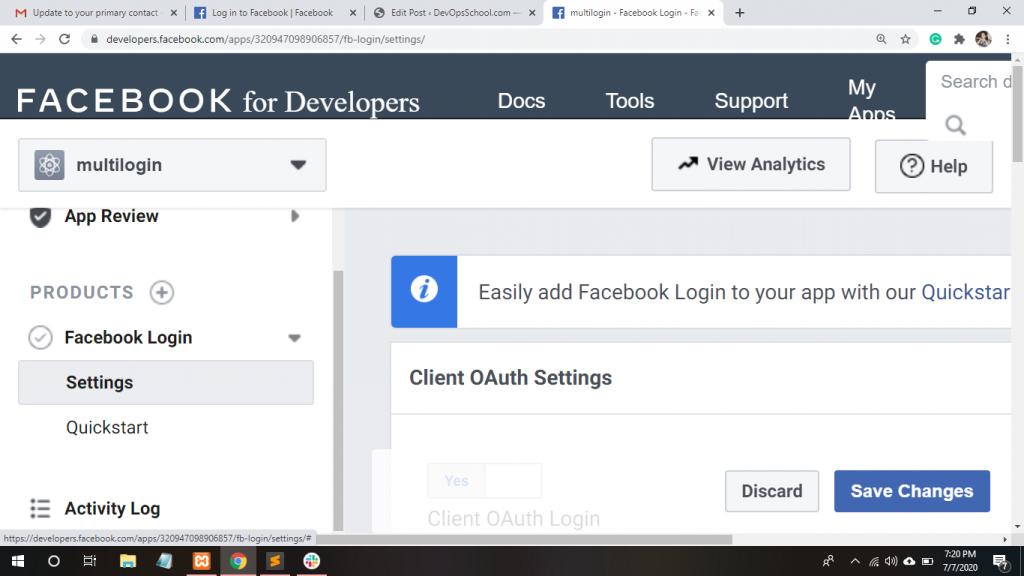
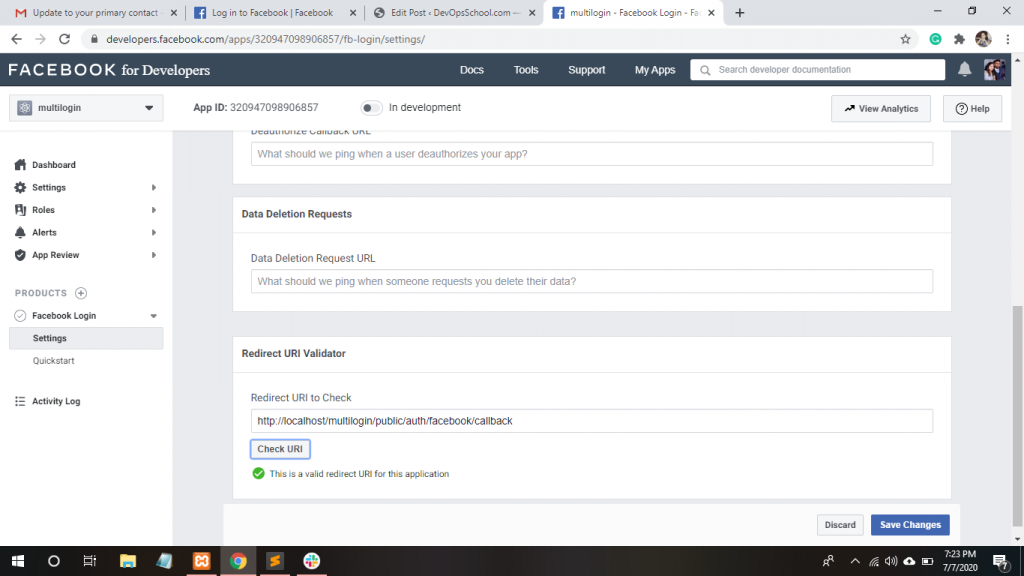
Step 18. Redirect URI to Check and Save Changes.
Step 19. Now, Set the path of the Project and Save changes within Settings/Base.
App ID
Step 20. Now, Copy App ID and Paste into Config/services.php file.
App Secret
Step 21. Copy App Secret and Paste into Config/services.php file.

Step 22. Now, Create a SocialProvider model, so write down the following command.
$ php artisan make:model -m SocialProvider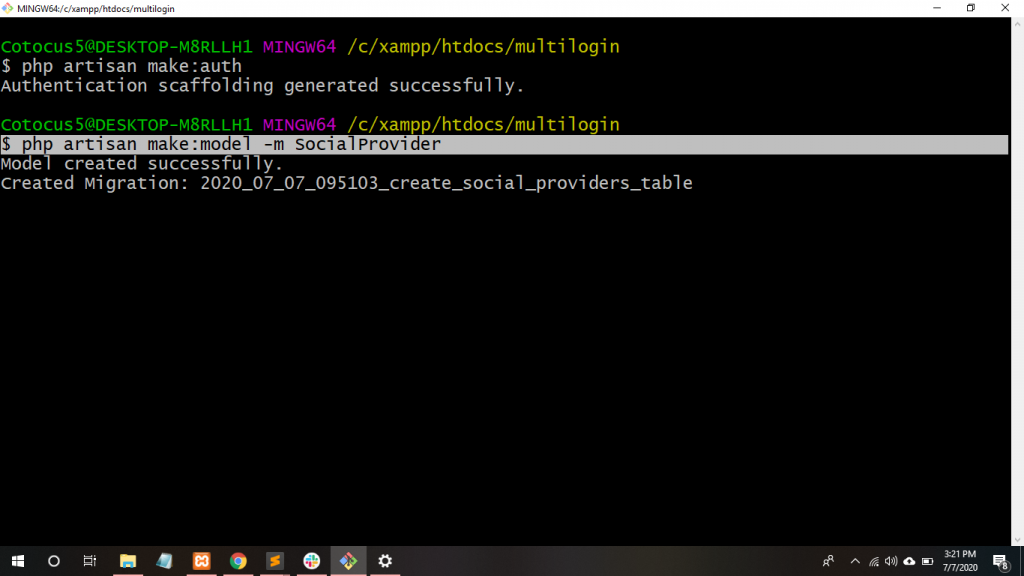
Step 23. Add user and provider id into the database/migrations/SocialProvider table file.
 $table->integer('user_id')->unsigned()->references{'id'}->on{'users'};
            $table->string('provider_id');
            $table->string('provider');Code language: PHP (php)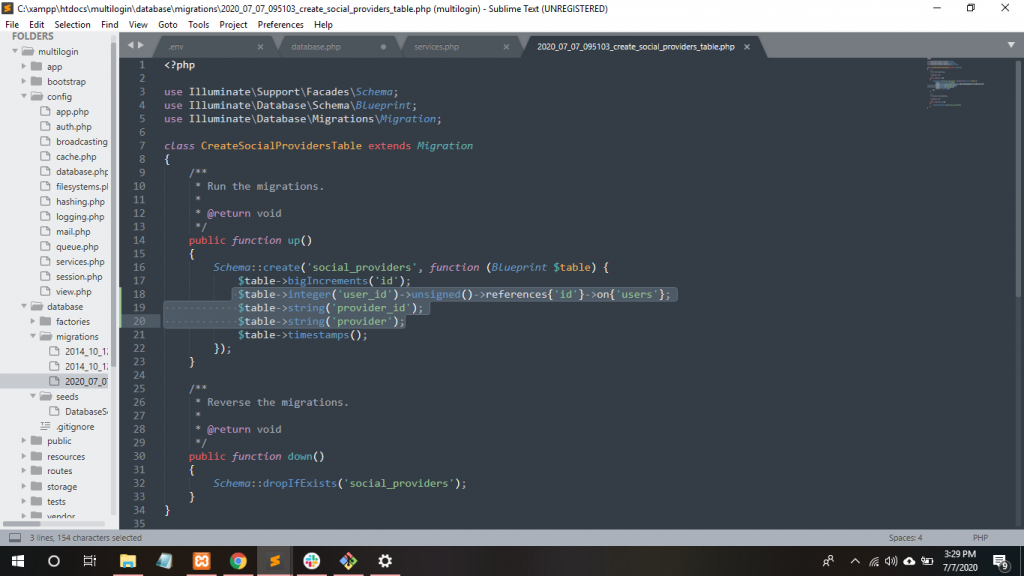
Step 24. Thereafter, Migrate the SocialProvider table into the MySQL database. Write the following command within git Base.
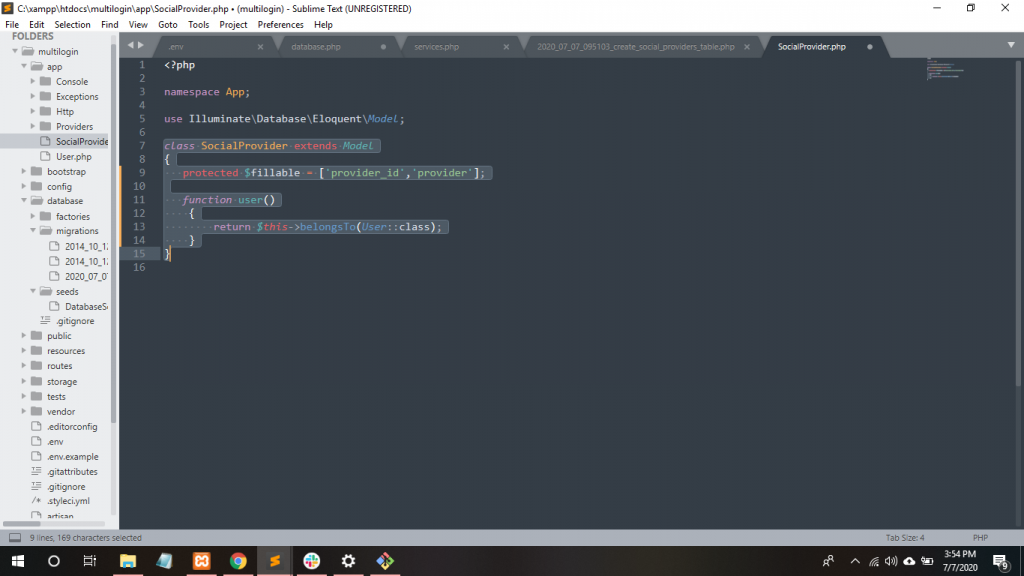
$ php artisan migrateStep 25. Go to App/SocialProvider.php file and write down the following code:
Step 26. Go to App/User.php file and write down the following code:
     function socialProviders()
    {
        return $this->hasMany(SocialProvider::class);
    }Code language: JavaScript (javascript)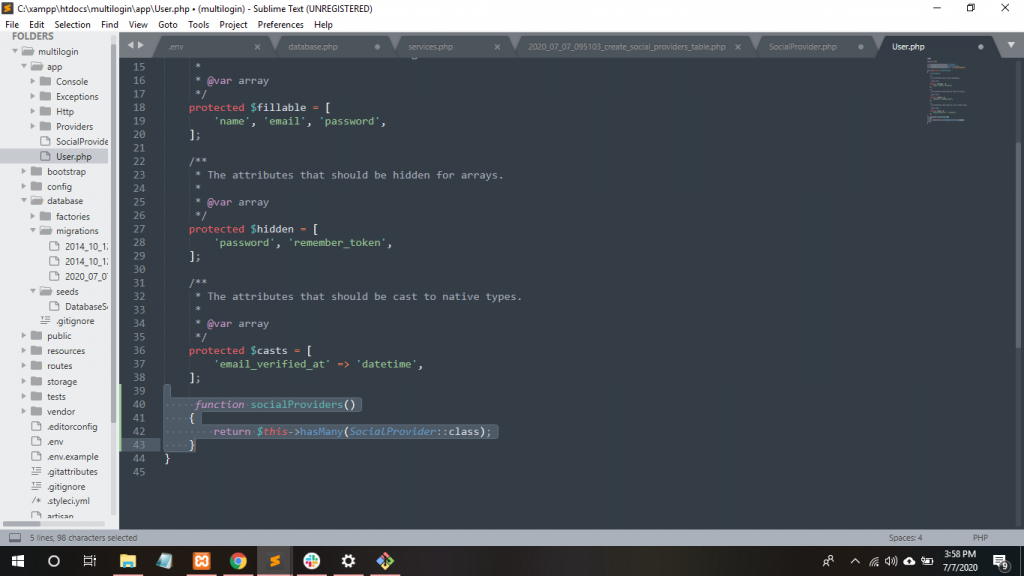
Step 27. So, Go to this URL https://laravel.com/docs/7.x/socialite#introduction to get the method asking for authentication and information.
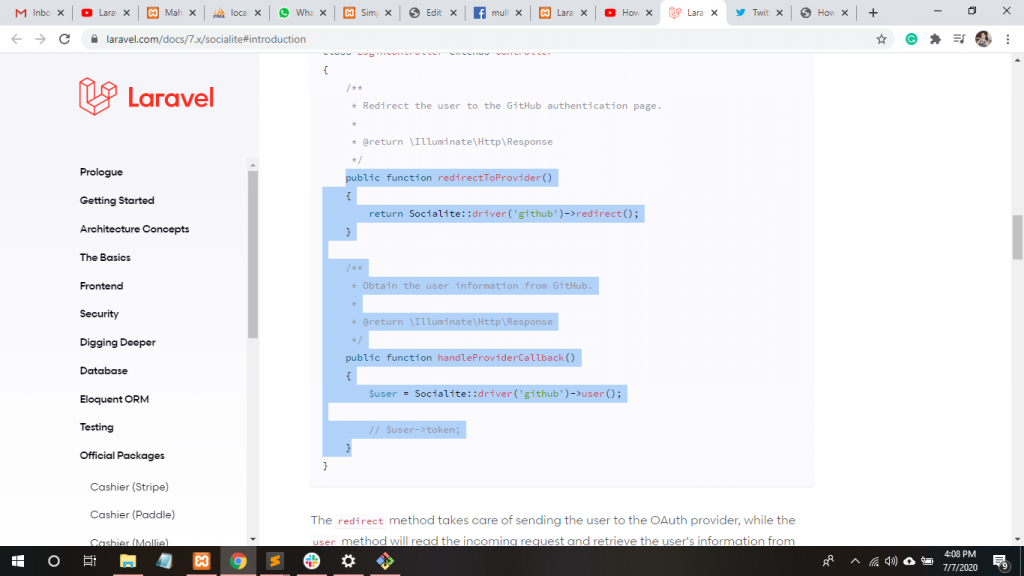
Step 28. Then, paste into app/Http/Controllers/Auth/RegisterController.php file.
public function redirectToProvider()
    {
        return Socialite::driver('facebook')->redirect();
    }
    public function handleProviderCallback()
    {
        $user = Socialite::driver('facebook')->user();
          return $user->getEmail();
    }Code language: PHP (php)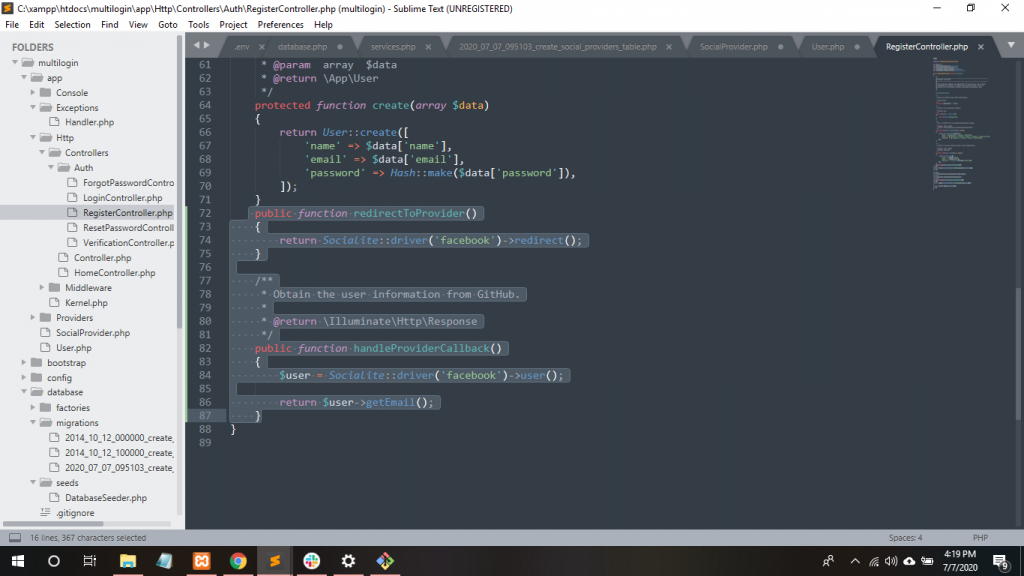
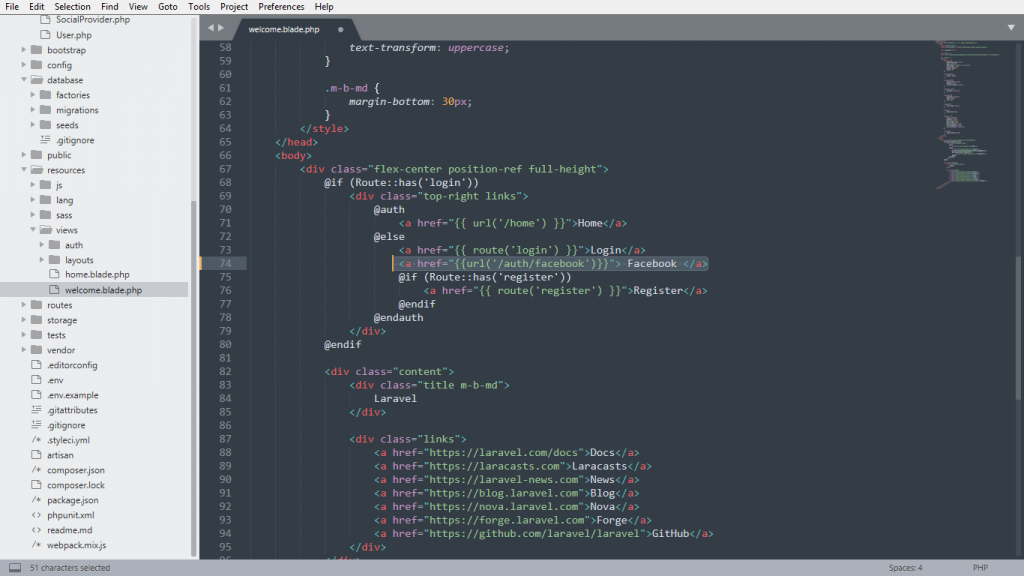
Step 29. Go to resources/views/welcome.blade.php file and write down this following code:
Step 30. Then, go to routes/web.php file and define all these routes.
Route::get('auth/{provider}', 'Auth\RegisterController@redirectToProvider');
Route::get('auth/{provider}/callback', 'Auth\RegisterController@handleProviderCallback');
Code language: PHP (php)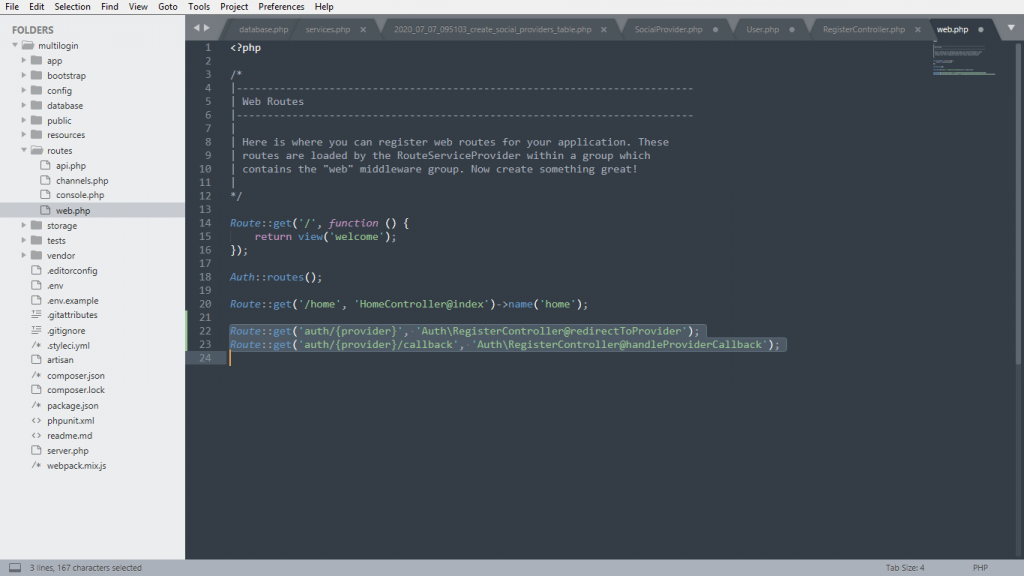
Step 31. After that, use Socialite and SocialProvider Class inside app/Http/Controllers/RegisterController.php file.
use Socialite;
use App\SocialProvider;Code language: PHP (php)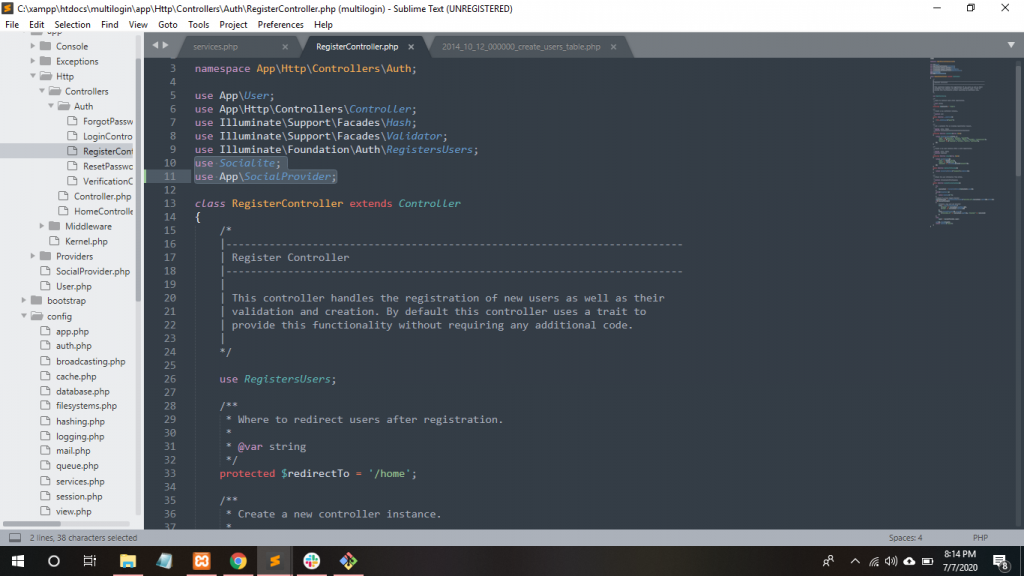
Step 32. Set the password null in the database as well inside the database/migrations/users table.
$table->string('password')->nullable();Code language: PHP (php)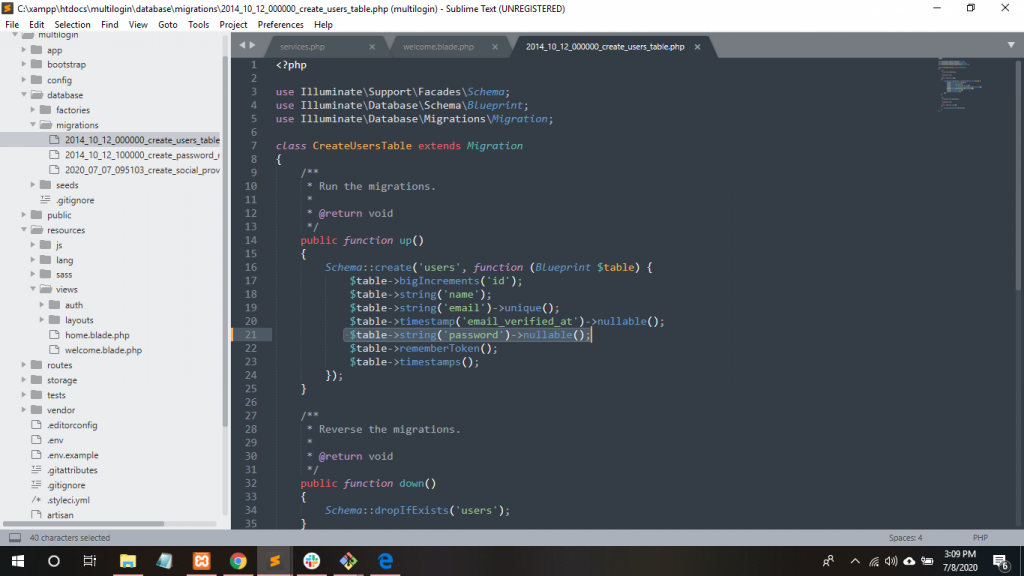
Step 33. Before run your project, just clear the cache.
$ php artisan c:cache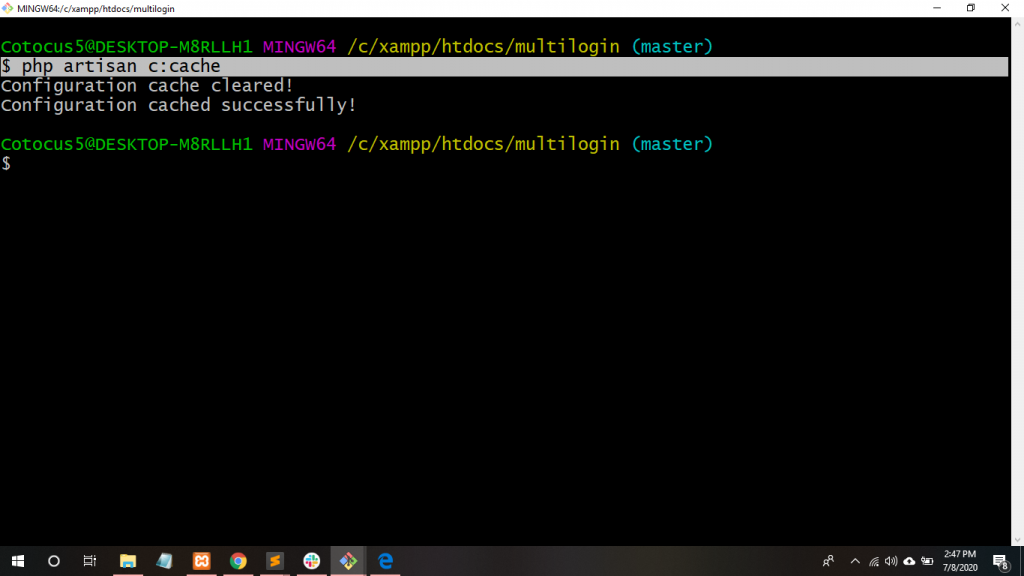
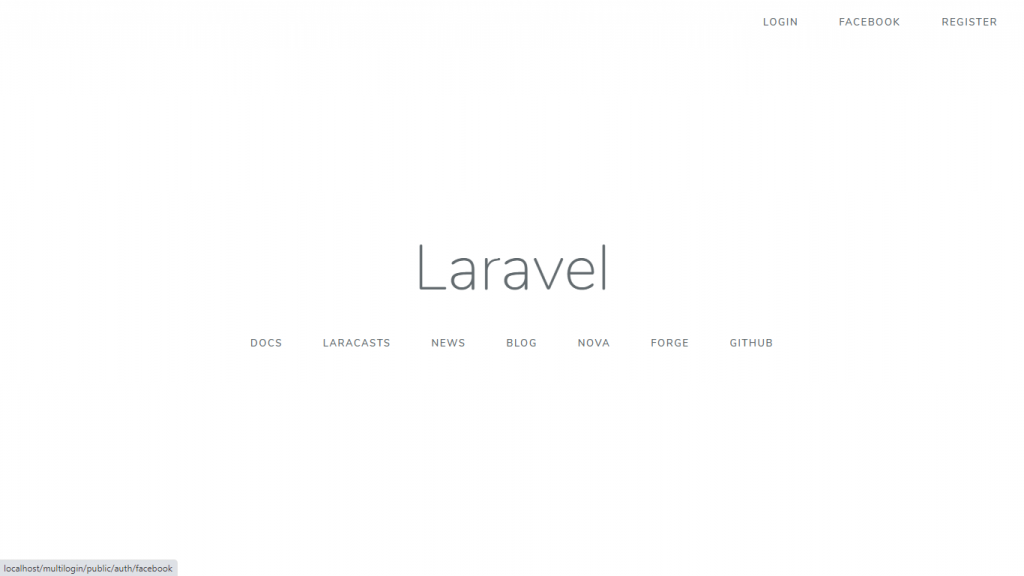
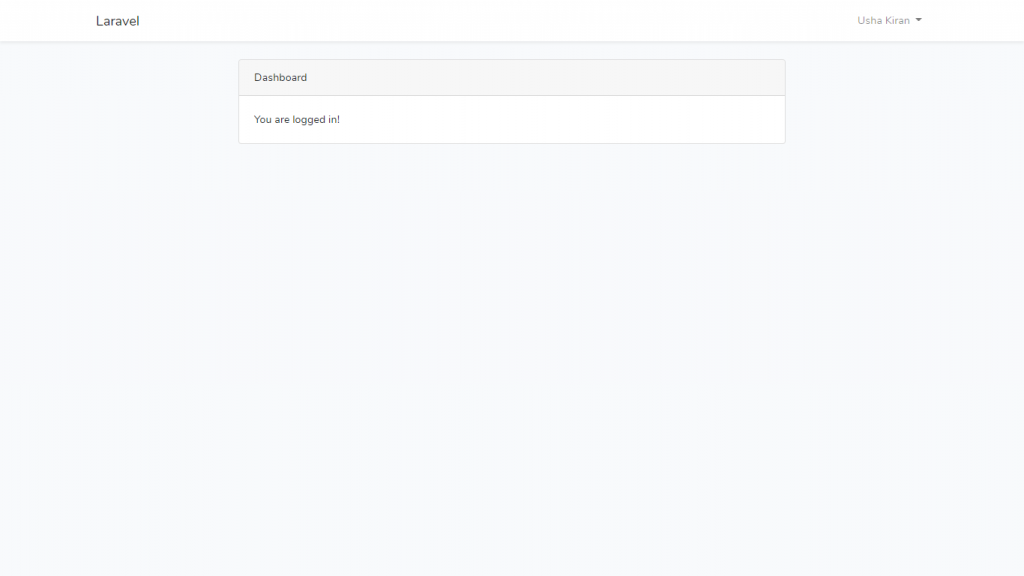
Run the Project URL
Thanks
With MotoShare.in, you can book a bike instantly, enjoy doorstep delivery, and ride without worries. Perfect for travelers, professionals, and adventure enthusiasts looking for a seamless mobility solution.
Find Trusted Cardiac Hospitals
Compare heart hospitals by city and services — all in one place.
Explore Hospitals