How To Install and Use PostgreSQL on Ubuntu?
Step 1 — Installing PostgreSQL
$ sudo apt update
$ sudo apt install postgresql postgresql-contrib
$ sudo systemctl start postgresql.service
Step 2 — Using PostgreSQL Roles and Databases
The installation procedure created a user account called postgres that is associated with the default Postgres role. In order to use Postgres, you can log into that account.
Switch over to the postgres account on your server by typing:

$ sudo -i -u postgres

You can now access a Postgres prompt immediately by typing:
$ psql

This will log you into the PostgreSQL prompt, and from here you are free to interact with the database management system right away.

Exit out of the PostgreSQL prompt by typing:
> \q
This will bring you back to the postgres Linux command prompt.

Accessing a Postgres Prompt Without Switching Accounts
$ sudo -u postgres psql
> \qCode language: JavaScript (javascript)
Step 3 — Creating a New Role
Currently, you just have the postgres role configured within the database. You can create new roles from the command line with the createrole command. The –interactive flag will prompt you for the name of the new role and also ask whether it should have superuser permissions.
Currently, you just have the postgres role configured within the database. You can create new roles from the command line with the createrole command.

The --interactive flag will prompt you for the name of the new role and also ask whether it should have superuser permissions.

If you are logged in as the <strong>postgres </strong>account, you can create a new user by typing:
$ createuser --interactive

If, instead, you prefer to use sudo for each command without switching from your normal account, type:
$ sudo -u postgres createuser --interactive
Output
Enter name of role to add: sammy
Shall the new role be a superuser? (y/n) yCode language: PHP (php)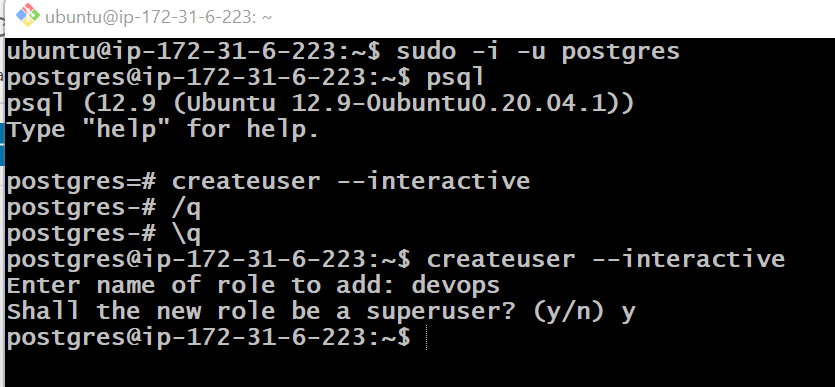
Step 4 — Creating a New Database
Another assumption that the Postgres authentication system makes by default is that for any role used to log in, that role will have a database with the same name which it can access.
This means that, if the user you created in the last section is called sammy, that role will attempt to connect to a database which is also called “sammy” by default. You can create the appropriate database with the createdb command.
If you are logged in as the postgres account, you would type something like:
$ createdb sammy.
If, instead, you prefer to use sudo for each command without switching from your normal account, you would type:
$ sudo -u postgres createdb sammy
Step 5 — Opening a Postgres Prompt with the New Role
To log in with ident based authentication, you’ll need a Linux user with the same name as your Postgres role and database.
If you don’t have a matching Linux user available, you can create one with the adduser command. You will have to do this from your non-root account with sudo privileges (meaning, not logged in as the postgres user):
$ sudo adduser sammy

Once this new account is available, you can either switch over and connect to the database by typing:

$ sudo -i -u sammy
psql
Or, you can do this inline:
$ sudo -u sammy psql

<strong>If you want your user to connect to a different database, you can do so by specifying the database like this:</strong>

psql -d postgres
Once logged in, you can get check your current connection information by typing:

\conninfo
Output
You are connected to database "sammy" as user "sammy" via socket in "/var/run/postgresql" at port "5432".
This is useful if you are connecting to non-default databases or with non-default users.Code language: PHP (php)I’m Rajesh Kumar, a DevOps, SRE, DevSecOps, Cloud, and Platform Engineering expert passionate about sharing practical knowledge, real-world experiences, and industry best practices. I have worked at Cotocus and regularly write about technology, travel, investing, health, product reviews, and digital marketing through my various platforms.
I publish technical articles at DevOps School, travel stories at Holiday Landmark, stock market insights at Stocks Mantra, health and fitness guidance at My Medic Plus, product reviews at TrueReviewNow, and SEO and digital marketing strategies at Wizbrand.
Find Trusted Cardiac Hospitals
Compare heart hospitals by city and services — all in one place.
Explore Hospitals