Machine Agent Installation in Linux
Step 1 – Understand Machine Agent Requirements and Supported Environments
- JRE 1.8 is required.
- Machine Agent installations with a bundled JRE include:
- AARCH64, Linux, Solaris (Solaris_sparcv9), Solaris (Solaris_X64), Windows: JRE 11.0.15 (Zulu 11.56)
- AIX: Machine Agent without JRE (Use the JRE 1.8 specific to AIX)
- Machine Agent installations without a bundled JRE should use:
- Linux: JRE 11
- Other operating systems: JRE 8
- The Machine Agent starts within its own JVM.
- You can use an existing JRE previously installed in your environment.
JRE 11.0.15
AARCH64, Linux, Solaris (Solaris_sparcv9), Solaris (Solaris_X64), Windows: JRE 11.0.15 (Zulu 11.56)
JRE 1.8
AIX: Machine Agent without JRE (Use the JRE 1.8 specific to AIX)
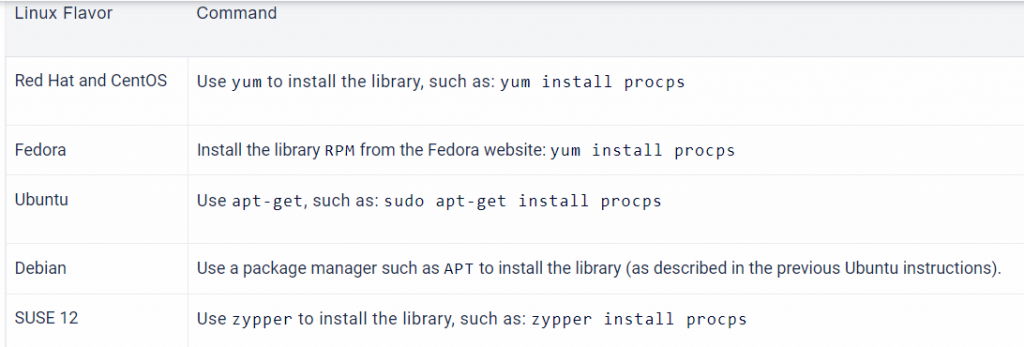
Required Libraries
JVM Memory Requirements
To accommodate the Machine Agent, AppDynamics recommends these additional heap and PermGen space sizes:
Maximum heap size (-Xmx): 256 MBMaximum PermGen heap size (-XX:MaxPermSize): 20 MB
These are example settings to increase the initial heap size:
- Linux and Unix systems:
<machine_agent_home>/bin/machine-agent -Xms64m - Windows:
cscript <machine_agent_home>\machine-agent.vbs -Xms64m
Step 2 – Download Installer Linux Install Using ZIP with Bundled JRE
Options – Linux Install Using ZIP with Bundled JRE
$ mkdir /opt/machine-agent
$ cd /opt/
$ yum install wget unzip -y
$ wget https://download-files.appdynamics.com/download-file/machine-bundle/22.5.0.3361/machineagent-bundle-64bit-linux-22.5.0.3361.zip
$ unzip machineagent-bundle-64bit-linux-22.5.0.3361.zip -d machine-agentCode language: JavaScript (javascript)
Step 3 – Configure controller-info.xml
$ vi /opt/machine-agent/conf/controller-info.xml
Required Options
<controller-host>xxxxxxxxxxxx.saas.appdynamics.com</controller-host>
<controller-port>443</controller-port>
<controller-ssl-enabled>true</controller-ssl-enabled>
<account-access-key>xg1xnx0lr5qr</account-access-key>
Code language: HTML, XML (xml)
Optional
Optional

=============================
Review memory requirements
=============================
- Linux and Unix systems: <machine_agent_home>/bin/machine-agent -Xms64m
- Windows:  cscript <machine_agent_home>\machine-agent.vbs -Xms64m

=============================
Configure the agent to use SSL

=============================
<?xml version="1.0" encoding="UTF-8"?>
<controller-info>
	<controller-host>mycompany.saas.appdynamics.com</controller-host>
	<controller-port>443</controller-port>
	<controller-ssl-enabled>true</controller-ssl-enabled>
    <!-- Encrypted Controller keystore / agent trust store password -->
	<controller-keystore-password>Tw49bd0hdCMBoQ5pfMMuYA/cA5B4pouVPkv48ovRm6c=</controller-keystore-password>
	<controller-keystore-filename>../../conf/cacerts.jks</controller-keystore-filename>
	...
    <!-- Secure Credential Store configuration -->
    <!-- Enable the Secure Credential Store -->
    <use-encrypted-credentials>true</use-encrypted-credentials>
    <!-- Path to they secure credential keystore -->
    <credential-store-filename>/opt/appdynamics/secretKeyStore</credential-store-filename>
    <!-- Obfuscated secure credential keystore password -->
    <credential-store-password>n/8GvAZsKk4gM3Z6g+XQ1w==</credential-store-password>
</controller-info>


=============================
Configure the agent to use proxy settings

=============================
Element in controller-info.xml: N/A
Environment Variable: N/A

System Property:
-Dappdynamics.http.proxyHost
-Dappdynamics.http.proxyPasswordFile
-Dappdynamics.http.proxyPort
-Dappdynamics.http.proxyUser

Example: -Dappdynamics.http.proxyPasswordFile=/path/to/file-with-password

=============================
Configure the Agent Account Information
=============================
Determine if you need to specify an application name and tier name.If you are installing the Machine Agent on the same server with any APM app agent, do not specify application name and tier name.

<node-name>agent1</node-name>
<application-name>devopsschool</application-name>
<tier-name>web</tier-name>

https://docs.appdynamics.com/display/PRO43/Standalone+Machine+Agent+Configuration+Property+ReferenceCode language: HTML, XML (xml)
Example Configuration – Machine Agent controller-info.xml File
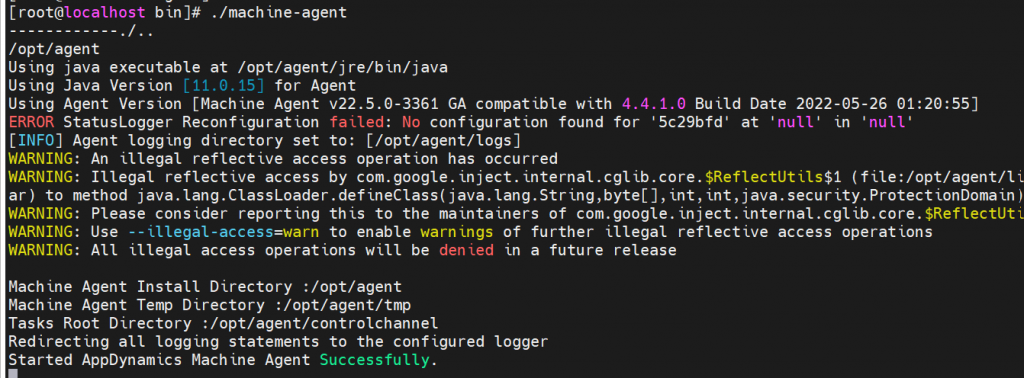
Step 4 – Start Machine Agent
Start the Machine Agent by entering: <machine_agent_home>/bin/machine-agent. For example, from the <machine_agent_home> directory:
./bin/machine-agent
Step 5 – Understand Machine Agent Help options
To review Machine Agent usage, enter: machine-agent -h

Usage: machine-agent [-dh] [-j JAVA_HOME] [-p pidfile] [-D prop] [-X prop]
Start the machine agent.
    -d            daemonize (run in background)
    -p pidfile    write PID to <pidfile>
    -h
    --help        print command line options
    -D prop       set JAVA system property
    -X prop       set non-standard JAVA system property

Code language: CSS (css)
Step 6 – Check Agent Logs
After a successful install, the agent log at <machine_agent_home>/logs, should contain the following message:
Started AppDynamics Machine Agent Successfully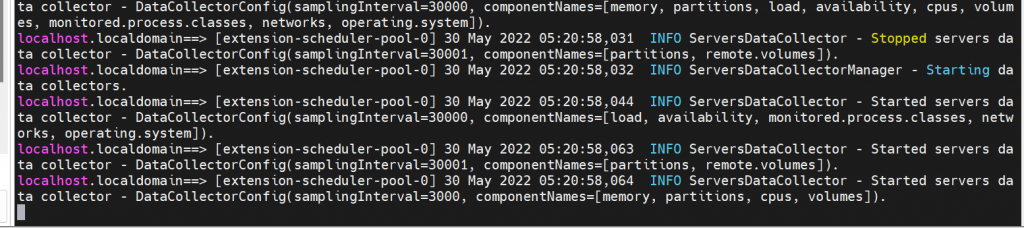
If the agent log file is not present, the Machine Agent may not be accessing the command properties. To troubleshoot, check the application server log file where STDOUT is logged. It has the fallback log messages, which are useful for troubleshooting the agent.
Verify that the Agent is Reporting to the Controller
- From the Controller Top Navigation Bar, select Settings > AppDynamics Agents.
- Click the Machine Agents tab.
The listing for the Machine Agent displays. If you do not see the Machine Agent listed, check your property settings in<machine_agent_home>/conf/controller-info.xml.

I’m Rajesh Kumar, a DevOps, SRE, DevSecOps, Cloud, and Platform Engineering expert passionate about sharing practical knowledge, real-world experiences, and industry best practices. I have worked at Cotocus and regularly write about technology, travel, investing, health, product reviews, and digital marketing through my various platforms.
I publish technical articles at DevOps School, travel stories at Holiday Landmark, stock market insights at Stocks Mantra, health and fitness guidance at My Medic Plus, product reviews at TrueReviewNow, and SEO and digital marketing strategies at Wizbrand.
Find Trusted Cardiac Hospitals
Compare heart hospitals by city and services — all in one place.
Explore Hospitals