How to install WordPress on localhost XAMPP?
What is the WordPress?
WordPress is a free and open-source (Content Management System) which is based on PHP and MySql. It’s the simplest software and most popular way to create your own website or blog.
Here, we’ll see how to install WordPress on local server.
Server Requirement
You can use software like:
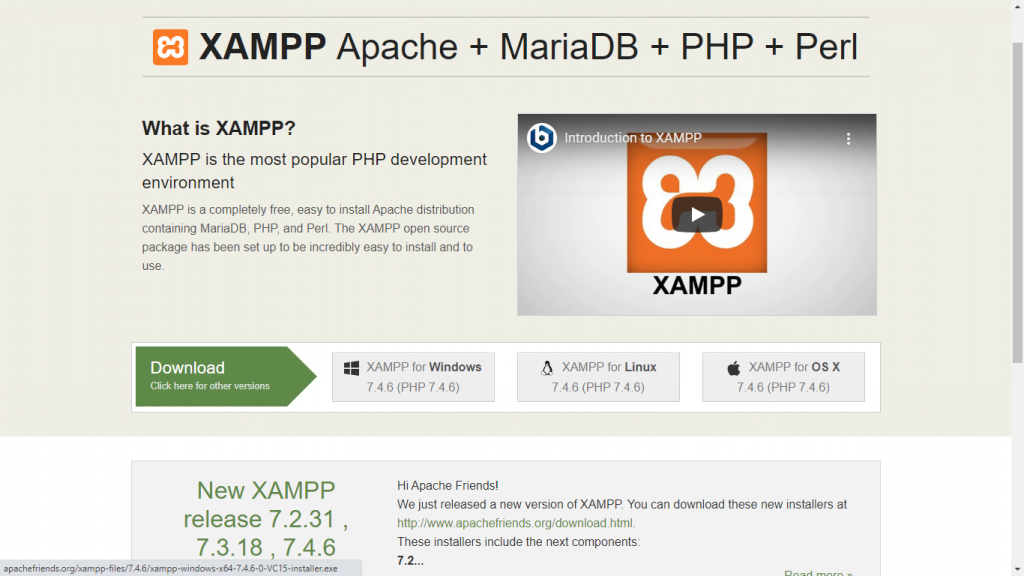
XAMPP is for X-OS, Apache, Mysql, PHP, Perl.
WAMP is for Windows.
LAMP is for Linux.
MAMP is for Mac OS.
These are completely free software that provides you a server generally Apache, Database MySql on PhpMyAdmin which is required for the installation. Here, you only have to create a WordPress database using PhpMyAdmin and edit the wp-config file.
If you are already running any one of among these servers, so you can start to install WordPress.
If not, then you have to install the XAMPP server which could be run in any OS.
Therefore, download it.
- Go to https://www.apachefriends.org/index.html or https://sourceforge.net/projects/xampp/ in your computer’s web browser.
2. Click XAMPP for Windows
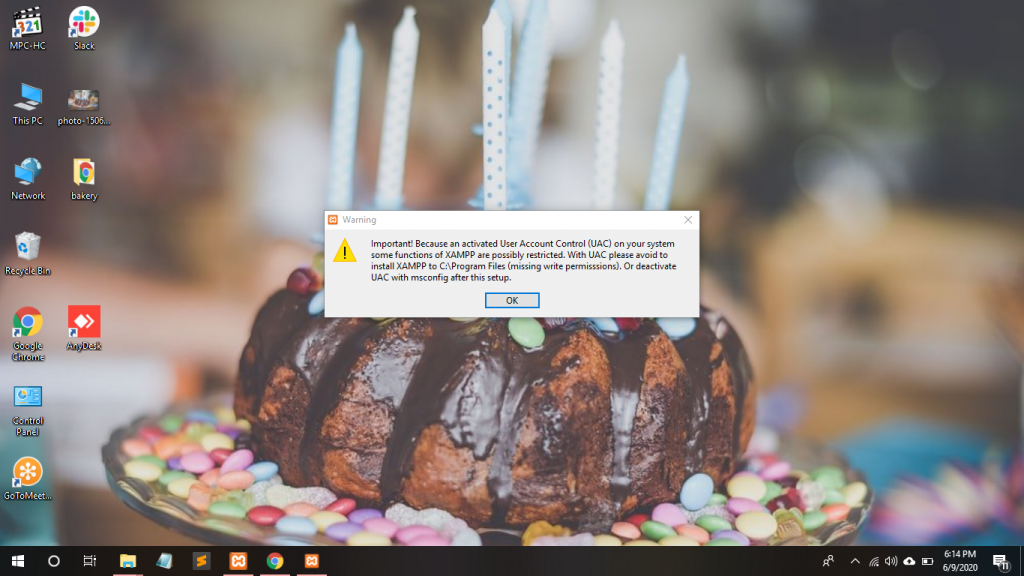
3. You may have to click OK on a warning if you have User Account Control (UAC) activated on your computer.
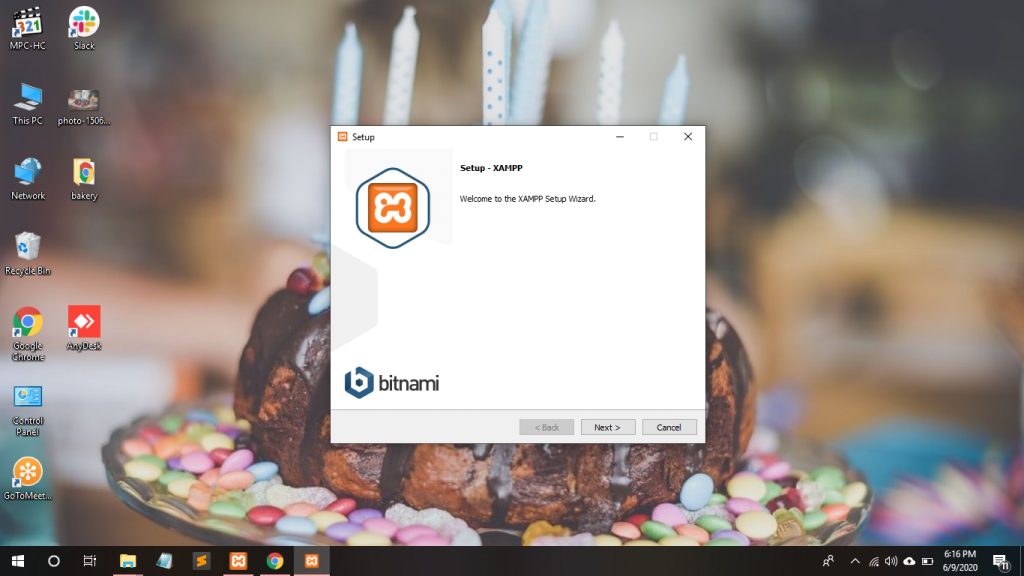
4. Click Next . It’s at the bottom of the setup window.
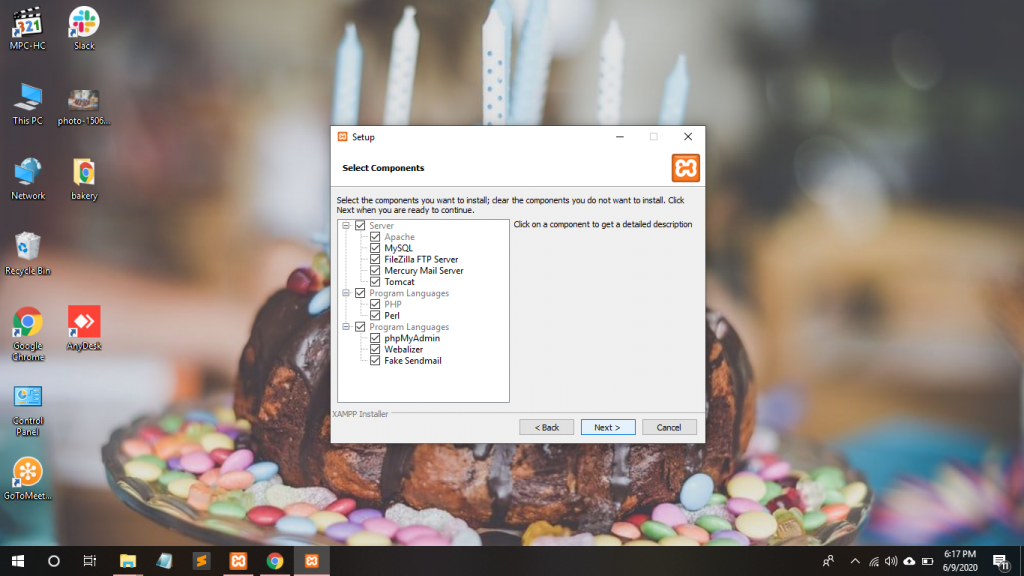
5. Click Next button. By default, all attributes are included in your XAMPP installation.
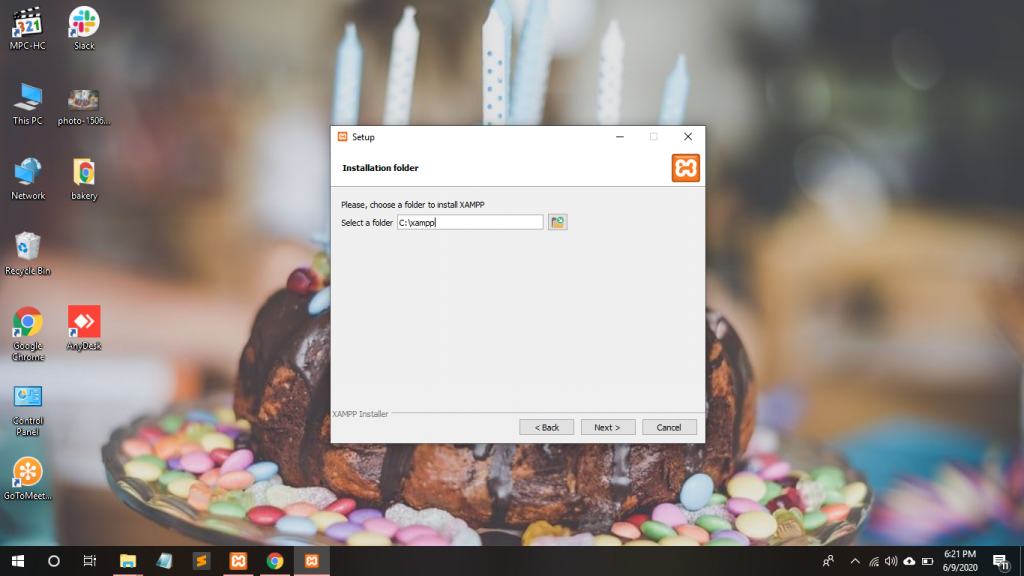
6. Select an installation location by clicking Next button
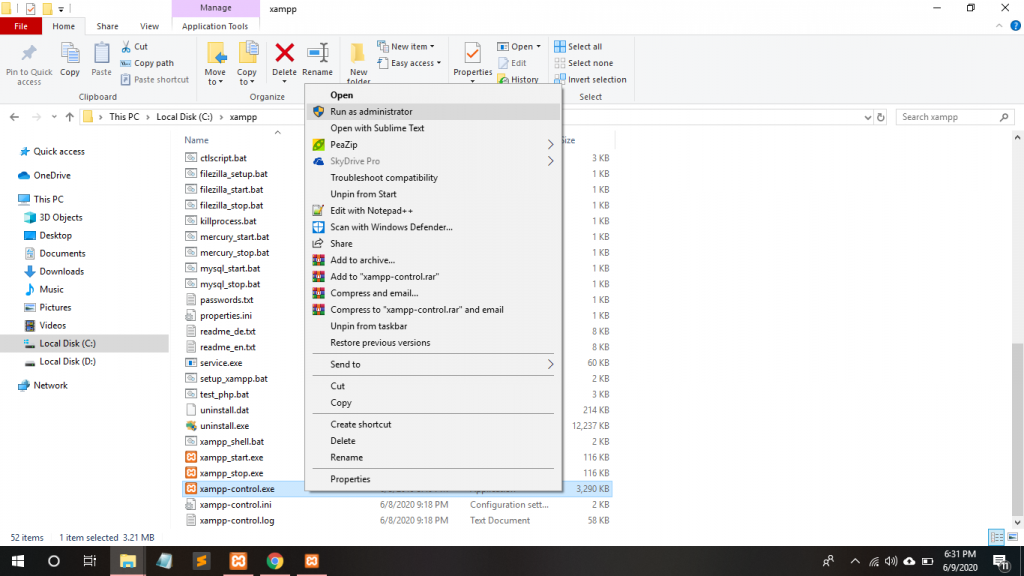
7. Start XAMPP from its installation point. If you need to open the XAMPP Control Panel in the future, you can do so by opening the folder in which you installed XAMPP, right-clicking the orange-and-white xampp-control icon, clicking Run as administrator, and clicking Yes when prompted.

8. Right click on config button .
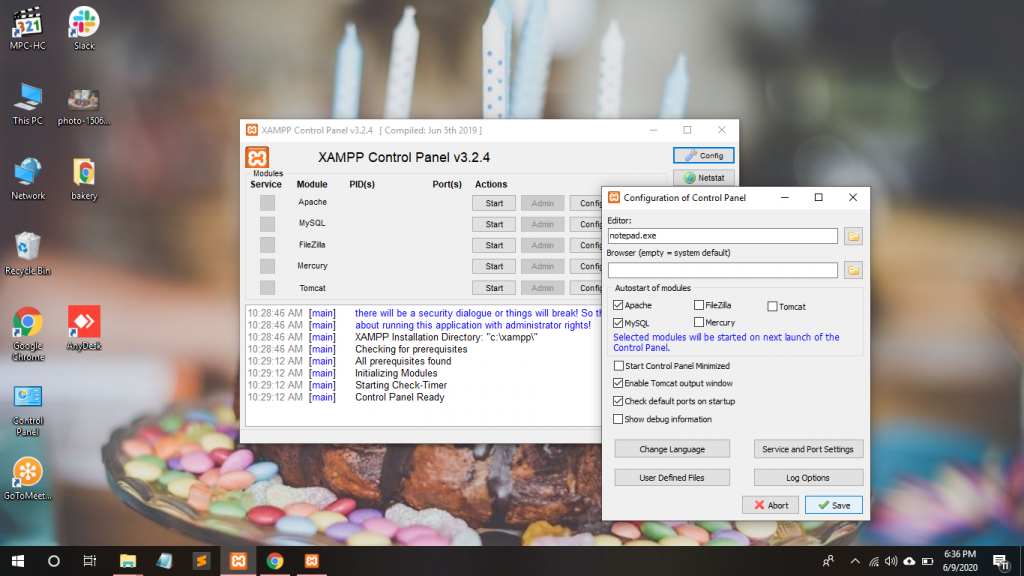
9. Here, you can see the Configuration of Control Panel. Check the Apache and MySql boxes and click the save button.
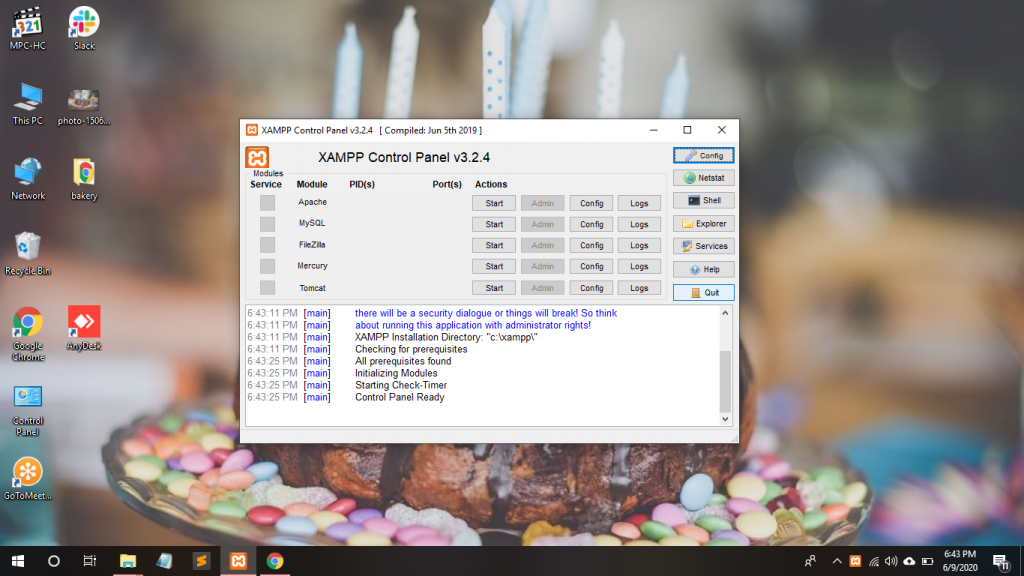
10. Restart XAMPP by clicking Quit and then re-opening it in administrator mode from its folder.
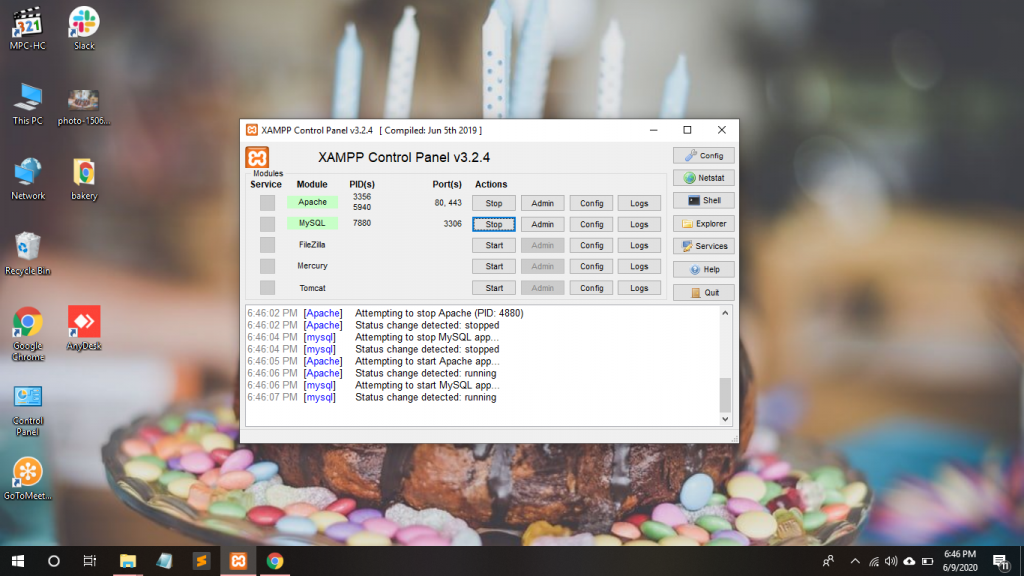
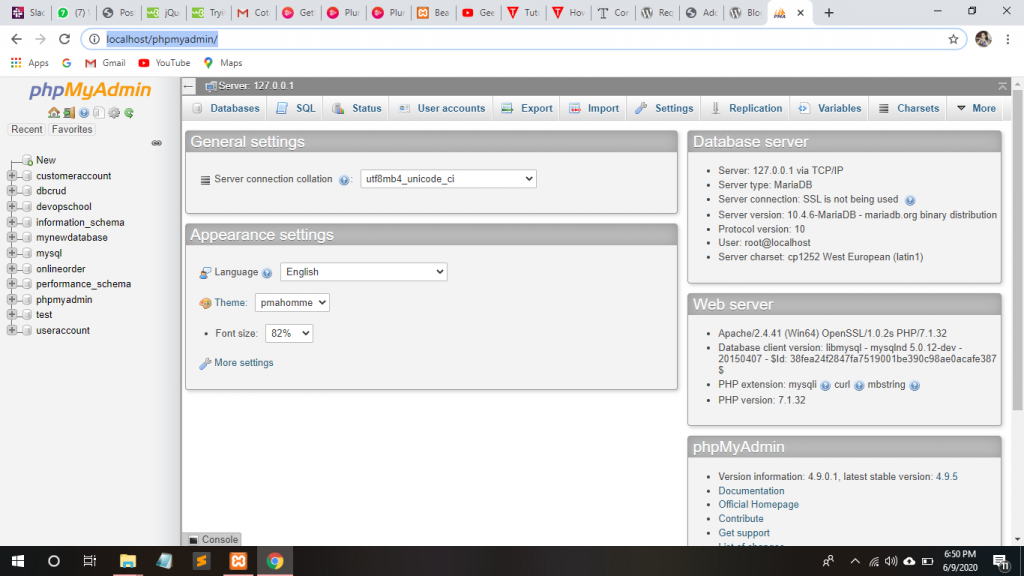
11. After that, just click start Apache and MySql. It would be started like this. Then open your chrome browser. Type localhost/phpmyadmin in URL bar.
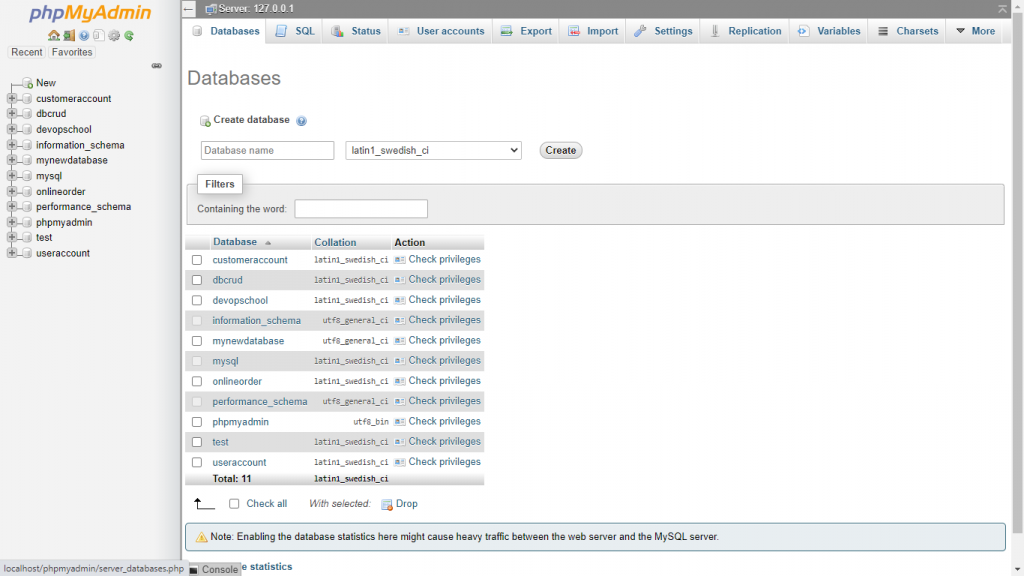
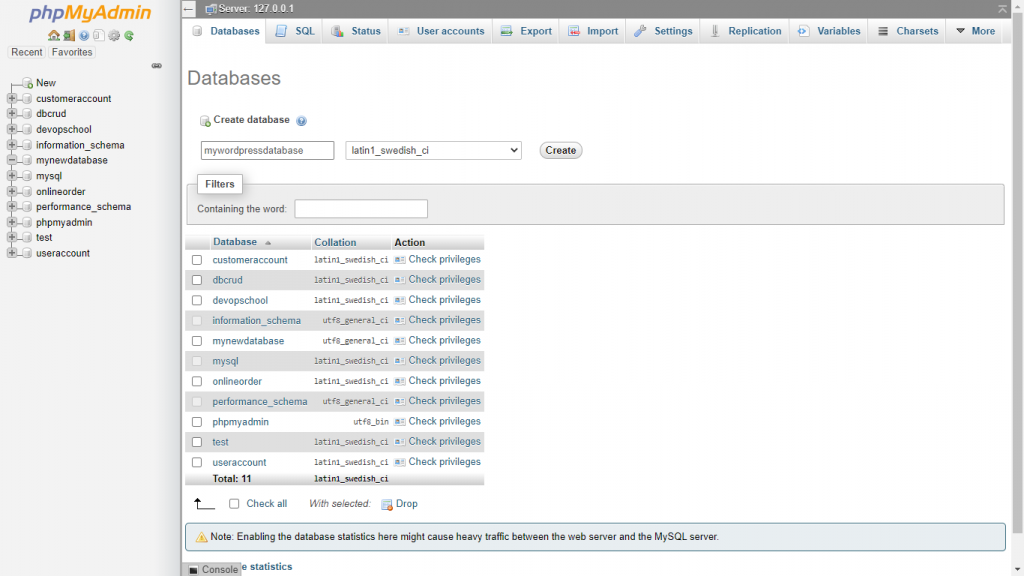
12. Click on Database to create a database for WordPress. Write the database name as yours need ex:- mywordpressdatabase and click Create button.
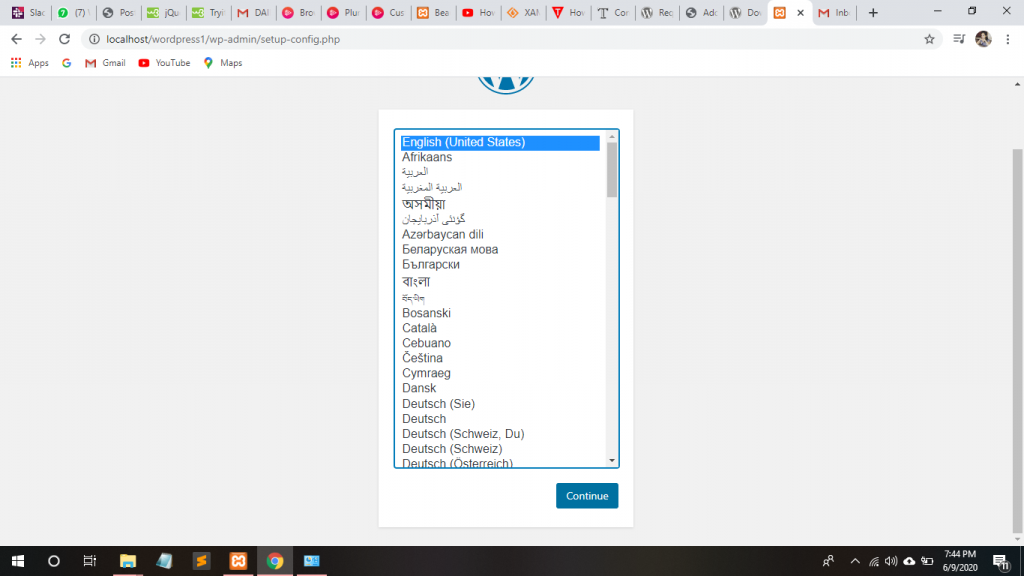
13. Go to https://wordpress.org/download/ and download WordPress. Cut the zip file and paste within xampp/htdocs folder and unzip there. Open Chrome browser and type localhost/wordpress/. It’ll appear as this, choose the English language and press the continue button.
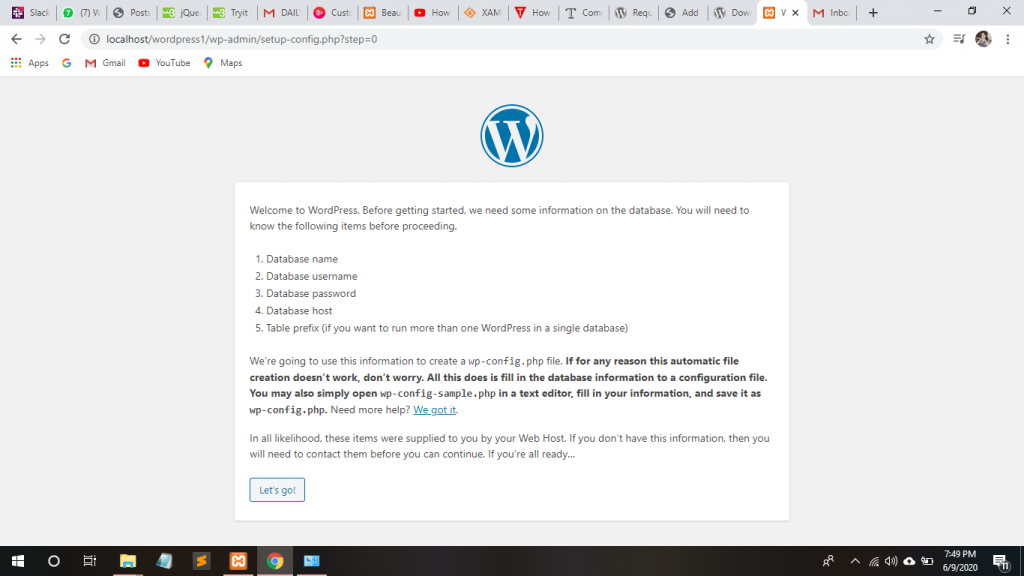
14. Just click on let’s go! button.

15. Fill the database name as you had created before and by default, the username is root and the password is null. Click the submit button.
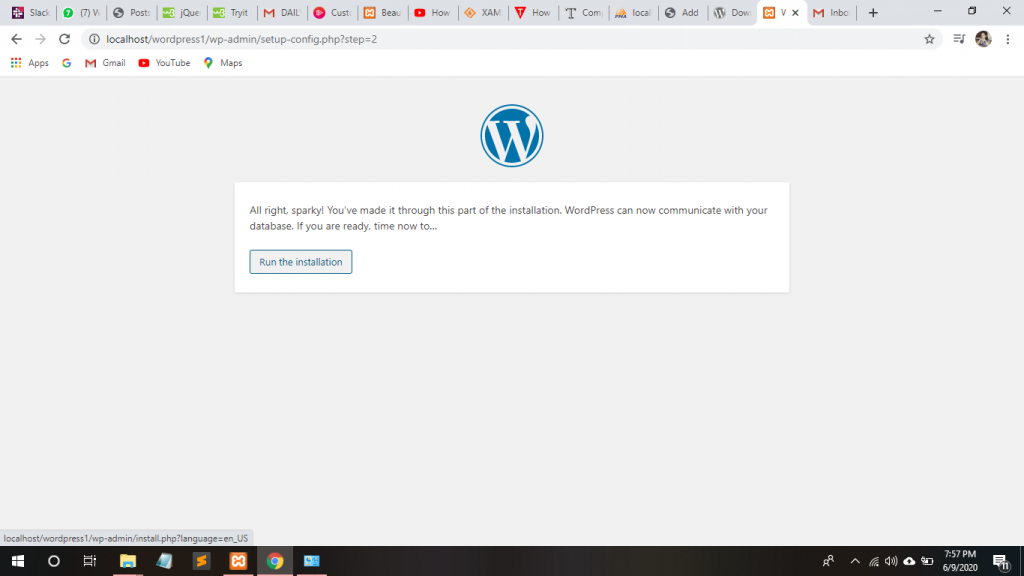
16. Click run the installation button.
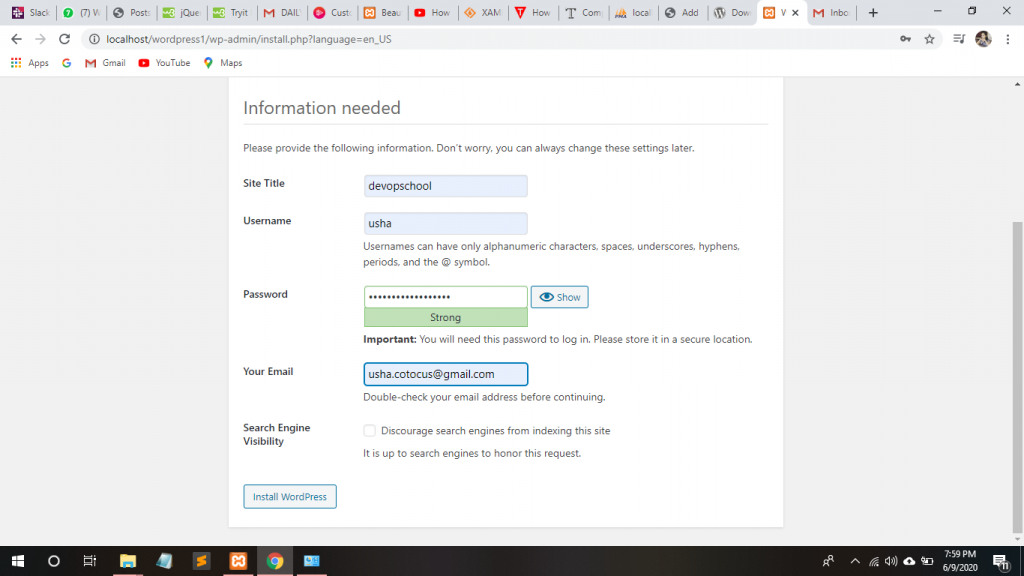
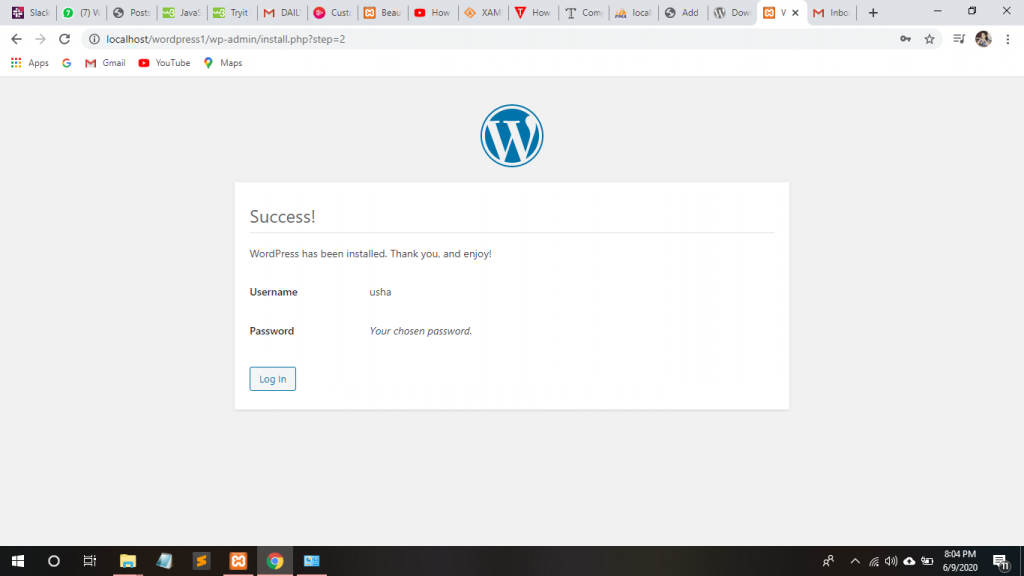
17. Fill the site title which you want to develop, give your username, password, and your email id. Click install WordPress.
Thanks.
With MotoShare.in, you can book a bike instantly, enjoy doorstep delivery, and ride without worries. Perfect for travelers, professionals, and adventure enthusiasts looking for a seamless mobility solution.
Find Trusted Cardiac Hospitals
Compare heart hospitals by city and services — all in one place.
Explore Hospitals